> ## Documentation Index
> Fetch the complete documentation index at: https://sudomock.com/docs/llms.txt
> Use this file to discover all available pages before exploring further.
> ## Agent Instructions
> The base URL is https://api.sudomock.com.
> Authenticate every request with the x-api-key header. Keys begin with sm_.
> A render returns the finished image at data.print_files[0].export_path. A request sent with is_async true returns a job_id to poll at GET /api/v1/jobs/{job_id}.
> Prefer the official SDKs over hand-written HTTP calls: npm install sudomock for Node, pip install sudomock for Python.
# Upload fonts for your text layers
> Add your own typefaces to the catalogue.
A text layer renders in the font the template asks for. When that font is one
you licensed rather than one we ship, upload it here once and every render on
the account can reach it.
## Font management
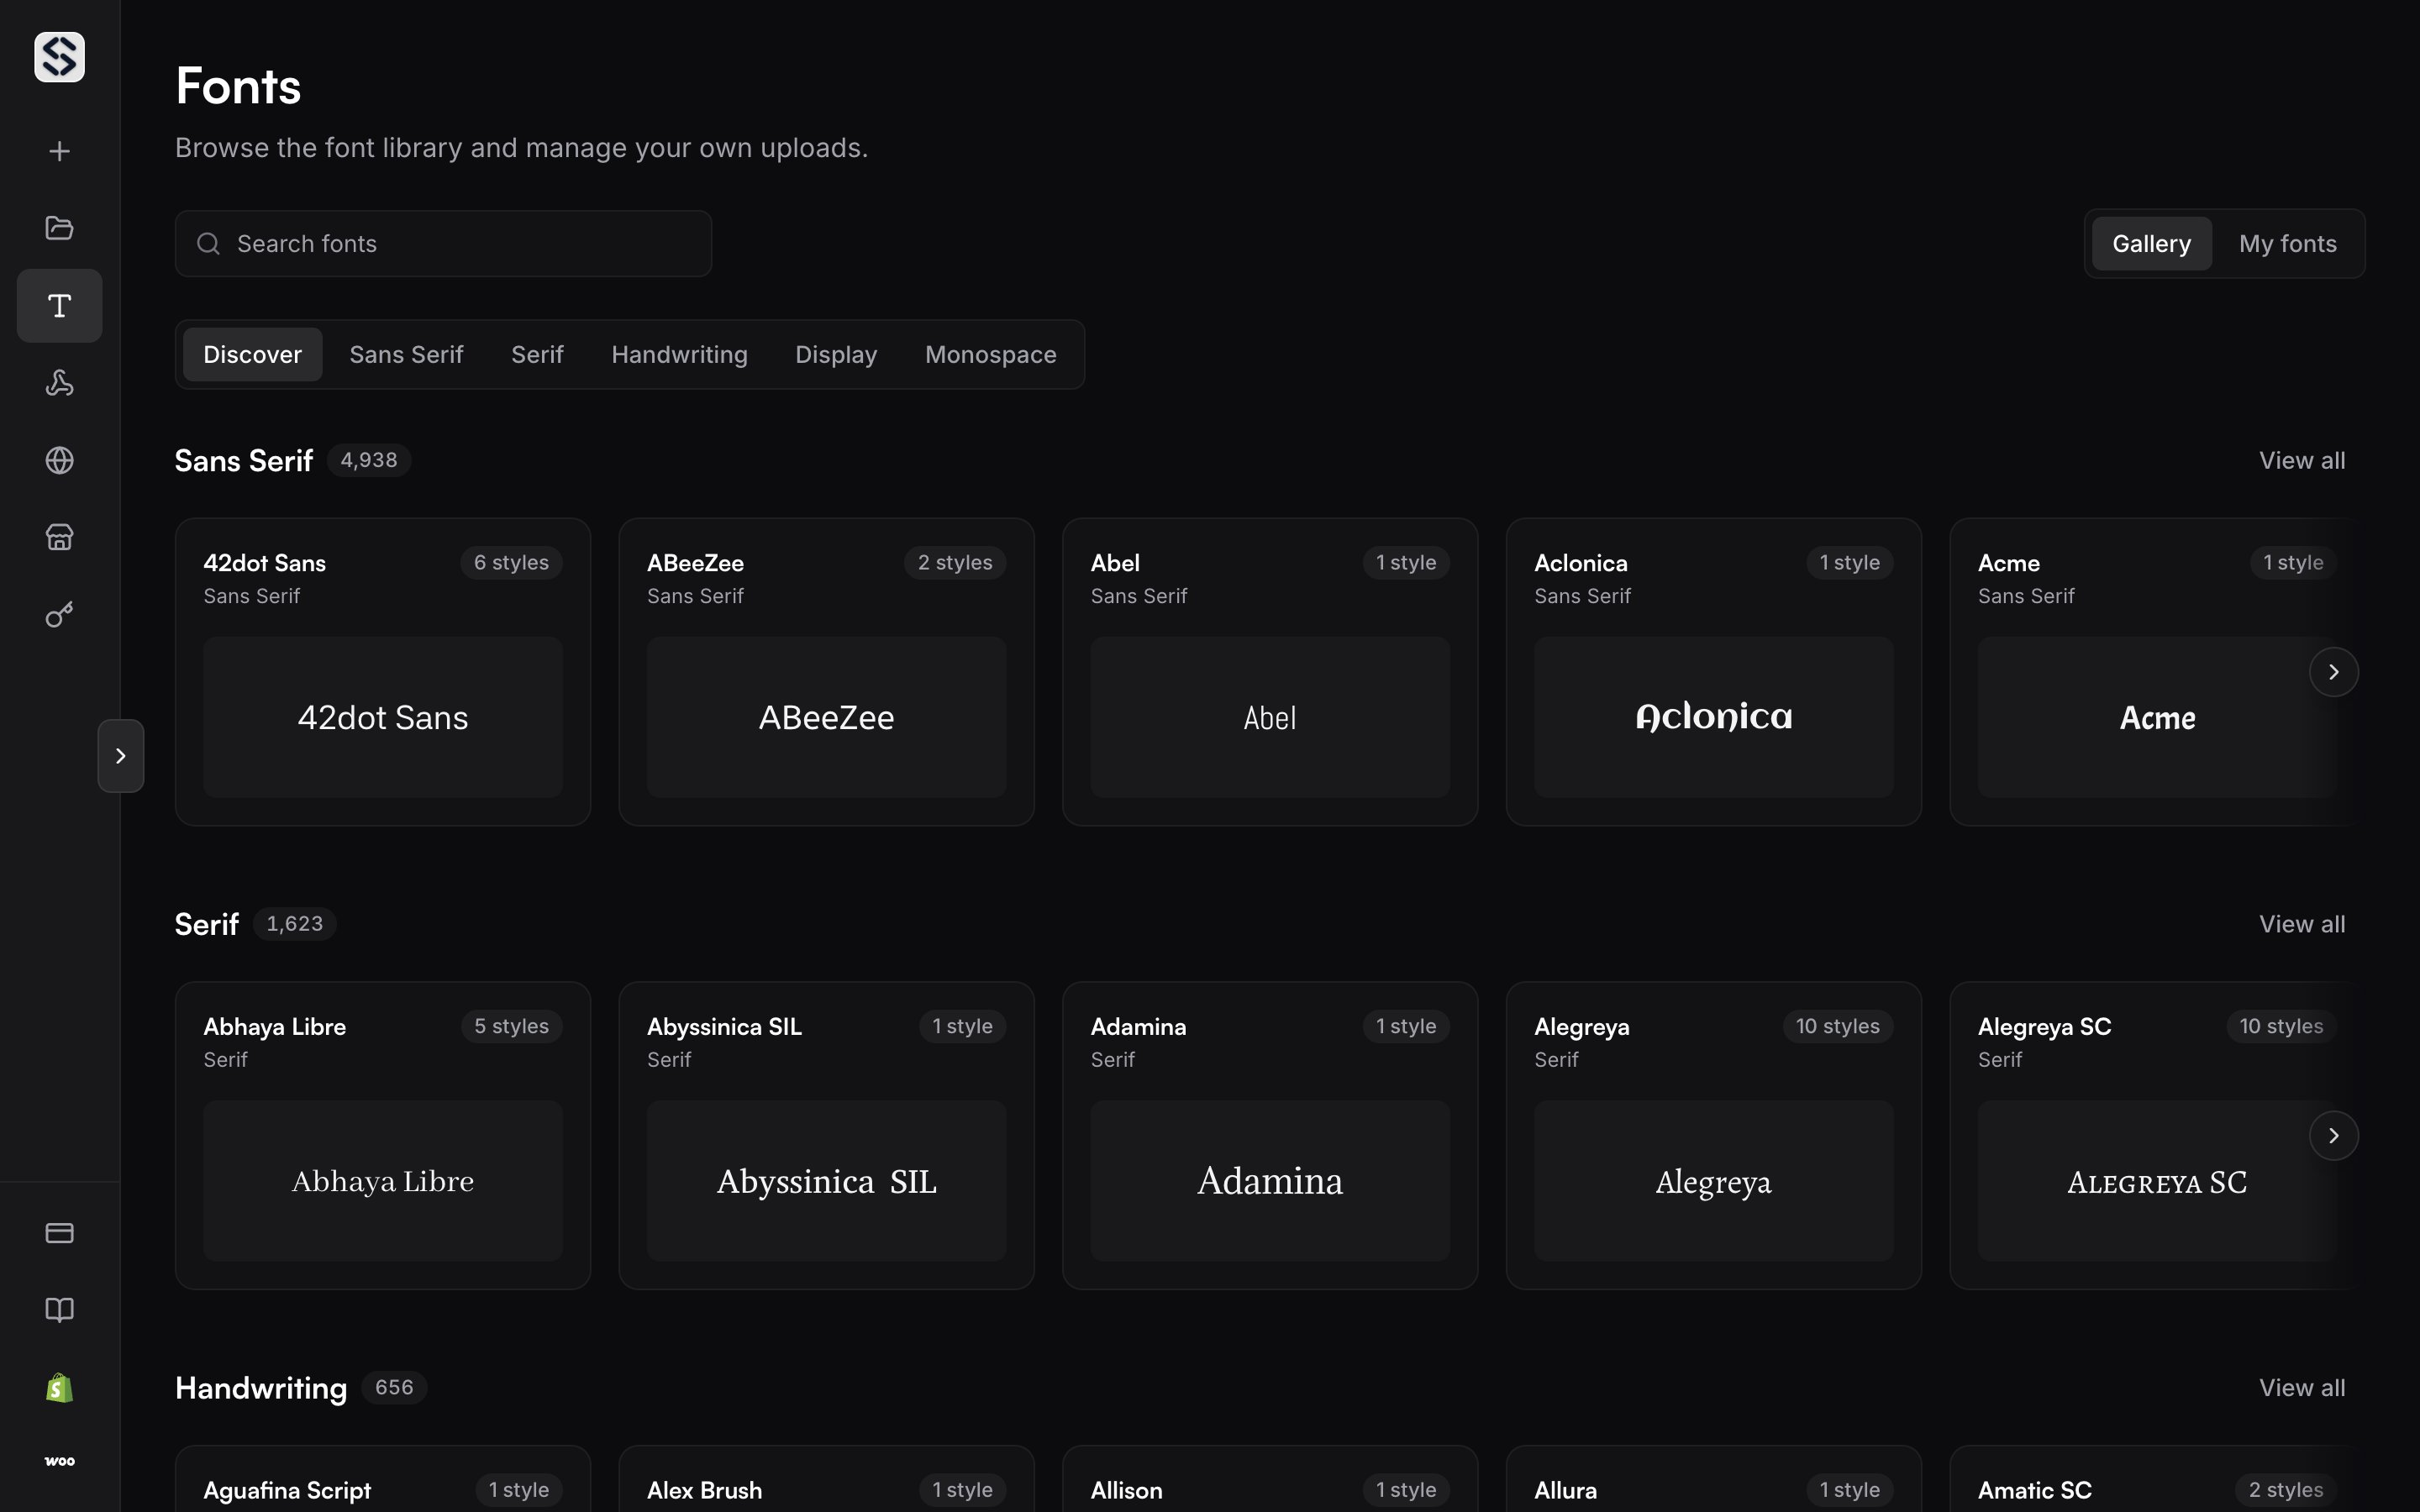
The **Fonts** page holds two views. **Gallery** is the built-in catalogue, the
open-licensed families every account renders from without uploading anything.
**My fonts** is what this account has added. The catalogue belongs to the
account rather than to a template, so a font added once is reachable from every
mockup you own: nothing to attach per mockup, nothing to repeat when you add a
template.
The same catalogue answers over HTTP: an API key can list, retrieve, add and
remove the same entries, and a font uploaded in the browser answers to the
[API](/docs/api-reference/fonts/retrieve-a-list-of-fonts) under the same uuid a
moment later.
Uploading is on the Pro and Scale plans, and every plan renders from the
catalogue. Inside an organization the owner and editors upload and remove
fonts, while a viewer renders with the same catalogue without changing it.
## Browse the gallery
The gallery opens on **Discover**, one row per classification, and **View all**
opens a classification in full. The search box matches family names as you type
and narrows either view. A card stands for a family rather than a file: it
carries the family name, its classification and how many styles it holds.
Opening one previews every style it carries, in words you type and at the size
you drag to, so you can read a typeface before you commit a render to it.
 ## Filter by classification
The tab bar carries the five classifications a font can hold, and each one has a
slug the address takes as `cat`:
* `sans-serif`
* `serif`
* `handwriting`
* `display`
* `monospace`
The view you choose is in the address, so `?cat=serif` and `?view=my` are links
you can share or bookmark. Over HTTP the split between the catalogue and your
own uploads is `scope`: `all` for both together, `system` for the catalogue
alone, `custom` for your own.
## Upload your own font
Switch the source control to **My fonts**. The header counts what you have
uploaded against what your plan allows, and **Upload font** opens the
uploader beneath it.
## Filter by classification
The tab bar carries the five classifications a font can hold, and each one has a
slug the address takes as `cat`:
* `sans-serif`
* `serif`
* `handwriting`
* `display`
* `monospace`
The view you choose is in the address, so `?cat=serif` and `?view=my` are links
you can share or bookmark. Over HTTP the split between the catalogue and your
own uploads is `scope`: `all` for both together, `system` for the catalogue
alone, `custom` for your own.
## Upload your own font
Switch the source control to **My fonts**. The header counts what you have
uploaded against what your plan allows, and **Upload font** opens the
uploader beneath it.
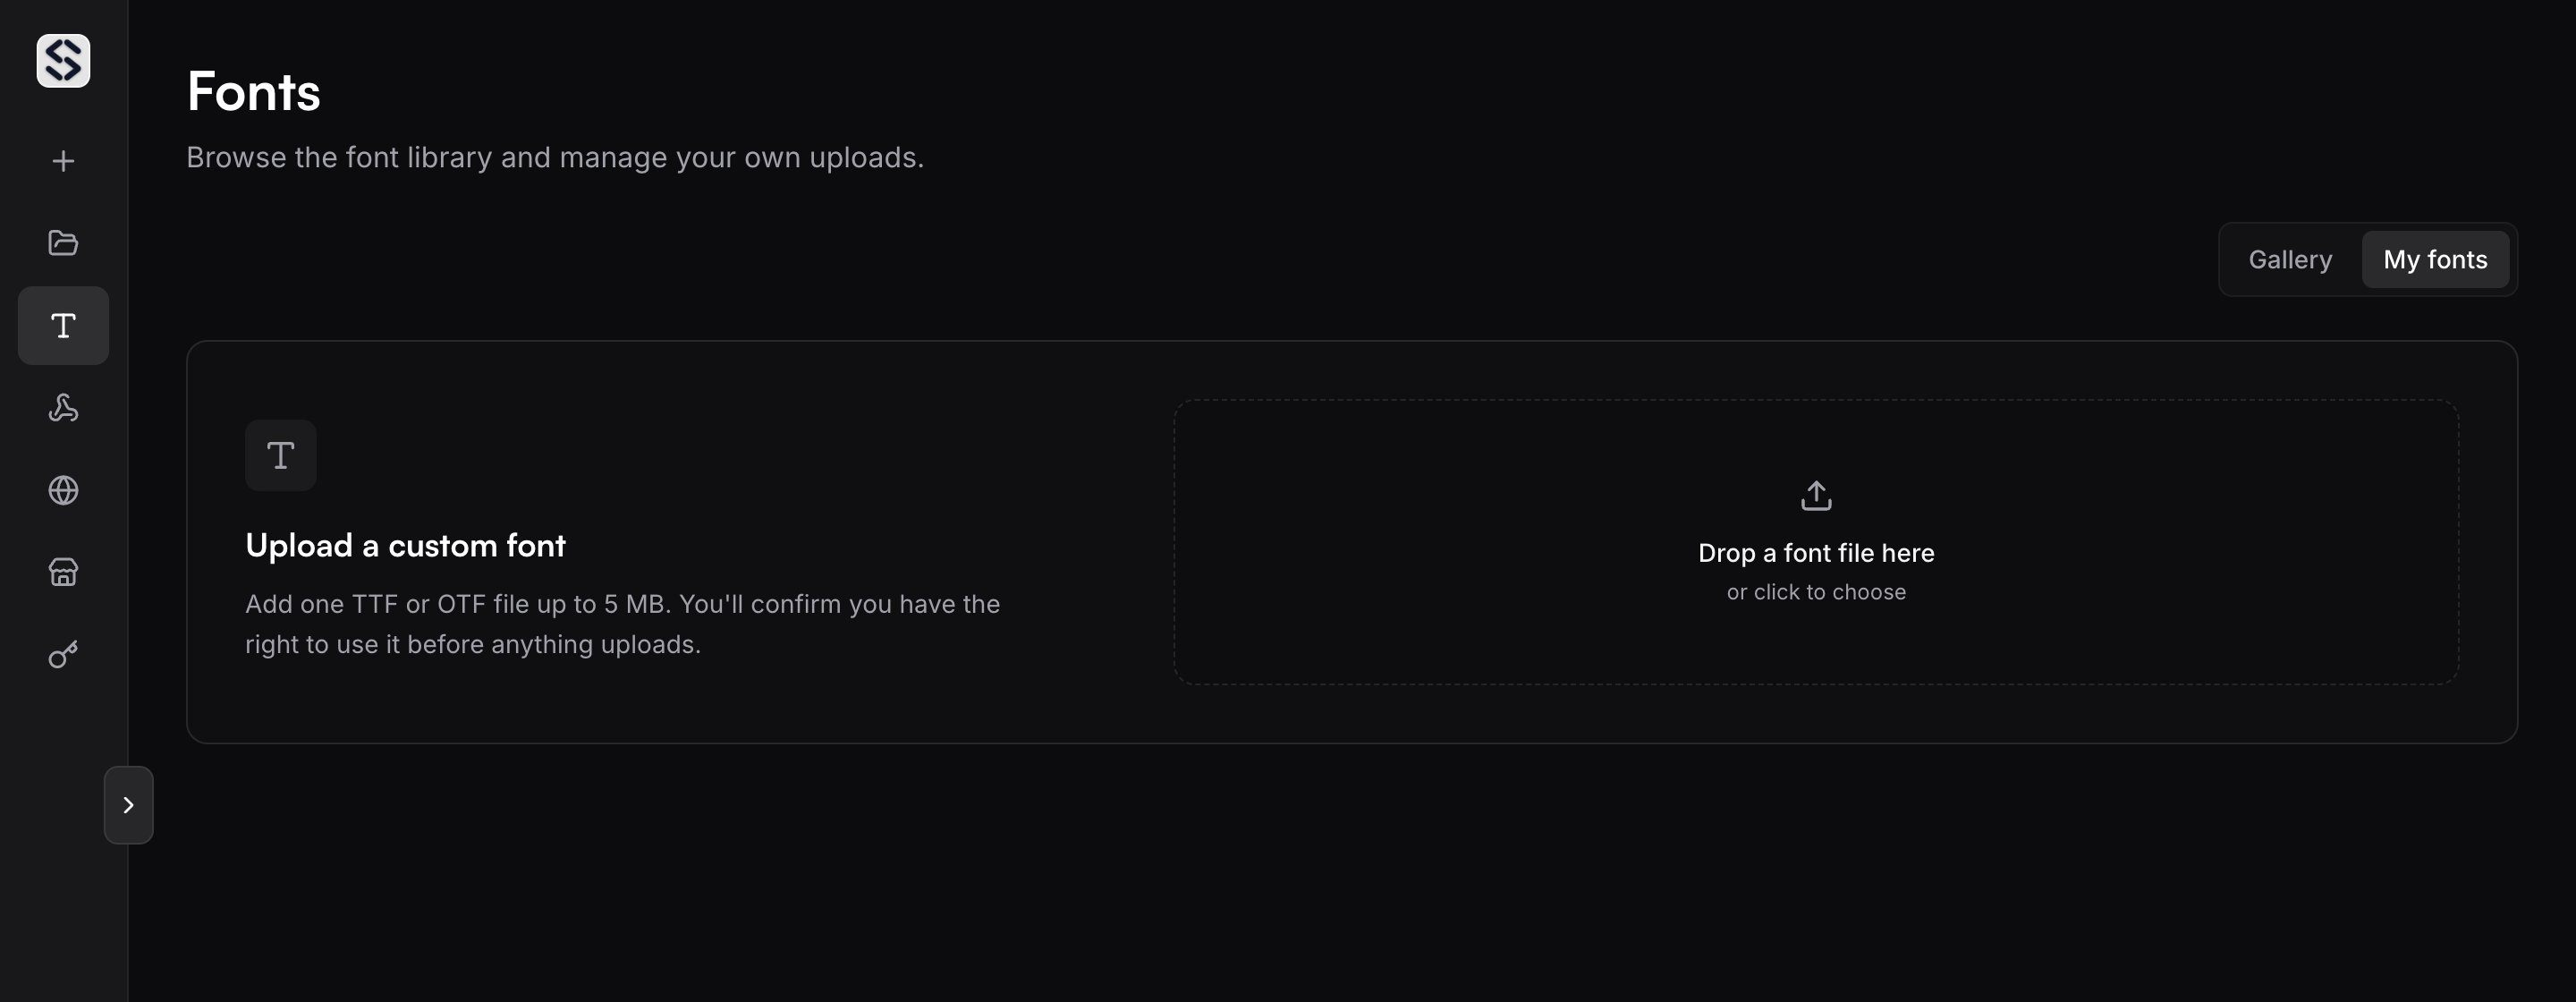 Drop a TTF or OTF file on the card, or click to choose one from disk. One
file per upload, so a brand family with Regular, Medium and Bold is three
uploads and three PostScript names. [Fonts](/docs/text/fonts) carries the size
ceiling and the number of custom fonts each plan holds.
Tick the confirmation that you hold the right to use and embed the file.
Uploading stays inactive until you do, and the API asks for the same thing
as `license_confirmed`. A public URL works in place of a file.
The family lands under **My fonts**, and the response carries the `uuid` and
`postscript_name` a render asks for. A font you upload is reachable by your
account alone.
## Use a font in a render
A render asks for a font by PostScript name or by uuid, set as `font` on a text
layer override. Leave it out and the layer keeps the typeface the designer
chose. A name that is not in your catalogue fails with `FONT_NOT_FOUND`, and a
name that matches more than one font fails with `FONT_AMBIGUOUS` and hands back
the candidates, which is why the uuid is the safer address when a name could be
shared. A text layer whose own font is missing renders with a default and warns
you rather than failing the job. [Text layers](/docs/text/text-layers) covers the
override and the warnings a render can carry, and
[Fitting and colour](/docs/text/fitting-and-color) covers what happens when the new
copy is longer than the old copy.
## Remove a font
Removal works on the family. Open it from **My fonts**, choose **Remove font**
and confirm, and every style you uploaded under that family goes with it. A
mockup that names the removed font renders with a default font on its next
render rather than failing, so a template keeps working while you replace the
file. The catalogue is shared, so a removal applies to the whole account. Over
HTTP the same removal takes a font's uuid, one style per call.
## API reference
* [Create a new font](/docs/api-reference/fonts/create-a-new-font) from a file or a public URL
* [Retrieve a list of fonts](/docs/api-reference/fonts/retrieve-a-list-of-fonts) with `search`, `category` and `scope`
* [Retrieve a single font](/docs/api-reference/fonts/retrieve-a-single-font) by uuid
* [Remove an existing font](/docs/api-reference/fonts/remove-an-existing-font) by uuid
Drop a TTF or OTF file on the card, or click to choose one from disk. One
file per upload, so a brand family with Regular, Medium and Bold is three
uploads and three PostScript names. [Fonts](/docs/text/fonts) carries the size
ceiling and the number of custom fonts each plan holds.
Tick the confirmation that you hold the right to use and embed the file.
Uploading stays inactive until you do, and the API asks for the same thing
as `license_confirmed`. A public URL works in place of a file.
The family lands under **My fonts**, and the response carries the `uuid` and
`postscript_name` a render asks for. A font you upload is reachable by your
account alone.
## Use a font in a render
A render asks for a font by PostScript name or by uuid, set as `font` on a text
layer override. Leave it out and the layer keeps the typeface the designer
chose. A name that is not in your catalogue fails with `FONT_NOT_FOUND`, and a
name that matches more than one font fails with `FONT_AMBIGUOUS` and hands back
the candidates, which is why the uuid is the safer address when a name could be
shared. A text layer whose own font is missing renders with a default and warns
you rather than failing the job. [Text layers](/docs/text/text-layers) covers the
override and the warnings a render can carry, and
[Fitting and colour](/docs/text/fitting-and-color) covers what happens when the new
copy is longer than the old copy.
## Remove a font
Removal works on the family. Open it from **My fonts**, choose **Remove font**
and confirm, and every style you uploaded under that family goes with it. A
mockup that names the removed font renders with a default font on its next
render rather than failing, so a template keeps working while you replace the
file. The catalogue is shared, so a removal applies to the whole account. Over
HTTP the same removal takes a font's uuid, one style per call.
## API reference
* [Create a new font](/docs/api-reference/fonts/create-a-new-font) from a file or a public URL
* [Retrieve a list of fonts](/docs/api-reference/fonts/retrieve-a-list-of-fonts) with `search`, `category` and `scope`
* [Retrieve a single font](/docs/api-reference/fonts/retrieve-a-single-font) by uuid
* [Remove an existing font](/docs/api-reference/fonts/remove-an-existing-font) by uuid