Hoodie Mockups: A Wide Front File Above the Pocket, Every Color
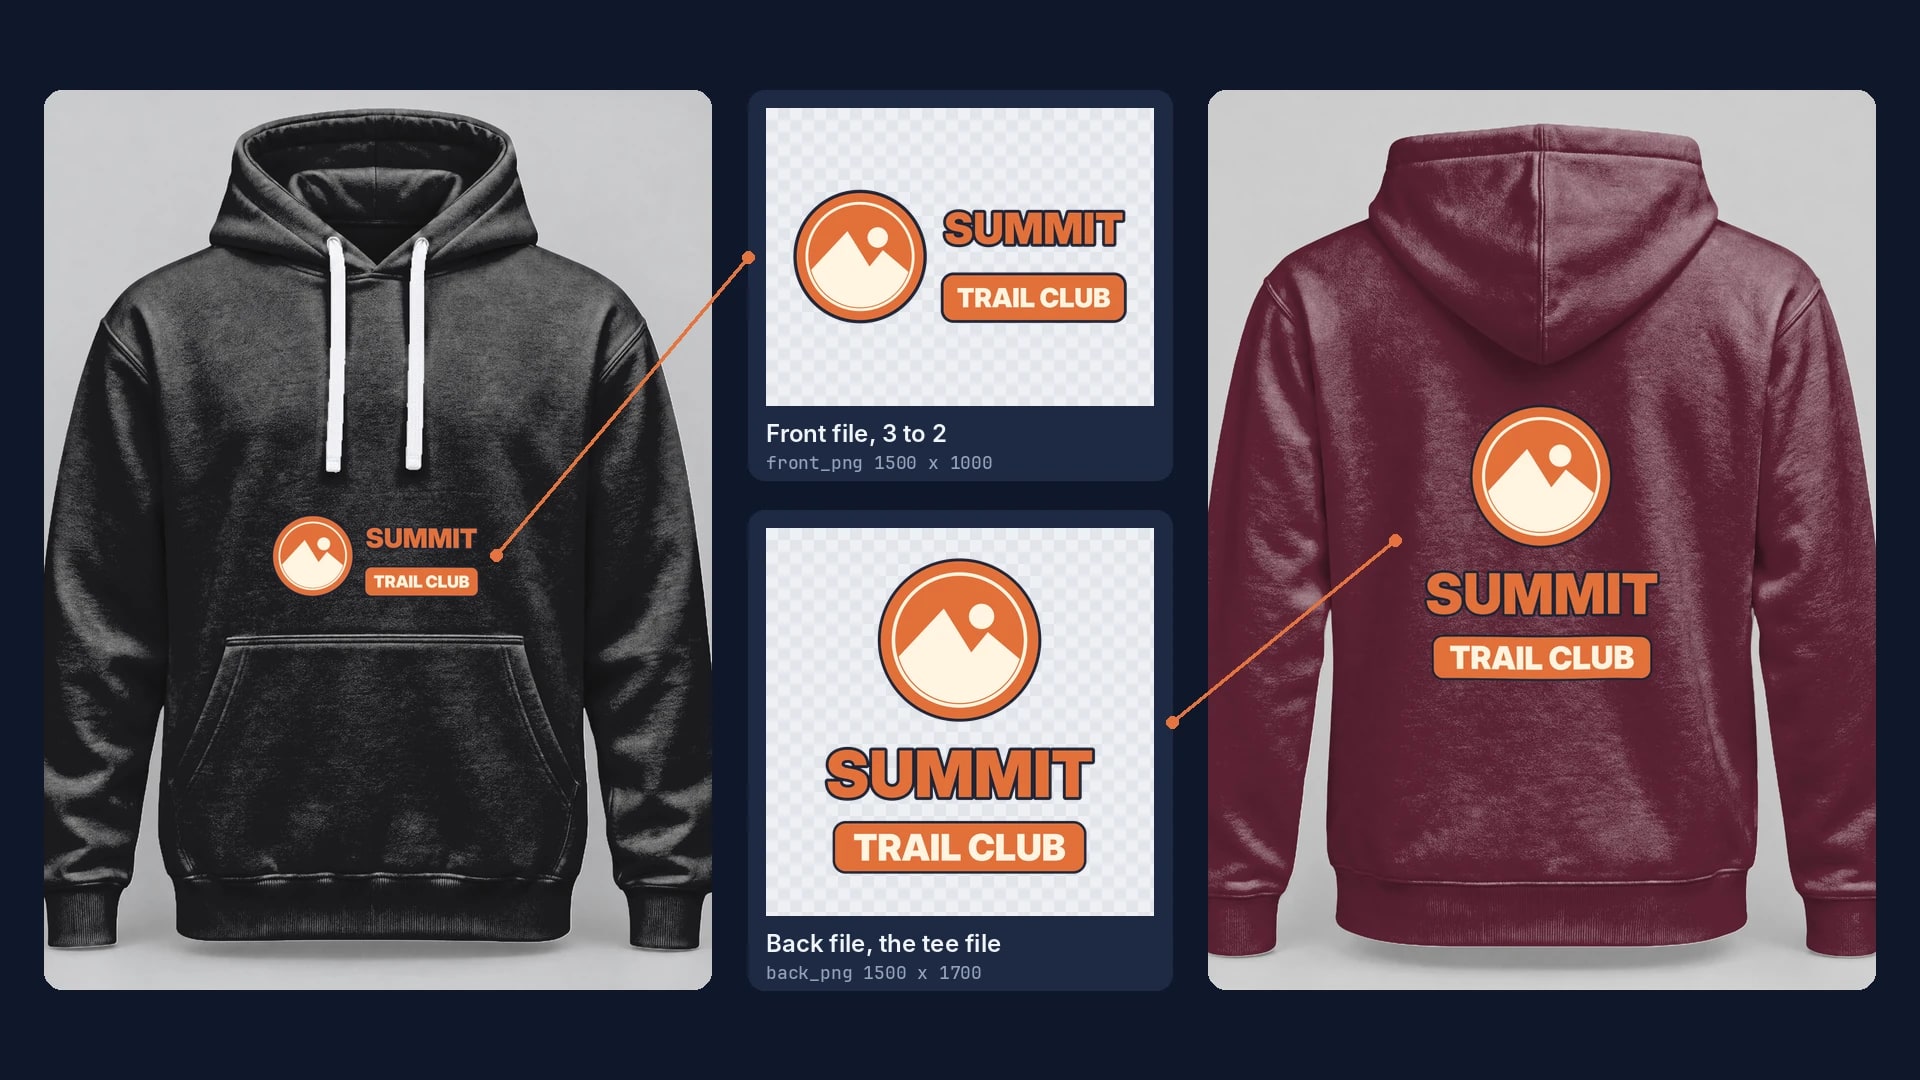
A pullover hoodie prints its front in a short, wide area above the pouch pocket and its back in a tall one, so each design needs a wide front file and a tall back file. Save the front and back photos once with those areas, then send one render per design, side and color.
Published 9 min readBeck
Key takeaways
- A tee's tall file in the hoodie front area comes out small, cut or stretched.
- The back of a hoodie takes the same tall file as a tee front, unchanged.
- On black, navy and maroon hoodies, blend mode normal keeps the artwork in its file colors.
Why a hoodie needs its own front file
Print shops size a pullover's front print by the pouch pocket under it, while the back takes a tall print, the kind of file a tee front takes.
Rush Order Tees' hoodie guide, from a custom apparel printer (published November 2022, read 16 November 2026), puts it this way: "Because of the front pocket (if there is a pocket), the maximum size for a chest print will be only 10″ high, and it could be limited to just 6″ on the smallest hoodie sizes." The exact front size differs by blank and provider, so the front version of each design follows the placement your provider lists for that hoodie.
Draw the front area above the pocket and the back area below the hood
Save a white hoodie's front photo and back photo as two photo mockups, each with one print area shaped like the print file for that side. Each area is four corner points in the photo's pixel grid, listed clockwise from the top left.
Our test photos show a white pullover hoodie on an invisible mannequin, front and back, 1,600 by 2,000 pixels each. On the front we drew a 456 by 304 pixel area, 3 to 2, centered on the chest between the tips of the drawcords and the pocket seam. On the back we drew a 560 by 635 pixel area, taller than wide, starting below the tip of the hood. Any straight-on pair of a white pullover photographed off the body works the same way, flat or on a mannequin, from your blank supplier or your own shoot; the On a Hanger view of the Gildan 18500 hoodie template is an off-body front to start from.
curl -X POST https://api.sudomock.com/api/v1/photo-mockups \-H "x-api-key: $SUDOMOCK_API_KEY" \-H "Content-Type: application/json" \-d '{"source_url": "https://cdn.example.com/photos/white-hoodie-front.jpg","name": "White hoodie, front","print_areas": [{ "points": [[567, 880], [1023, 880], [1023, 1184], [567, 1184]], "name": "Front" }]}'
const response = await fetch('https://api.sudomock.com/api/v1/photo-mockups', {method: 'POST',headers: {'x-api-key': process.env.SUDOMOCK_API_KEY,'Content-Type': 'application/json',},body: JSON.stringify({"source_url": "https://cdn.example.com/photos/white-hoodie-front.jpg","name": "White hoodie, front","print_areas": [{"points": [[567,880],[1023,880],[1023,1184],[567,1184]],"name": "Front"}]}),});const data = await response.json();console.log(data);
import osimport requestsresponse = requests.post("https://api.sudomock.com/api/v1/photo-mockups",headers={"x-api-key": os.environ["SUDOMOCK_API_KEY"],"Content-Type": "application/json",},json={"source_url": "https://cdn.example.com/photos/white-hoodie-front.jpg","name": "White hoodie, front","print_areas": [{"points": [[567,880,],[1023,880,],[1023,1184,],[567,1184,],],"name": "Front",},],},)print(response.json())
package mainimport ("bytes""fmt""io""net/http""os")func main() {payload := []byte(`{"source_url": "https://cdn.example.com/photos/white-hoodie-front.jpg","name": "White hoodie, front","print_areas": [{"points": [[567,880],[1023,880],[1023,1184],[567,1184]],"name": "Front"}]}`)req, err := http.NewRequest("POST", "https://api.sudomock.com/api/v1/photo-mockups", bytes.NewBuffer(payload))if err != nil {panic(err)}req.Header.Set("x-api-key", os.Getenv("SUDOMOCK_API_KEY"))req.Header.Set("Content-Type", "application/json")resp, err := http.DefaultClient.Do(req)if err != nil {panic(err)}defer resp.Body.Close()body, _ := io.ReadAll(resp.Body)fmt.Println(string(body))}
<?php$payload = <<<'JSON'{"source_url": "https://cdn.example.com/photos/white-hoodie-front.jpg","name": "White hoodie, front","print_areas": [{"points": [[567,880],[1023,880],[1023,1184],[567,1184]],"name": "Front"}]}JSON;$ch = curl_init('https://api.sudomock.com/api/v1/photo-mockups');curl_setopt_array($ch, [CURLOPT_CUSTOMREQUEST => 'POST',CURLOPT_RETURNTRANSFER => true,CURLOPT_HTTPHEADER => ['x-api-key: ' . getenv('SUDOMOCK_API_KEY'),'Content-Type: application/json',],CURLOPT_POSTFIELDS => $payload,]);$response = curl_exec($ch);curl_close($ch);echo $response;
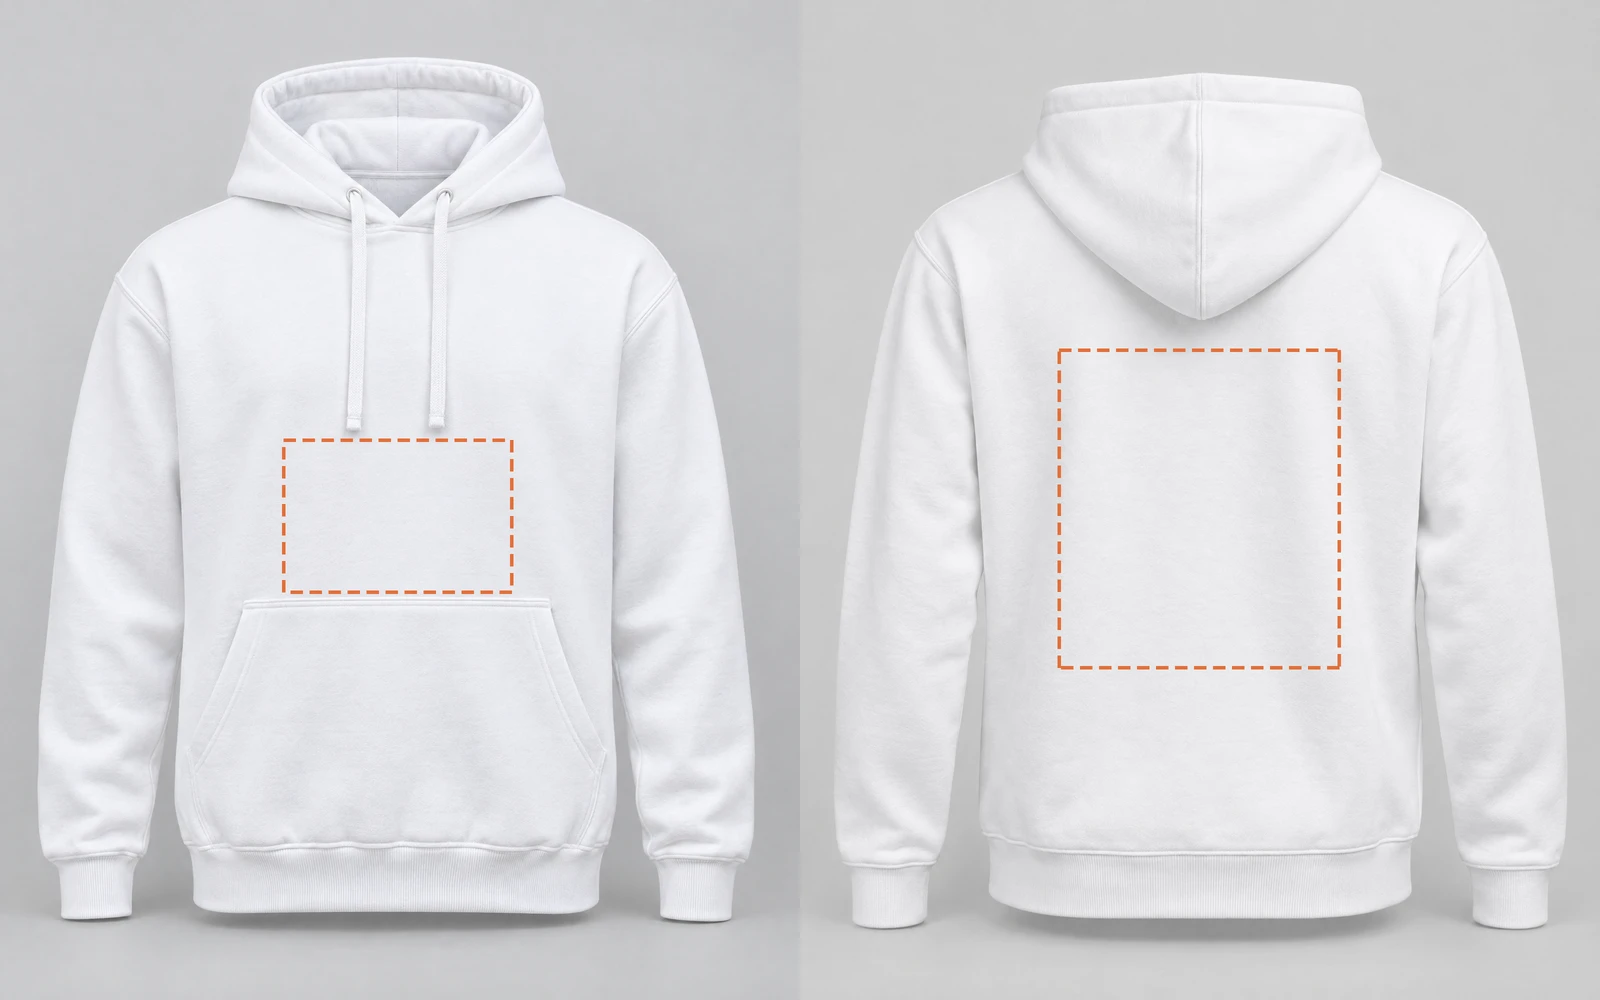 The two areas we sent, outlined: 456 by 304 pixels on the chest, 560 by 635 pixels on the back. The white hoodie photos were generated for this test, 15 November 2026.
The back is the same call with the back photo and the area [[518, 700], [1078, 700], [1078, 1335], [518, 1335]] named Back. Keep three ids from each response, six in all: the mockup (data.mockup_id), its area (data.quads[0].print_area_id) and the hoodie surface (data.surfaces[0].surface_uuid). Both mockups came back with their area exactly as drawn and the whole hoodie as one surface.
Render the front with a wide file
A front render names the front area and sends the wide version of the design. The default fit scales the whole file into the area and keeps its proportions, so a file laid out at 3 to 2 fills the chest from edge to edge.
curl -X POST https://api.sudomock.com/api/v1/photo-mockups/FRONT_MOCKUP_ID/render \-H "x-api-key: $SUDOMOCK_API_KEY" \-H "Content-Type: application/json" \-d '{"print_areas": [{"uuid": "FRONT_AREA_ID","artwork_url": "https://cdn.example.com/hoodies/summit-front-3x2.png","placement": { "fit": "fit" }}],"export_options": { "image_format": "jpg", "image_size": 1024 }}'
const response = await fetch('https://api.sudomock.com/api/v1/photo-mockups/FRONT_MOCKUP_ID/render', {method: 'POST',headers: {'x-api-key': process.env.SUDOMOCK_API_KEY,'Content-Type': 'application/json',},body: JSON.stringify({"print_areas": [{"uuid": "FRONT_AREA_ID","artwork_url": "https://cdn.example.com/hoodies/summit-front-3x2.png","placement": {"fit": "fit"}}],"export_options": {"image_format": "jpg","image_size": 1024}}),});const data = await response.json();console.log(data);
import osimport requestsresponse = requests.post("https://api.sudomock.com/api/v1/photo-mockups/FRONT_MOCKUP_ID/render",headers={"x-api-key": os.environ["SUDOMOCK_API_KEY"],"Content-Type": "application/json",},json={"print_areas": [{"uuid": "FRONT_AREA_ID","artwork_url": "https://cdn.example.com/hoodies/summit-front-3x2.png","placement": {"fit": "fit",},},],"export_options": {"image_format": "jpg","image_size": 1024,},},)print(response.json())
package mainimport ("bytes""fmt""io""net/http""os")func main() {payload := []byte(`{"print_areas": [{"uuid": "FRONT_AREA_ID","artwork_url": "https://cdn.example.com/hoodies/summit-front-3x2.png","placement": {"fit": "fit"}}],"export_options": {"image_format": "jpg","image_size": 1024}}`)req, err := http.NewRequest("POST", "https://api.sudomock.com/api/v1/photo-mockups/FRONT_MOCKUP_ID/render", bytes.NewBuffer(payload))if err != nil {panic(err)}req.Header.Set("x-api-key", os.Getenv("SUDOMOCK_API_KEY"))req.Header.Set("Content-Type", "application/json")resp, err := http.DefaultClient.Do(req)if err != nil {panic(err)}defer resp.Body.Close()body, _ := io.ReadAll(resp.Body)fmt.Println(string(body))}
<?php$payload = <<<'JSON'{"print_areas": [{"uuid": "FRONT_AREA_ID","artwork_url": "https://cdn.example.com/hoodies/summit-front-3x2.png","placement": {"fit": "fit"}}],"export_options": {"image_format": "jpg","image_size": 1024}}JSON;$ch = curl_init('https://api.sudomock.com/api/v1/photo-mockups/FRONT_MOCKUP_ID/render');curl_setopt_array($ch, [CURLOPT_CUSTOMREQUEST => 'POST',CURLOPT_RETURNTRANSFER => true,CURLOPT_HTTPHEADER => ['x-api-key: ' . getenv('SUDOMOCK_API_KEY'),'Content-Type: application/json',],CURLOPT_POSTFIELDS => $payload,]);$response = curl_exec($ch);curl_close($ch);echo $response;
data.print_files[0].export_path in the response is the URL of the rendered hoodie. The average SudoMock render finishes in under a second. Our design was drawn for this test in two layouts of one transparent PNG: 1,500 by 1,000 pixels with the badge beside the lettering for the front, and 1,500 by 1,700 pixels with the badge above it for the back.
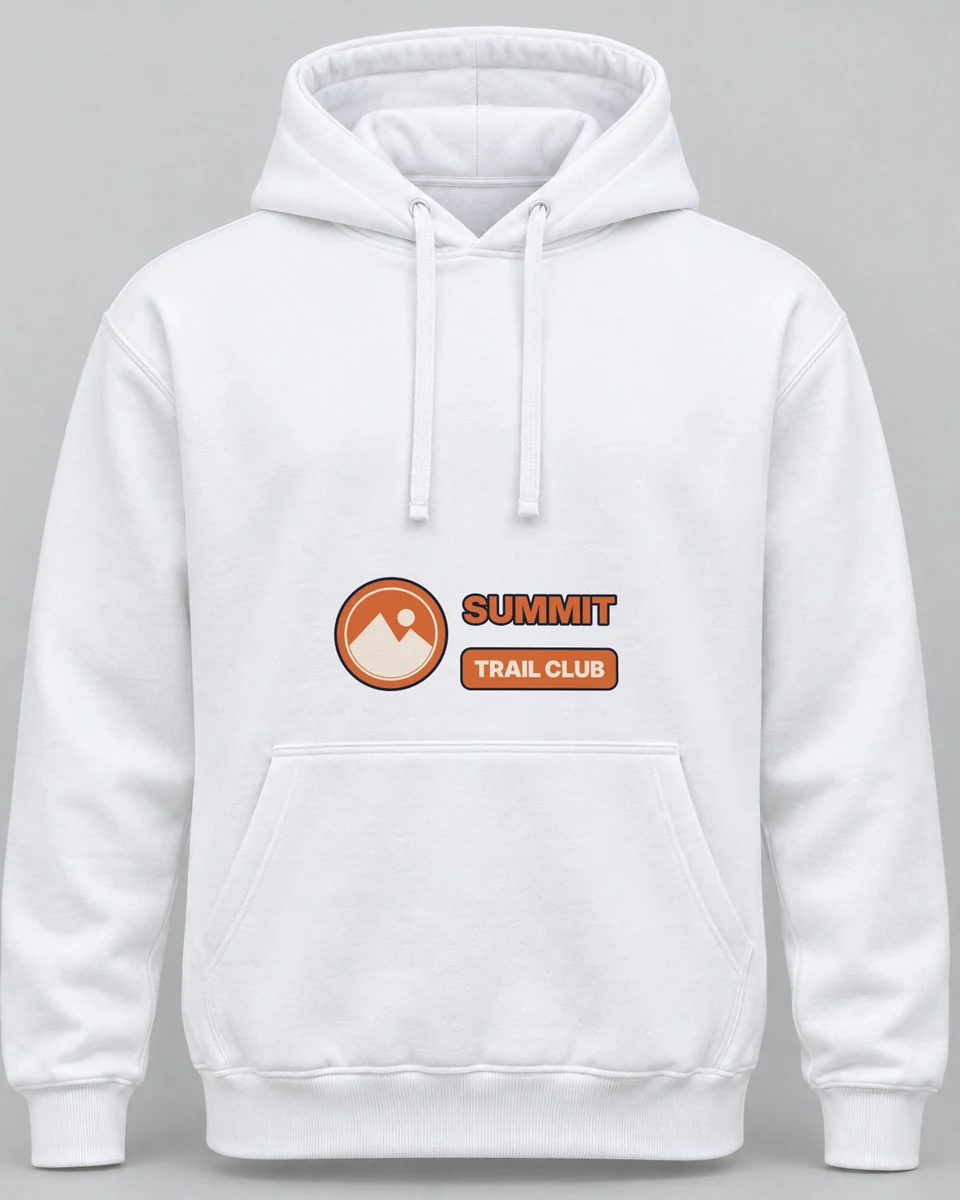 The wide front file on the white hoodie, fit into the 3 to 2 chest area. SudoMock render, 16 November 2026.
What a tee file does on the hoodie front
A tall tee file sent to the hoodie's chest area cannot fill it without giving something up. With fit it keeps the whole design and comes out small, with crop it fills the area and loses its top and bottom, and with fill it stretches to the edges.
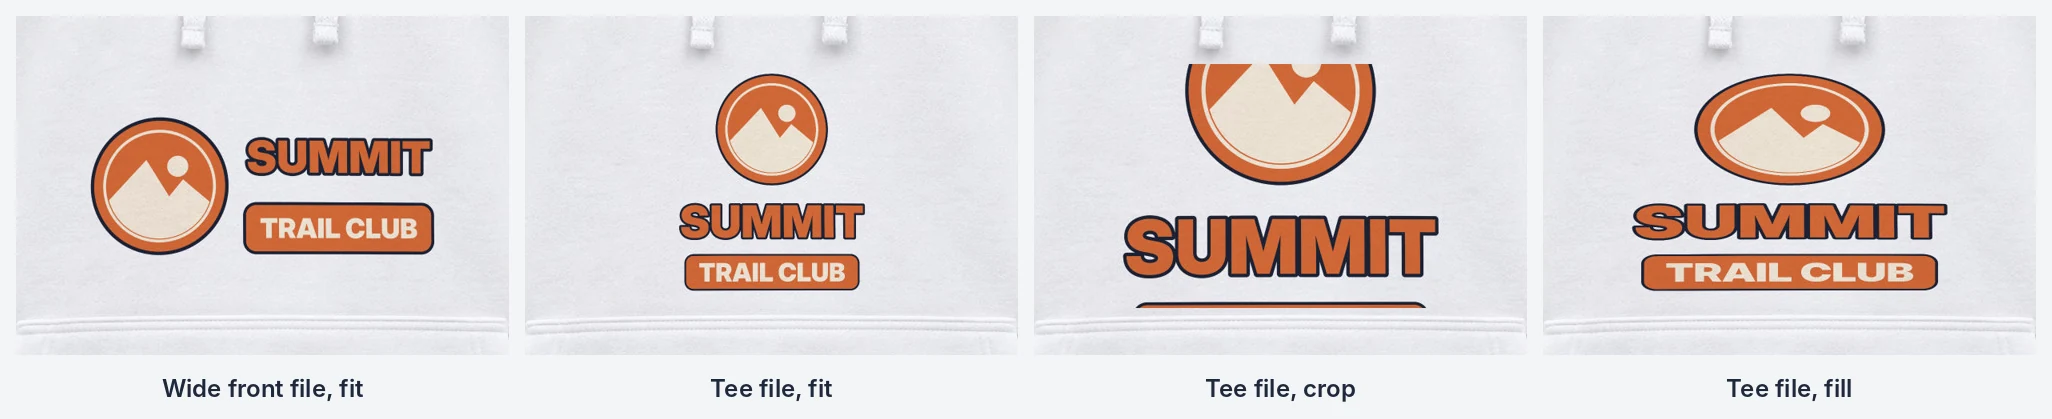 Left to right: the wide front file, then the tall tee file with fit, crop and fill. Same mockup and area. SudoMock renders, 16 November 2026.
fit value | The tall tee file in the 3 to 2 chest area |
|---|---|
fit | The whole design, scaled down to the area's height, with empty space at both sides |
crop | Fills the area; the top of the badge and the TRAIL CLUB bar are cut off |
fill | Fills the area; the round badge turns into an oval |
The render reference defines the three values. None of them turns a tall layout into a wide one, so the front gets its own file.
The back takes the tee file as it is
The back area is tall, so the file you already print on a tee front goes on a hoodie's back without a new layout. The request is the front request with the back mockup's ids and the tall file.
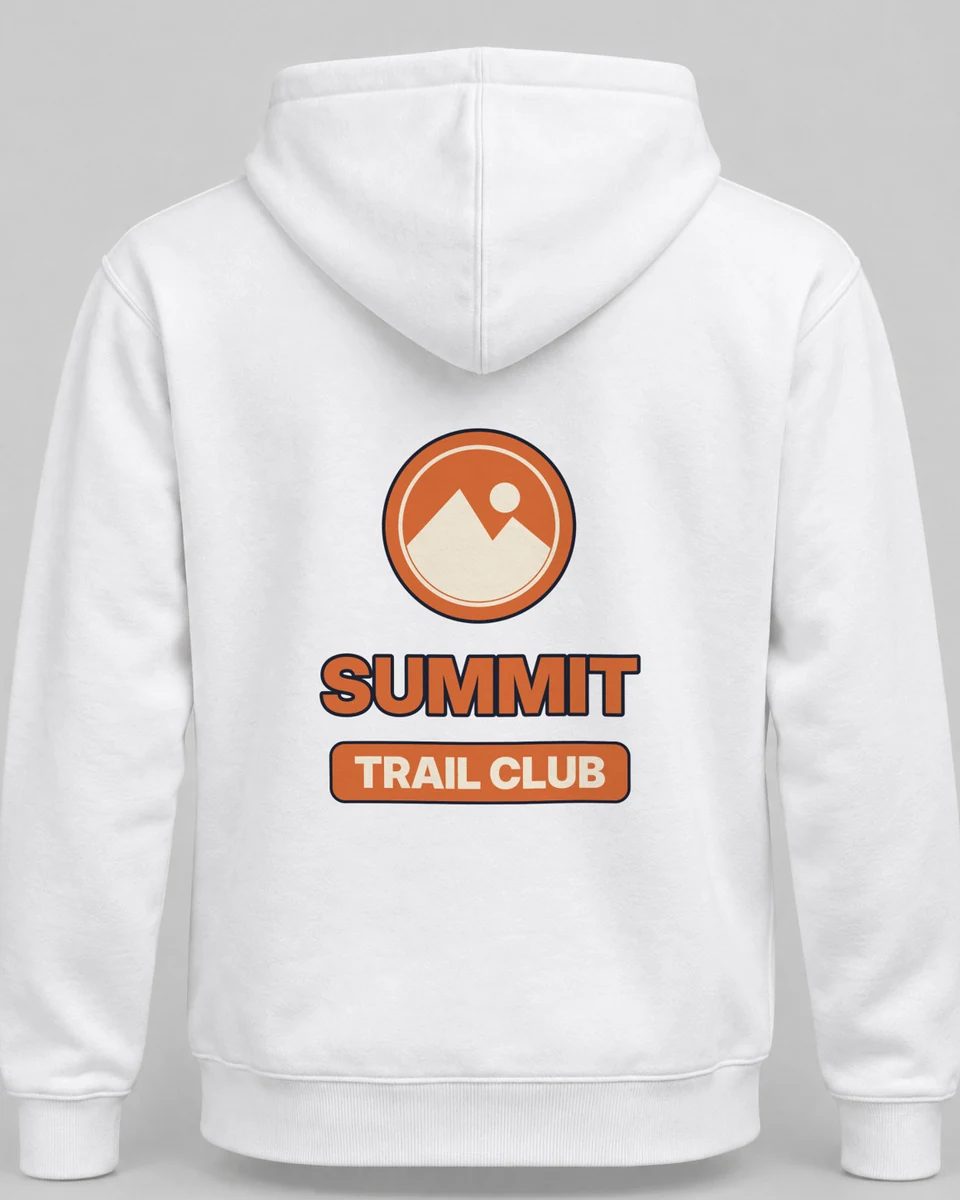 The tall file, unchanged, in the back area. SudoMock render, 16 November 2026.
Every hoodie color, front and back
Each render can paint the hoodie through its surface, so one white hoodie photo per side gives every color you sell. The surface goes in as a second target with a hex color, and the fleece, ribbing, drawcords and folds stay in place.
{ "surface_uuid": "HOODIE_SURFACE_ID", "color": "#1F2537" }
On the dark colors, set blend_mode to normal in the area entry's adjustments so the artwork prints in its file colors on the dark fleece; white and sport grey keep the default. Lettering set on a filled shape, like the bar behind TRAIL CLUB here, reads the same on every color without a second version of the file.
| Color | Front | Back |
|---|---|---|
| White | 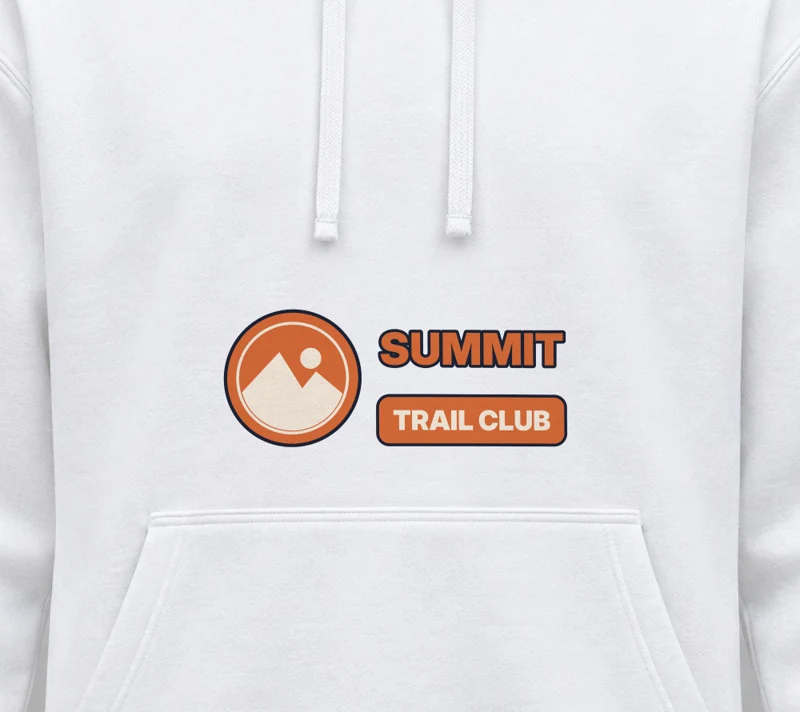 | 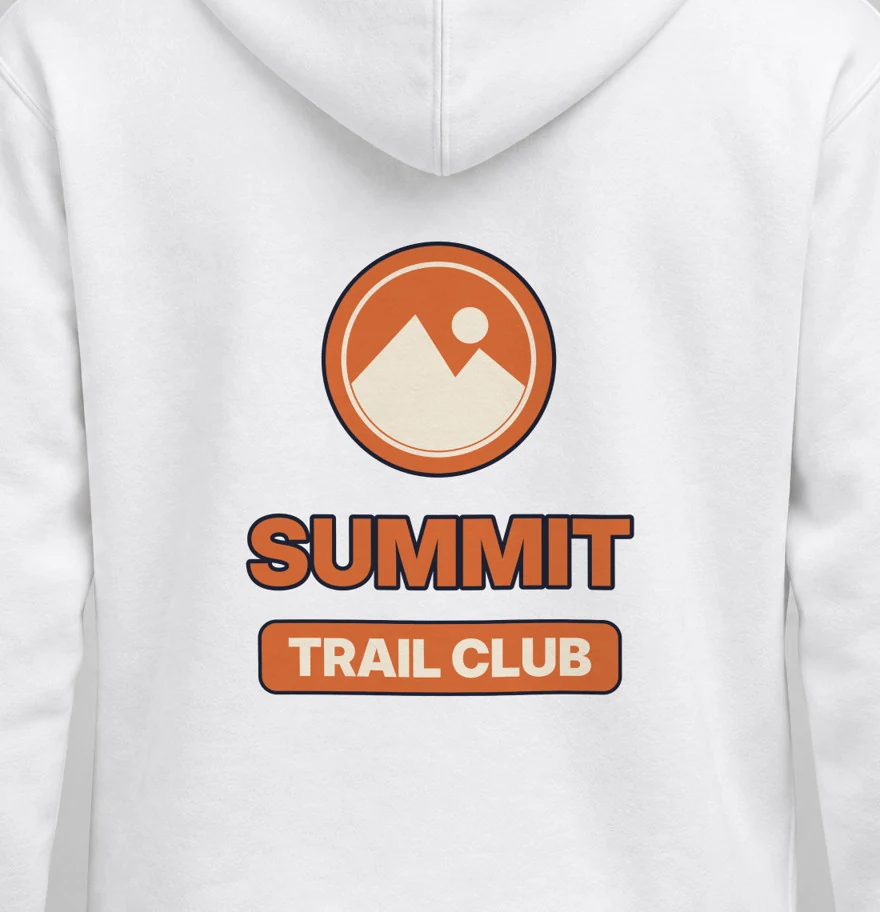 |
| Black #1B1B1D | 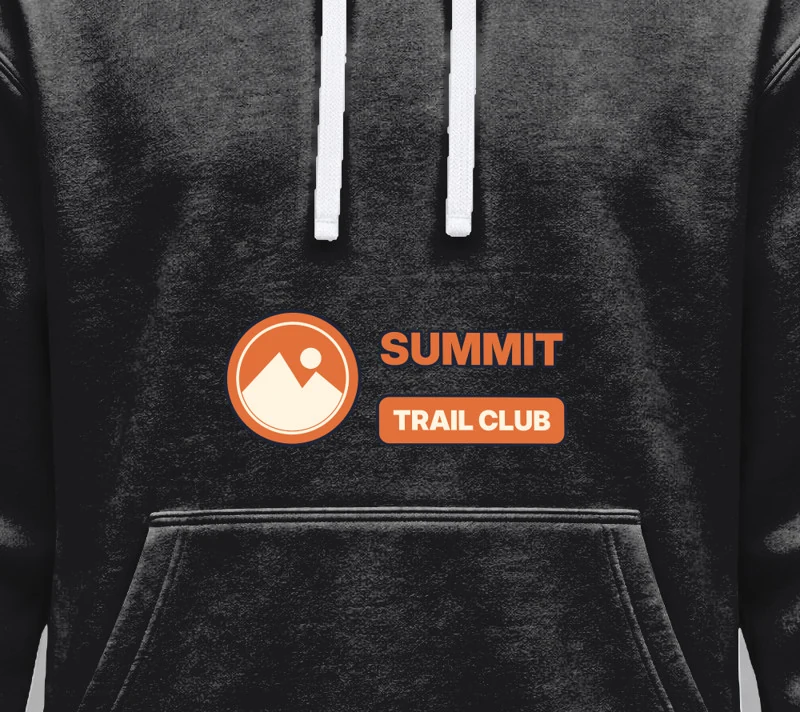 | 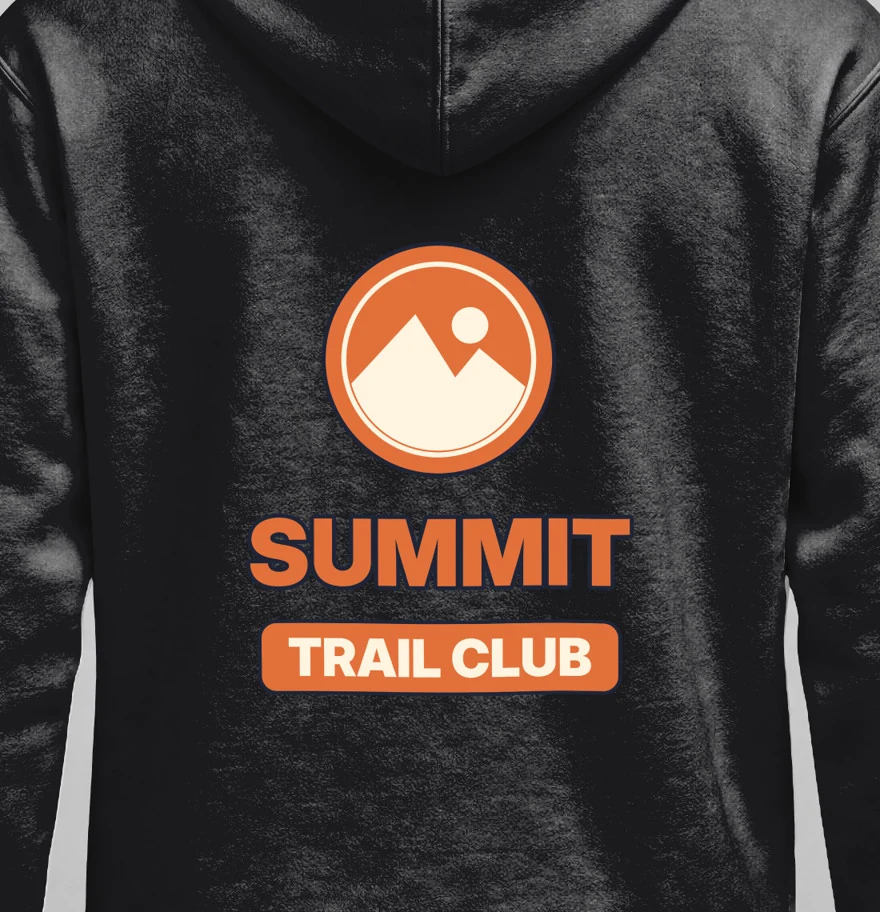 |
| Navy #1F2537 | 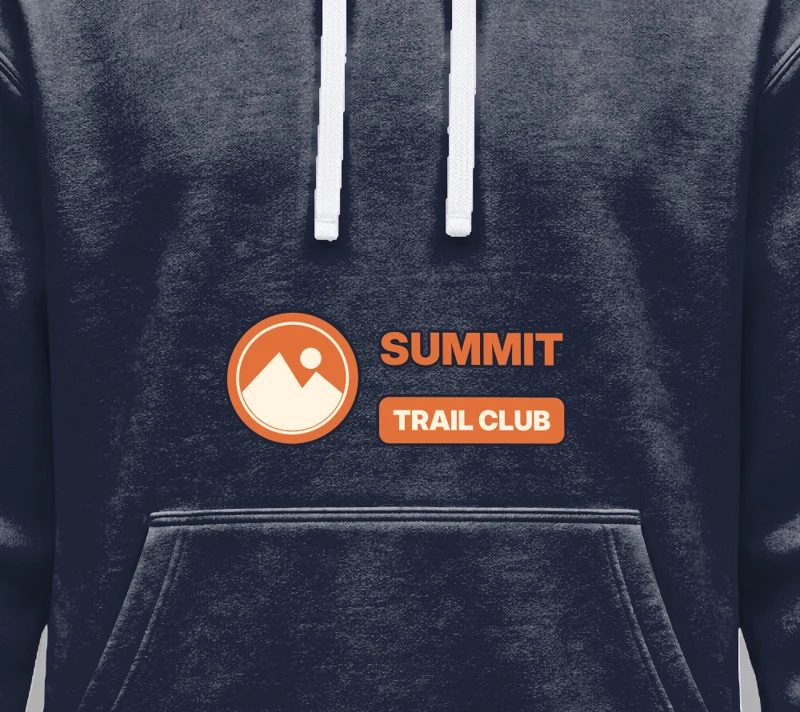 | 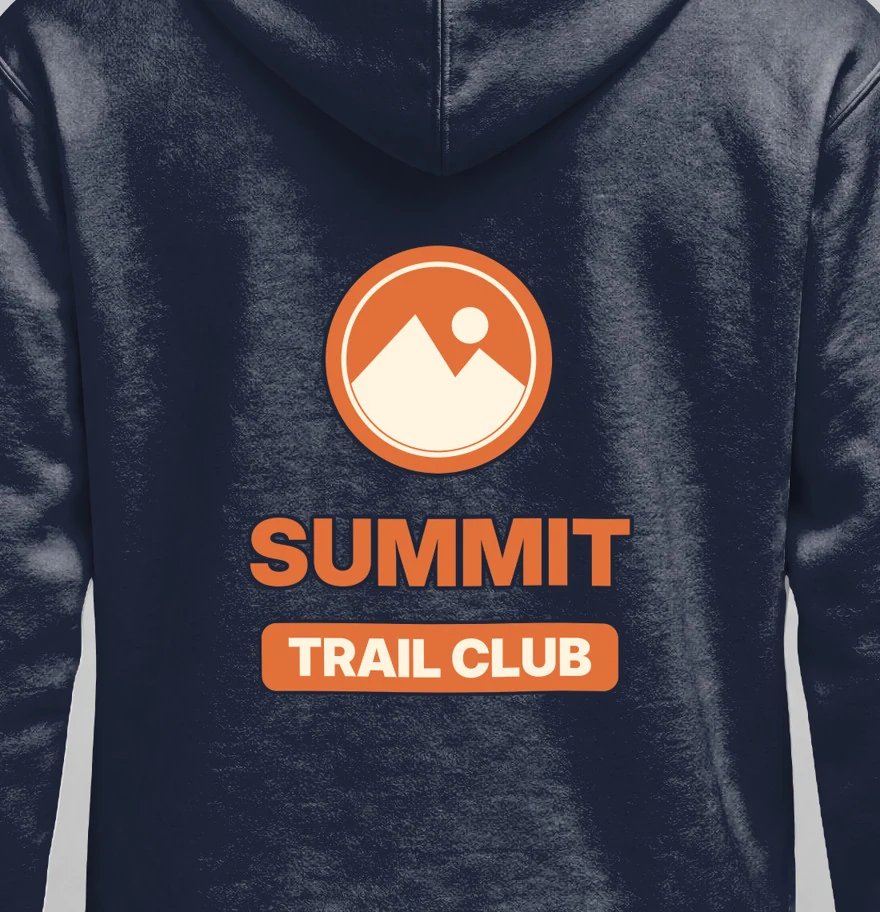 |
| Sport grey #A3A5A7 | 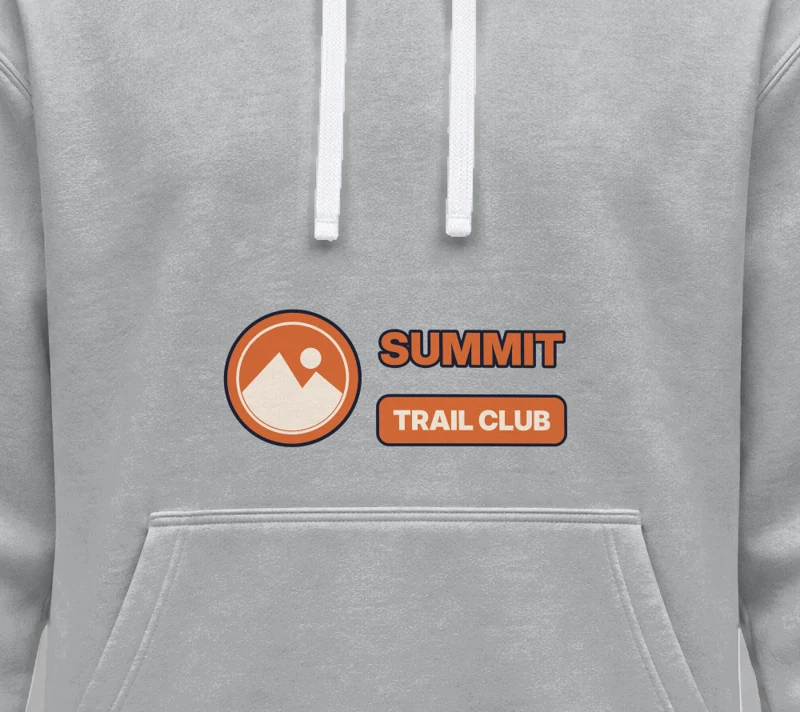 | 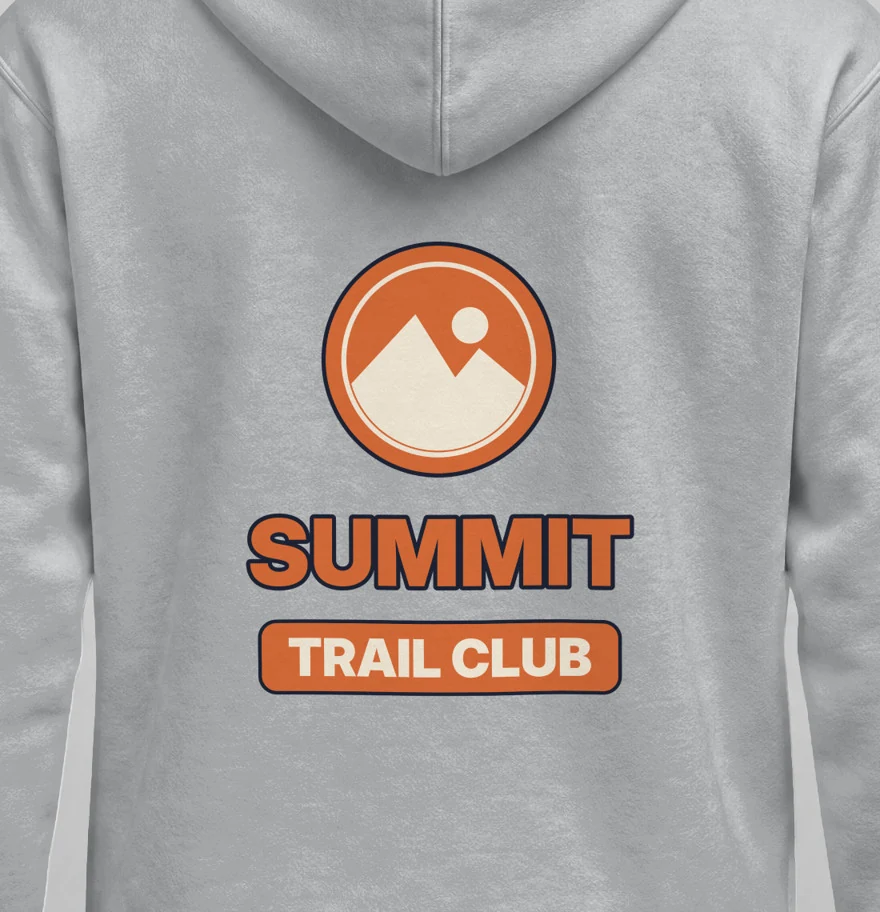 |
| Maroon #5A2232 | 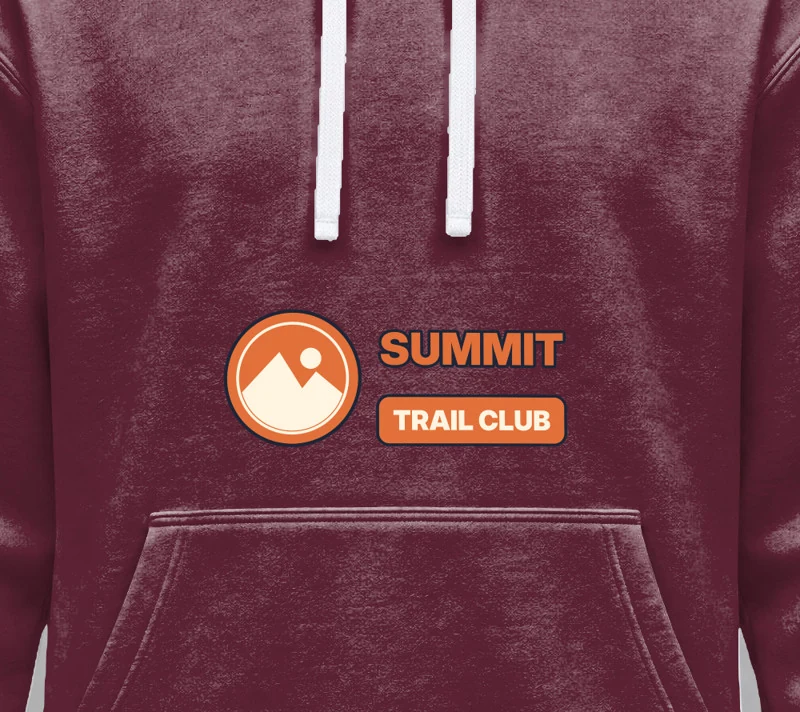 | 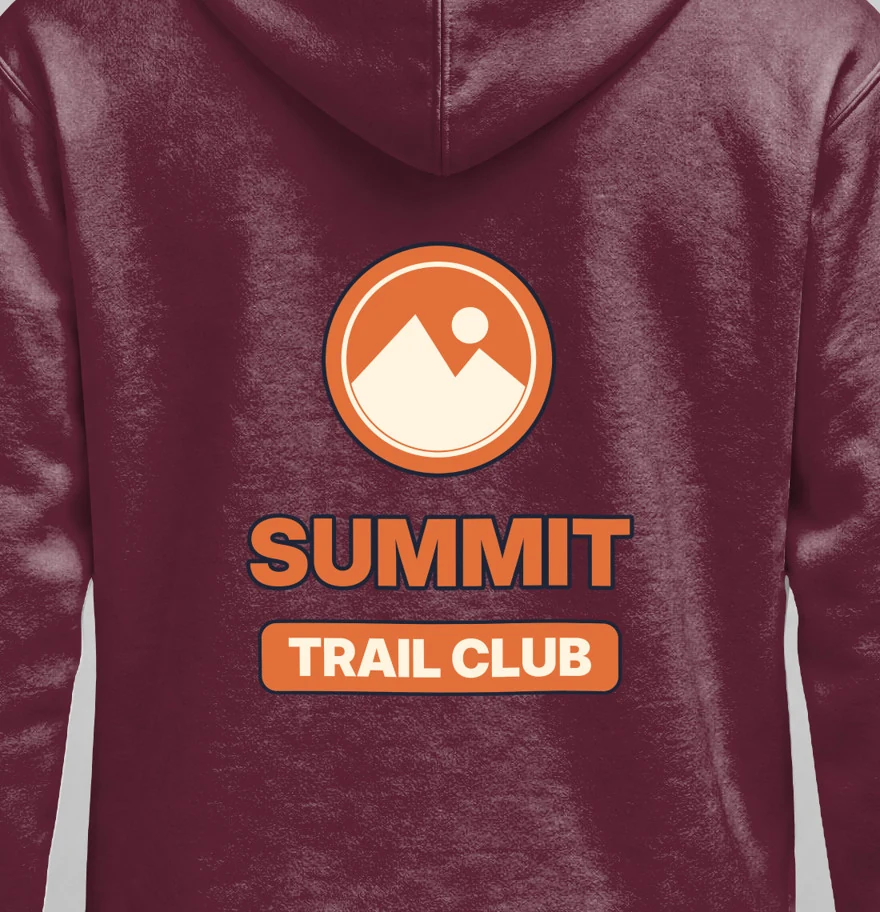 |
All ten are SudoMock renders from the two white hoodie photos, made on 16 November 2026; black, navy and maroon use normal. For a listing, each hex should come from the color chart of the blank you sell, since the buyer receives that blank.
Render the catalog: two files per design
Two saved mockups carry the whole catalog: each CSV row names a design's front file and back file, and both go out in every color. The script turns each row into ten requests, five colors on each side, sends them eight at a time and names every image after the row's SKU, the color and the side.
sku,front_png,back_pngHD-SUMMIT-01,https://cdn.example.com/hoodies/summit-front-3x2.png,https://cdn.example.com/hoodies/summit-back.pngHD-WAVE-02,https://cdn.example.com/hoodies/wave-front-3x2.png,https://cdn.example.com/hoodies/wave-back.png
Paste the mockup, area and surface id of each side into SIDES, export your key as SUDOMOCK_API_KEY and start the script with the CSV path as its only argument. A mockup saved earlier gives back its ids through retrieve a single photo mockup.
import csv, os, sys, timefrom concurrent.futures import ThreadPoolExecutorimport requestsSIDES = {"front": {"mockup": "FRONT_MOCKUP_ID", "area": "FRONT_AREA_ID", "surface": "FRONT_SURFACE_ID", "file": "front_png"},"back": {"mockup": "BACK_MOCKUP_ID", "area": "BACK_AREA_ID", "surface": "BACK_SURFACE_ID", "file": "back_png"},}COLORS = {"white": None, "black": "#1B1B1D", "navy": "#1F2537", "sport-grey": "#A3A5A7", "maroon": "#5A2232"}DARK = {"black", "navy", "maroon"}HEADERS = {"x-api-key": os.environ["SUDOMOCK_API_KEY"]}def render(row, color, side):s = SIDES[side]area = {"uuid": s["area"], "artwork_url": row[s["file"]], "placement": {"fit": "fit"}}if color in DARK:area["adjustments"] = {"blend_mode": "normal"}targets = [area]if COLORS[color]:targets.insert(0, {"surface_uuid": s["surface"], "color": COLORS[color]})body = {"print_areas": targets, "export_options": {"image_format": "jpg", "image_size": 1024}}url = f"https://api.sudomock.com/api/v1/photo-mockups/{s['mockup']}/render"res = requests.post(url, json=body, headers=HEADERS, timeout=120)if res.status_code == 429:time.sleep(int(res.headers.get("Retry-After", 5)))res = requests.post(url, json=body, headers=HEADERS, timeout=120)if not res.ok:return f"{row['sku']} {color} {side} failed {res.status_code} {res.text}"image = requests.get(res.json()["data"]["print_files"][0]["export_path"], timeout=60)if not image.ok:return f"{row['sku']} {color} {side} download failed {image.status_code}"name = f"{row['sku']}-{color}-{side}.jpg"with open(name, "wb") as f:f.write(image.content)return f"{name} saved"with open(sys.argv[1], newline="") as f:rows = list(csv.DictReader(f))jobs = [(row, color, side) for row in rows for color in COLORS for side in SIDES]with ThreadPoolExecutor(max_workers=8) as pool:for line in pool.map(lambda job: render(*job), jobs):print(line)
The two rows above come out as 20 images, from HD-SUMMIT-01-white-front.jpg to HD-WAVE-02-maroon-back.jpg. Past a few hundred renders, switch each request to "is_async": true and pick the images up from their jobs rather than waiting on every call. Teams that keep their catalog in a spreadsheet can run the same rows from a Make scenario on Google Sheets without code.
A hoodie PSD of your own
A hoodie PSD with one smart object for the front print and one for the back takes the same pair of files in a single render request; front and back t-shirt mockups shows that request on a tee. Upload the PSD once with POST /api/v1/psd/upload (upload a PSD). In the dashboard, PSD uploads are capped at 300 MB, and API uploads support files up to Adobe's official PSD file size limit.
Next step
Take a white pullover hoodie's front and back photos, off the body and straight on, save each as a photo mockup with a chest area at the front placement your provider lists and a back area below the hood, and render one design's two files on a white and a black hoodie. With those six ids in SIDES, the script covers the rest of the catalog. For on-model shots in white, the Gildan 18500 hoodie template has Worn Front and Worn Back views, and GET /api/v1/library/templates?search=gildan%2018500 returns the source_url of each for the same create call (start from a ready-made template); the other pullover hoodie templates work the same way. Every target and placement field is in the render reference, hoodie mockups by API adds webhooks to the same workflow and text personalization on a PSD template, and lettering-only designs have their own hoodie text mockups. Caps follow the same front-area logic in hat mockups.
Frequently asked questions
What size should a hoodie front print be?
Shorter than a tee front, because the pouch pocket sits under it. Rush Order Tees' 2022 hoodie guide caps a pullover's chest print at 10 inches high, and less on the smallest sizes, while the back takes a tall print. Lay the front file out at the placement your print provider lists for your hoodie.
Can I use my t-shirt design on a hoodie?
On the back, yes: the back area is tall like a tee front, so the same file fits without a new layout. On the front, a tall tee file comes out small, loses its top and bottom, or stretches in the short area above the pocket. Make a wide version of the design for the front.
Can I make hoodie mockups in several colors from one photo?
Yes. Save one white hoodie photo per side as a photo mockup, and each comes back with the hoodie as a surface. A render that sends a hex color for that surface returns the hoodie in that color, so five colors on both sides are ten renders against the two saved mockups.
Does a zip-up hoodie take a front print?
Yes, within the room the zipper leaves: it runs down the middle of the front and limits a print there, and providers also list chest placements beside it and the back. Draw one print area for each placement your provider lists and render each design into those areas the same way.
Sources
- Choosing The Best Custom Hoodies: 7 Expert Tips (opens in new tab), Rush Order Tees
- Create a mockup from a product photo (opens in new tab), SudoMock docs
- Print areas and surfaces (opens in new tab), SudoMock docs
- Render a photo mockup (opens in new tab), SudoMock docs
- Render artwork onto a photo mockup (opens in new tab), SudoMock docs
- Start From a Ready-Made Template: No File of Your Own (opens in new tab), SudoMock docs
- Usage limits (opens in new tab), SudoMock docs
- Upload a PSD (opens in new tab), SudoMock docs
Beck
CTO
Related articles
Front and Back T-Shirt Mockups: Both Prints in One Render
Put the chest badge and the back print of every design pair on one mockup, in every shirt color, with one render request each.
6 min read
Hat Mockups for Every Design and Cap Color by API
Save one cap photo with a front print area, recolor the cap in each request, and render every design on every color by API.
7 min read
Every T-Shirt Color Variant Mockup from One PSD by API
One PSD with a color smart object renders every t-shirt colorway: one request per color, shown with six real renders.
4 min read
Explore by use case
See SudoMock in action for your specific product category
Your own PSD, rendered via API
Render your own PSD through the API. Start with 500 one-time credits, no card.