Hat Mockups for Every Design and Cap Color by API
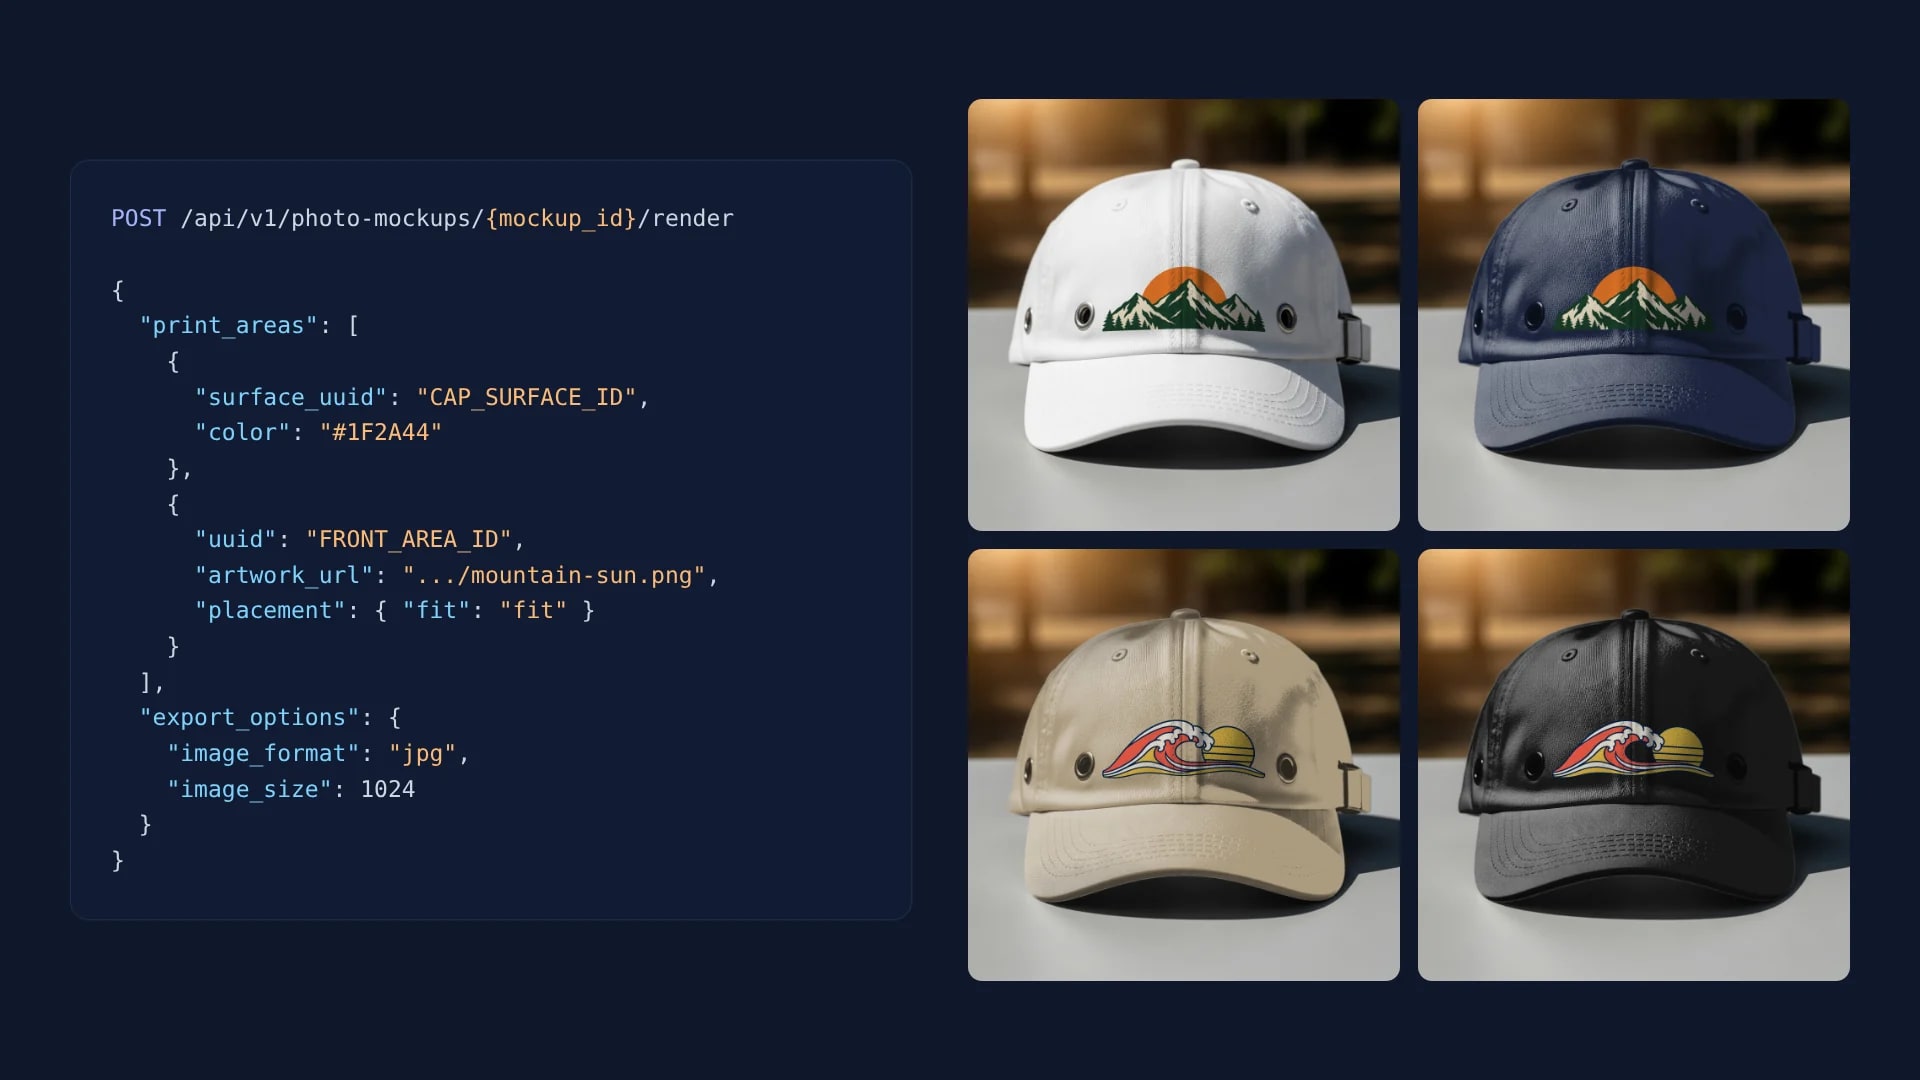
A hat mockup for every design and cap color starts from one photo of a light blank cap, saved once as a photo mockup with a front print area at the shape of the front print file. Each render then paints the cap through its surface and places one design in that area, so 20 designs in 6 colors are 120 requests.
Published 7 min readBeck
Key takeaways
- Draw the front area at the print file's shape; some caps print the front as two near-square panels.
- Keep a lighter version of a design for black caps, where dark ink loses contrast.
- Save cap color names on the mockup once, and each render asks for navy or khaki by name.
Start from one photo of a white cap
Use a white or light blank with its front facing the camera, because each render can paint the cap any color while its twill, seams and shadows stay in place. The navy, khaki and black renders below all come from one white cap photo.
Our test photo is the front view of the white cotton dad hat template, 1,024 by 1,024 pixels: an unstructured six-panel cap with a curved brim and a buckle strap. Its Use This Mockup button opens the chosen view in your account as a photo mockup. The dad hat templates and the wider headwear templates hold more dad hats, trucker caps, snapbacks and beanies to start from, and a photo of your own blank works the same way.
Draw the front print area at the print file's shape
The front area should have the shape of the front print file your provider takes for that cap, so every design scales into the mockup the way it will print. Draw it in the photo's own pixels, corners from the top left clockwise, at the size the print has on the cap.
We drew a 400 by 160 pixel area, the 5 to 2 shape of a printed (DTF) front on a classic dad cap, across both front panels and centered on the seam, with its lower edge clear of the brim. Caps differ here. The dad hat template page gives about 4 by 2.25 inches for an embroidered front on a Yupoong 6245CM, a shorter shape, and some caps print the front as two panels left and right of the center seam, each close to square. Read the front placement your provider lists for your exact cap, draw the area at that shape, and draw one area per panel when the front prints in two.
curl -X POST https://api.sudomock.com/api/v1/photo-mockups \-H "x-api-key: $SUDOMOCK_API_KEY" \-H "Content-Type: application/json" \-d '{"source_url": "https://cdn.example.com/photos/white-dad-hat-front.png","name": "White dad hat, front","print_areas": [{ "points": [[312, 392], [712, 392], [712, 552], [312, 552]], "name": "Front" }]}'
const response = await fetch('https://api.sudomock.com/api/v1/photo-mockups', {method: 'POST',headers: {'x-api-key': process.env.SUDOMOCK_API_KEY,'Content-Type': 'application/json',},body: JSON.stringify({"source_url": "https://cdn.example.com/photos/white-dad-hat-front.png","name": "White dad hat, front","print_areas": [{"points": [[312,392],[712,392],[712,552],[312,552]],"name": "Front"}]}),});const data = await response.json();console.log(data);
import osimport requestsresponse = requests.post("https://api.sudomock.com/api/v1/photo-mockups",headers={"x-api-key": os.environ["SUDOMOCK_API_KEY"],"Content-Type": "application/json",},json={"source_url": "https://cdn.example.com/photos/white-dad-hat-front.png","name": "White dad hat, front","print_areas": [{"points": [[312,392,],[712,392,],[712,552,],[312,552,],],"name": "Front",},],},)print(response.json())
package mainimport ("bytes""fmt""io""net/http""os")func main() {payload := []byte(`{"source_url": "https://cdn.example.com/photos/white-dad-hat-front.png","name": "White dad hat, front","print_areas": [{"points": [[312,392],[712,392],[712,552],[312,552]],"name": "Front"}]}`)req, err := http.NewRequest("POST", "https://api.sudomock.com/api/v1/photo-mockups", bytes.NewBuffer(payload))if err != nil {panic(err)}req.Header.Set("x-api-key", os.Getenv("SUDOMOCK_API_KEY"))req.Header.Set("Content-Type", "application/json")resp, err := http.DefaultClient.Do(req)if err != nil {panic(err)}defer resp.Body.Close()body, _ := io.ReadAll(resp.Body)fmt.Println(string(body))}
<?php$payload = <<<'JSON'{"source_url": "https://cdn.example.com/photos/white-dad-hat-front.png","name": "White dad hat, front","print_areas": [{"points": [[312,392],[712,392],[712,552],[312,552]],"name": "Front"}]}JSON;$ch = curl_init('https://api.sudomock.com/api/v1/photo-mockups');curl_setopt_array($ch, [CURLOPT_CUSTOMREQUEST => 'POST',CURLOPT_RETURNTRANSFER => true,CURLOPT_HTTPHEADER => ['x-api-key: ' . getenv('SUDOMOCK_API_KEY'),'Content-Type: application/json',],CURLOPT_POSTFIELDS => $payload,]);$response = curl_exec($ch);curl_close($ch);echo $response;
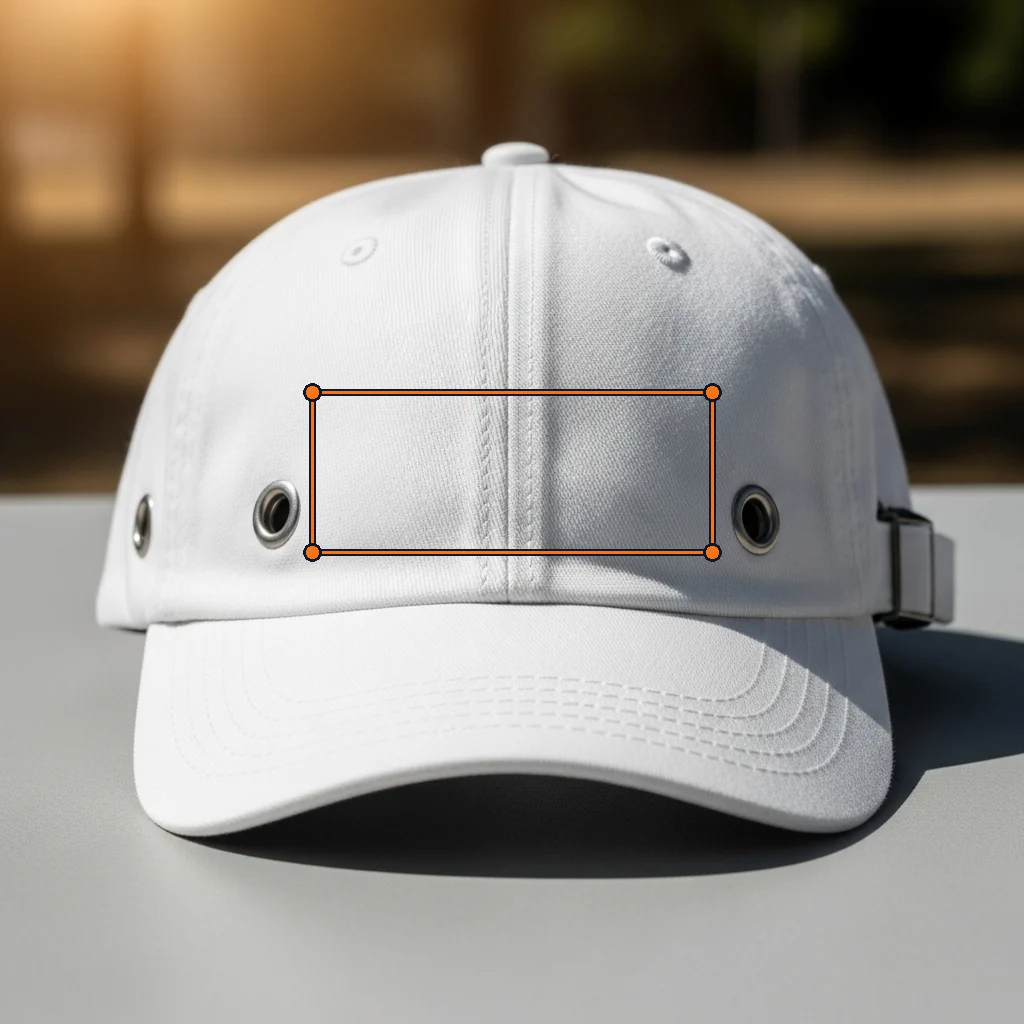 The Front area we sent with the create request, outlined on the template's front view: 400 by 160 pixels, the 5 to 2 shape of a printed front on a classic dad cap. Template photo from the SudoMock library, 12 November 2026.
The call answers with the finished mockup. Keep data.mockup_id, the front area's data.quads[0].print_area_id and the cap's data.surfaces[0].surface_uuid: the area takes the design and the surface takes the cap color. On 12 November 2026 we sent the template's front view with the area above, and the mockup came back ready, the area saved as Front and the whole cap returned as a surface beside it. The print areas and surfaces guide explains both lists.
Render one design on one cap color
One render request names both targets: the cap's surface with a hex color, and the front area with the design. Leave the surface entry out and the cap keeps the color it has in the photo.
curl -X POST https://api.sudomock.com/api/v1/photo-mockups/MOCKUP_ID/render \-H "x-api-key: $SUDOMOCK_API_KEY" \-H "Content-Type: application/json" \-d '{"print_areas": [{ "surface_uuid": "CAP_SURFACE_ID", "color": "#1F2A44" },{"uuid": "FRONT_AREA_ID","artwork_url": "https://cdn.example.com/caps/mountain-sun.png","placement": { "fit": "fit" }}],"export_options": { "image_format": "jpg", "image_size": 1024 }}'
const response = await fetch('https://api.sudomock.com/api/v1/photo-mockups/MOCKUP_ID/render', {method: 'POST',headers: {'x-api-key': process.env.SUDOMOCK_API_KEY,'Content-Type': 'application/json',},body: JSON.stringify({"print_areas": [{"surface_uuid": "CAP_SURFACE_ID","color": "#1F2A44"},{"uuid": "FRONT_AREA_ID","artwork_url": "https://cdn.example.com/caps/mountain-sun.png","placement": {"fit": "fit"}}],"export_options": {"image_format": "jpg","image_size": 1024}}),});const data = await response.json();console.log(data);
import osimport requestsresponse = requests.post("https://api.sudomock.com/api/v1/photo-mockups/MOCKUP_ID/render",headers={"x-api-key": os.environ["SUDOMOCK_API_KEY"],"Content-Type": "application/json",},json={"print_areas": [{"surface_uuid": "CAP_SURFACE_ID","color": "#1F2A44",},{"uuid": "FRONT_AREA_ID","artwork_url": "https://cdn.example.com/caps/mountain-sun.png","placement": {"fit": "fit",},},],"export_options": {"image_format": "jpg","image_size": 1024,},},)print(response.json())
package mainimport ("bytes""fmt""io""net/http""os")func main() {payload := []byte(`{"print_areas": [{"surface_uuid": "CAP_SURFACE_ID","color": "#1F2A44"},{"uuid": "FRONT_AREA_ID","artwork_url": "https://cdn.example.com/caps/mountain-sun.png","placement": {"fit": "fit"}}],"export_options": {"image_format": "jpg","image_size": 1024}}`)req, err := http.NewRequest("POST", "https://api.sudomock.com/api/v1/photo-mockups/MOCKUP_ID/render", bytes.NewBuffer(payload))if err != nil {panic(err)}req.Header.Set("x-api-key", os.Getenv("SUDOMOCK_API_KEY"))req.Header.Set("Content-Type", "application/json")resp, err := http.DefaultClient.Do(req)if err != nil {panic(err)}defer resp.Body.Close()body, _ := io.ReadAll(resp.Body)fmt.Println(string(body))}
<?php$payload = <<<'JSON'{"print_areas": [{"surface_uuid": "CAP_SURFACE_ID","color": "#1F2A44"},{"uuid": "FRONT_AREA_ID","artwork_url": "https://cdn.example.com/caps/mountain-sun.png","placement": {"fit": "fit"}}],"export_options": {"image_format": "jpg","image_size": 1024}}JSON;$ch = curl_init('https://api.sudomock.com/api/v1/photo-mockups/MOCKUP_ID/render');curl_setopt_array($ch, [CURLOPT_CUSTOMREQUEST => 'POST',CURLOPT_RETURNTRANSFER => true,CURLOPT_HTTPHEADER => ['x-api-key: ' . getenv('SUDOMOCK_API_KEY'),'Content-Type: application/json',],CURLOPT_POSTFIELDS => $payload,]);$response = curl_exec($ch);curl_close($ch);echo $response;
The finished image is at data.print_files[0].export_path, and the average SudoMock render finishes in under a second. fit scales the whole design into the front area, so a transparent PNG at the area's own 5 to 2 shape fills it edge to edge. image_size sets the output's longer side, and jpg is the format the render guide recommends for marketplace uploads.
Every design on every cap color
A cap catalog is a grid: every design on every cap color you sell, one render per pair against the same mockup. On 12 November 2026 we rendered two designs on four colors, and only the hex and the artwork URL changed between the eight requests.
| Design | White | Navy #1F2A44 | Khaki #C3B091 | Black #1C1C1C |
|---|---|---|---|---|
| Mountain sun | 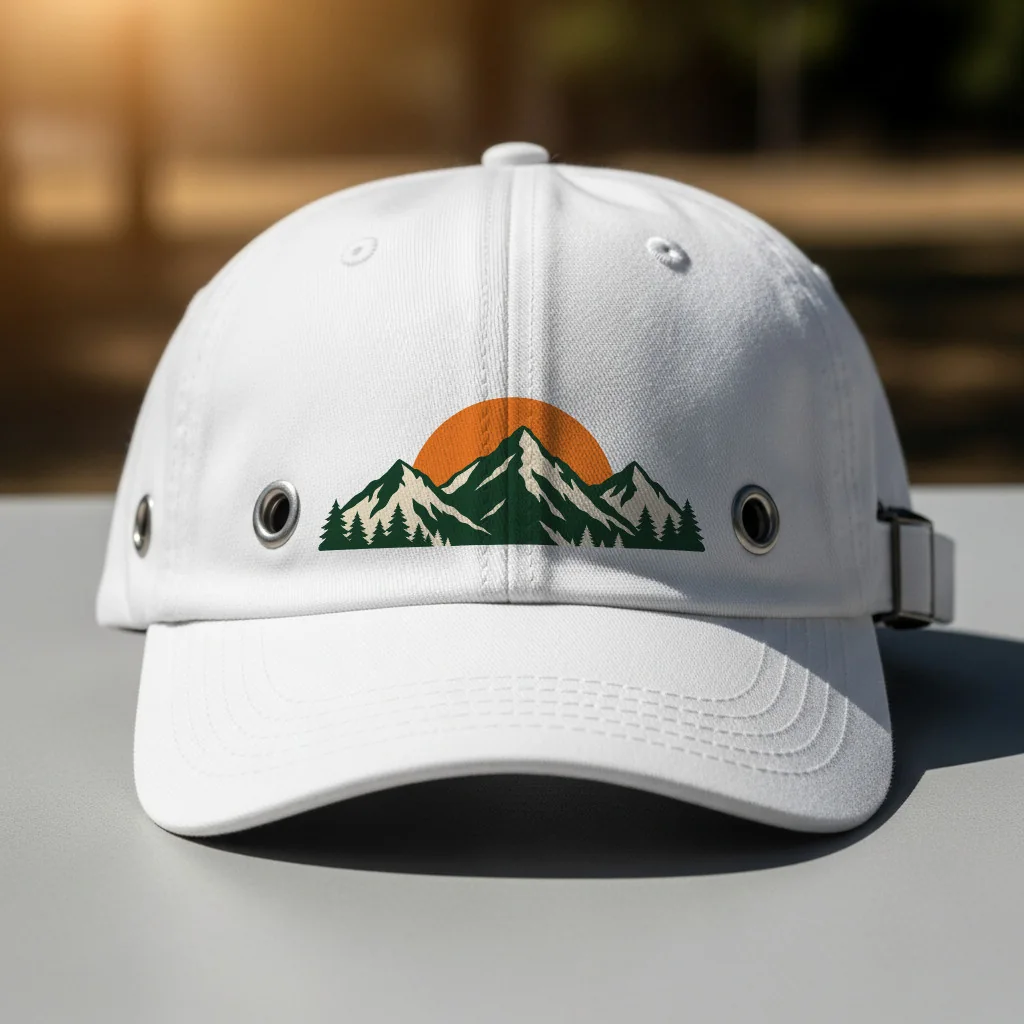 | 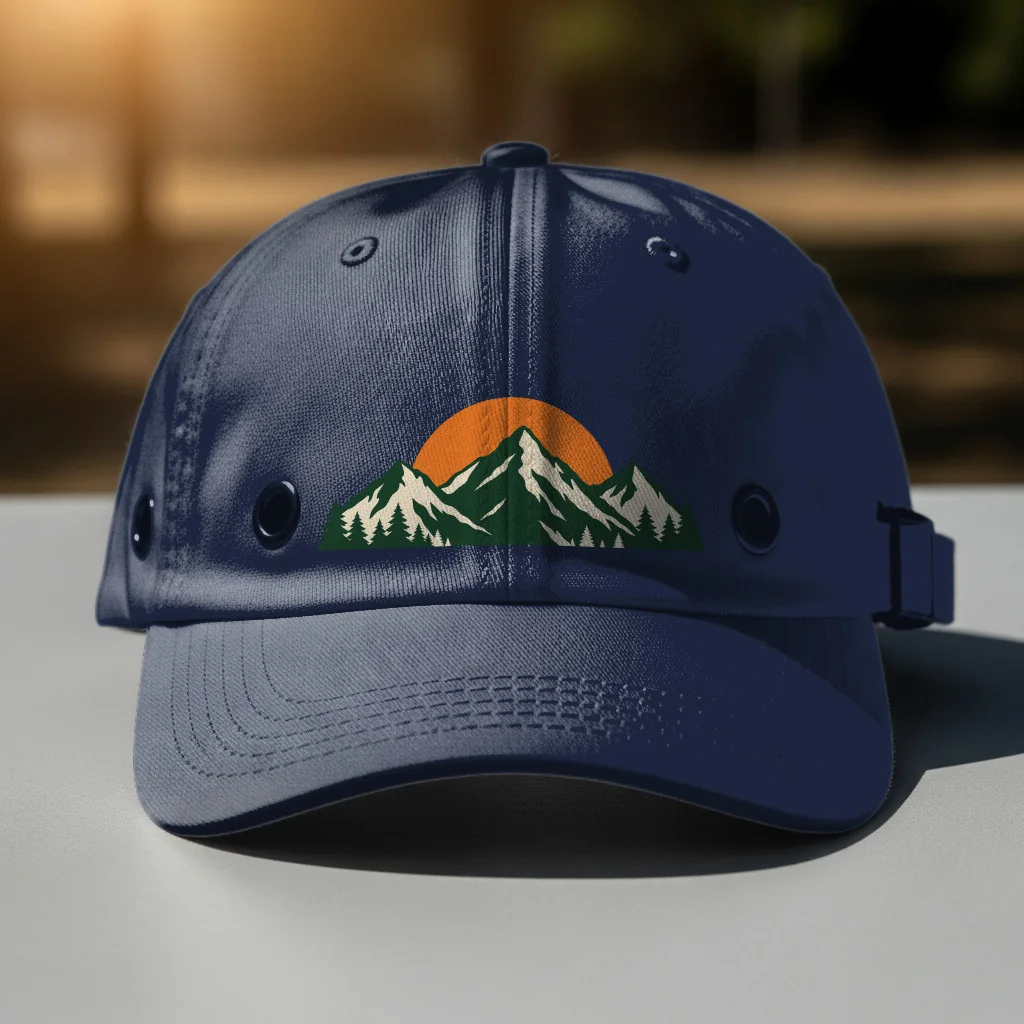 | 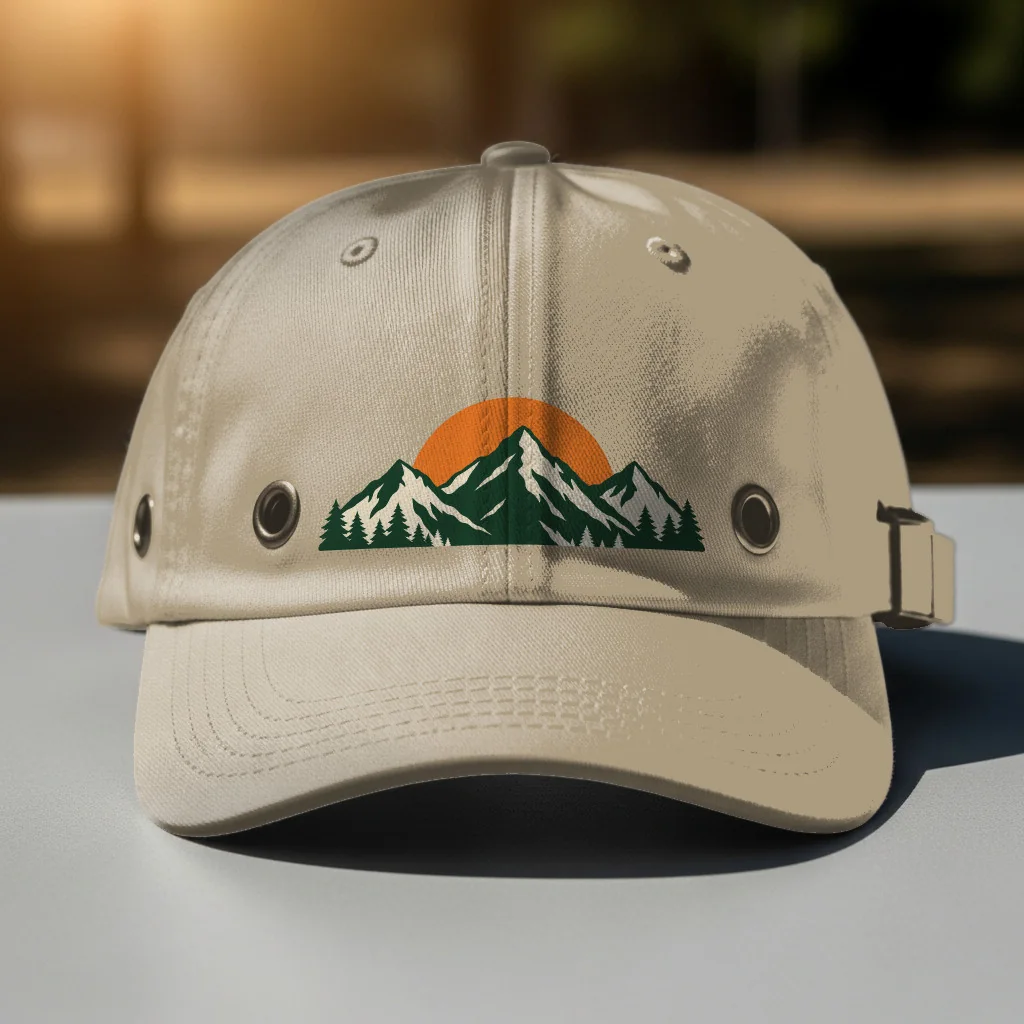 | 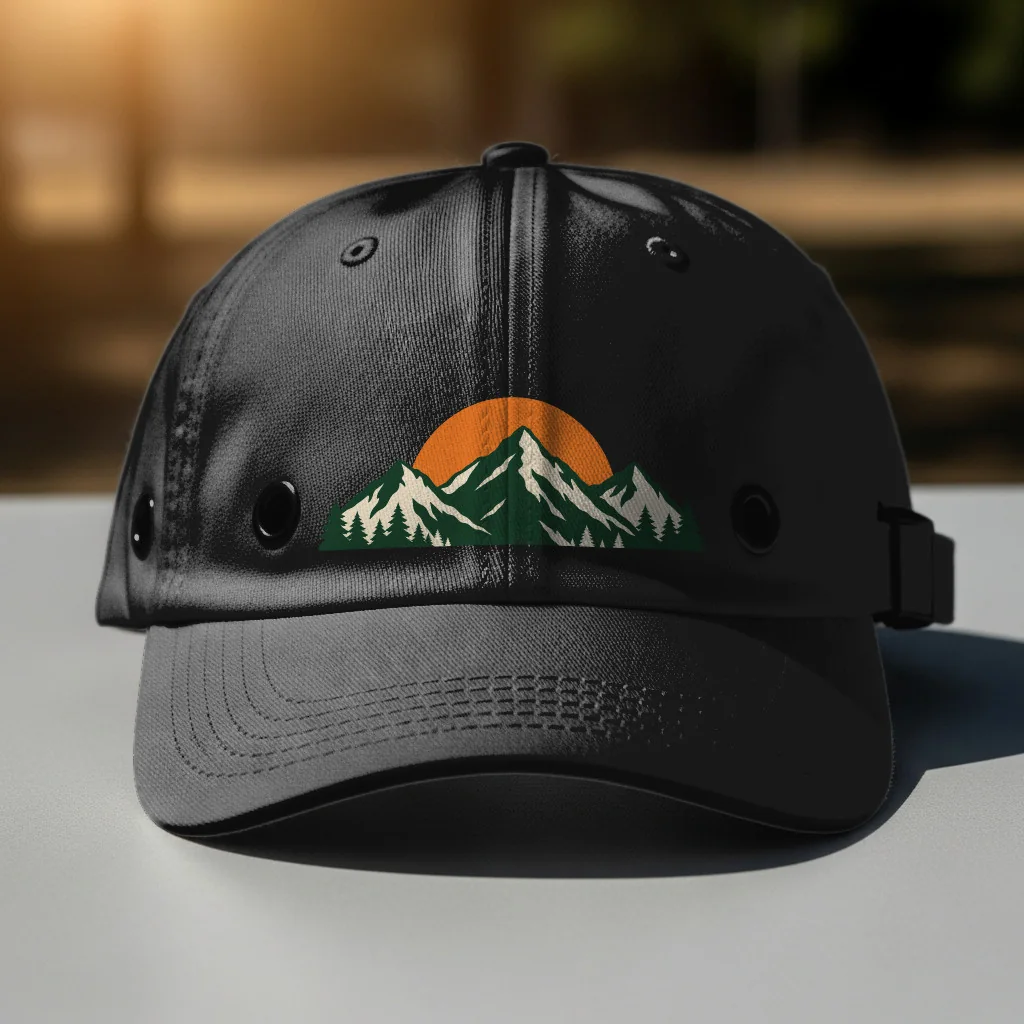 |
| Wave and sun | 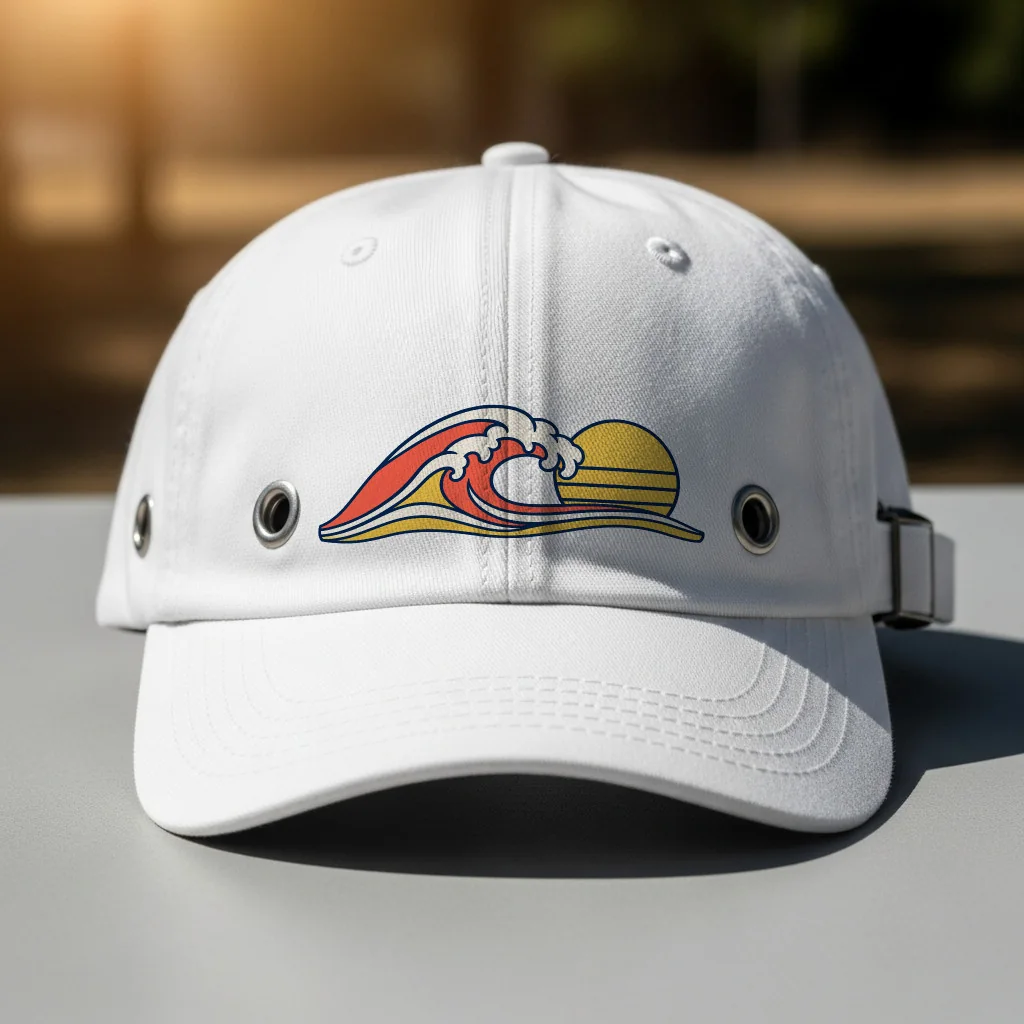 | 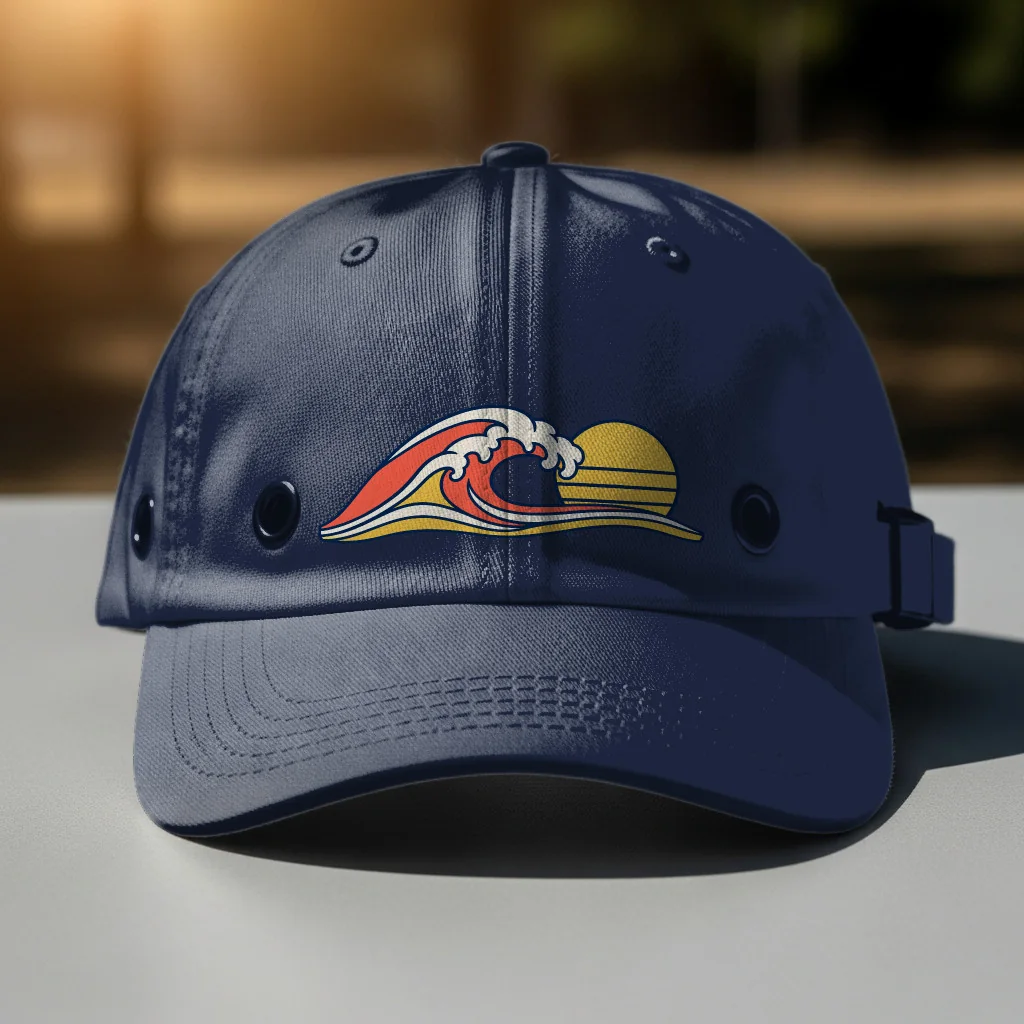 | 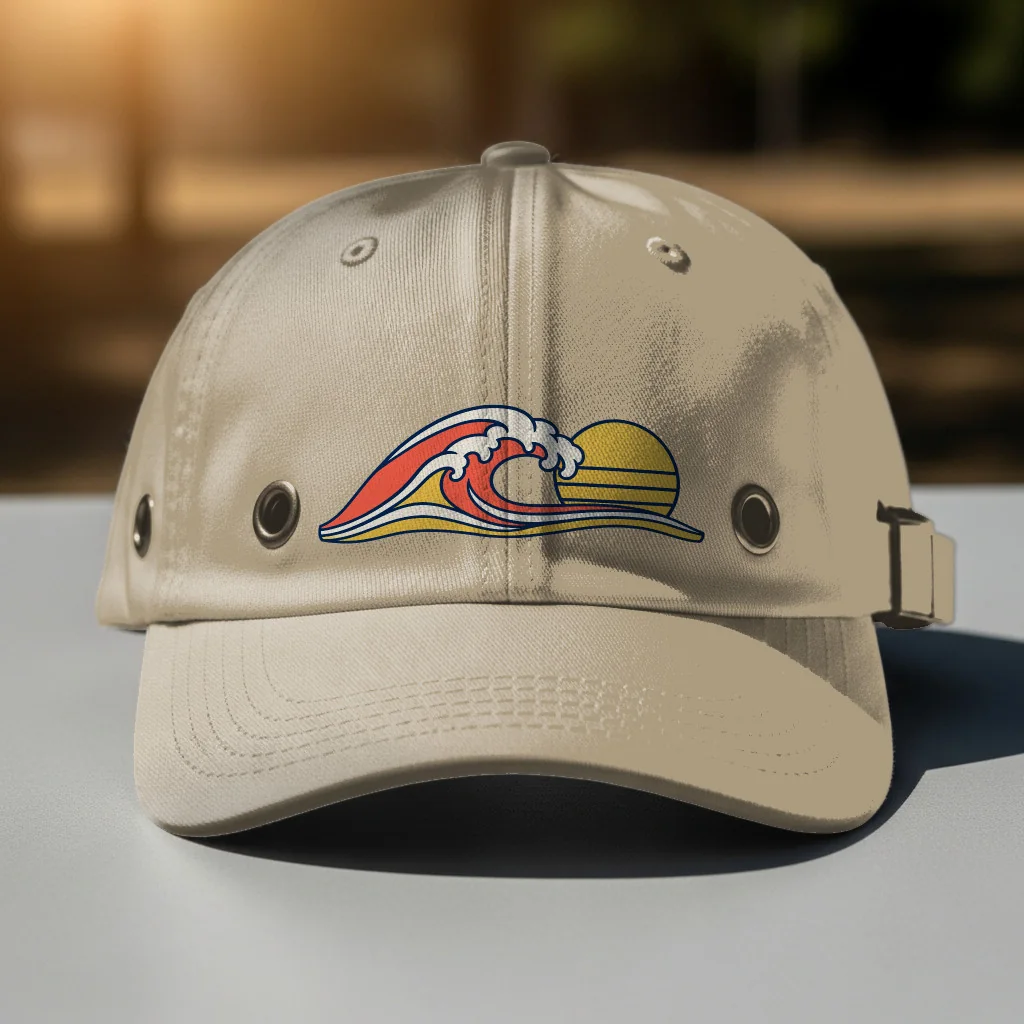 | 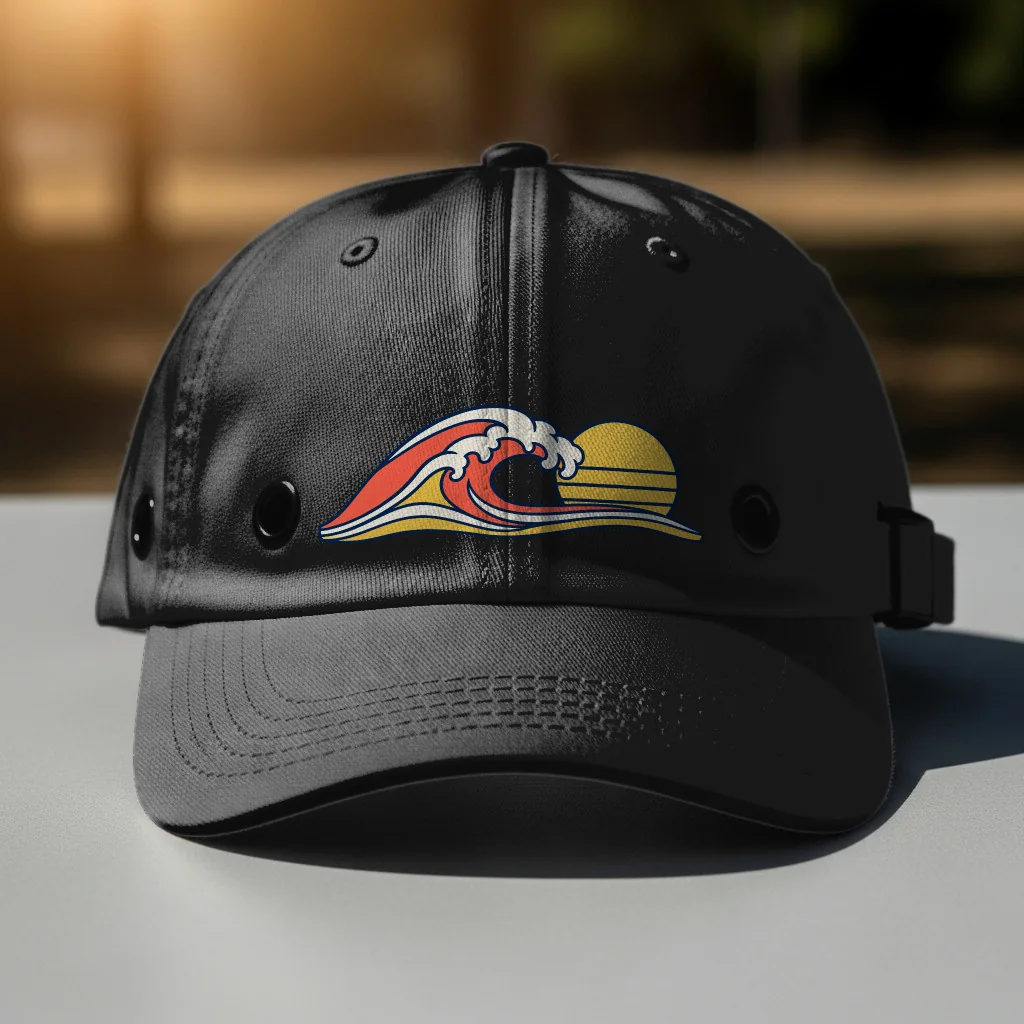 |
All eight are SudoMock renders on the white dad hat template; the two designs were generated for this test as transparent PNGs of 2,000 by 800 pixels. The hex values are ours: take your blank's values from your supplier's color chart, so each image shows the cap a buyer receives. On the black cap the mountain's dark green trees lose contrast, as dark ink does on any dark blank, so keep a lighter version of a design for black caps and send it in those requests.
Keep the default blend for a printed front
The default blend, multiply, reads like ink printed into the cap's twill, and it adapts to a dark cap. Set blend_mode to normal in the front entry's adjustments when a logo's brand colors have to match the file exactly.
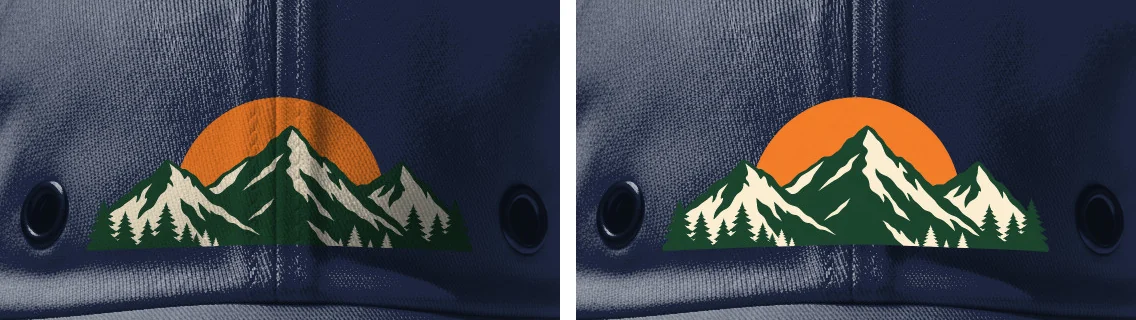 Left: blend_mode left out (multiply). Right: blend_mode normal. On the navy cap both keep the cream and orange bright; the default lets the twill and the seam show through, normal prints the file's colors exactly. SudoMock renders, 12 November 2026.
The fit and blend modes guide says what each of the seven modes is for.
Name your cap colors once
When your catalog already names its cap colors, save the names on the mockup and render by name. PATCH /api/v1/photo-mockups/{mockup_id} takes a colors list of label and hex pairs, and the list replaces the saved one, so send every color you keep.
curl -X PATCH https://api.sudomock.com/api/v1/photo-mockups/MOCKUP_ID \-H "x-api-key: $SUDOMOCK_API_KEY" \-H "Content-Type: application/json" \-d '{"colors": [{ "label": "navy", "hex": "#1F2A44" },{ "label": "khaki", "hex": "#C3B091" },{ "label": "black", "hex": "#1C1C1C" }]}'
const response = await fetch('https://api.sudomock.com/api/v1/photo-mockups/MOCKUP_ID', {method: 'PATCH',headers: {'x-api-key': process.env.SUDOMOCK_API_KEY,'Content-Type': 'application/json',},body: JSON.stringify({"colors": [{"label": "navy","hex": "#1F2A44"},{"label": "khaki","hex": "#C3B091"},{"label": "black","hex": "#1C1C1C"}]}),});const data = await response.json();console.log(data);
import osimport requestsresponse = requests.patch("https://api.sudomock.com/api/v1/photo-mockups/MOCKUP_ID",headers={"x-api-key": os.environ["SUDOMOCK_API_KEY"],"Content-Type": "application/json",},json={"colors": [{"label": "navy","hex": "#1F2A44",},{"label": "khaki","hex": "#C3B091",},{"label": "black","hex": "#1C1C1C",},],},)print(response.json())
package mainimport ("bytes""fmt""io""net/http""os")func main() {payload := []byte(`{"colors": [{"label": "navy","hex": "#1F2A44"},{"label": "khaki","hex": "#C3B091"},{"label": "black","hex": "#1C1C1C"}]}`)req, err := http.NewRequest("PATCH", "https://api.sudomock.com/api/v1/photo-mockups/MOCKUP_ID", bytes.NewBuffer(payload))if err != nil {panic(err)}req.Header.Set("x-api-key", os.Getenv("SUDOMOCK_API_KEY"))req.Header.Set("Content-Type", "application/json")resp, err := http.DefaultClient.Do(req)if err != nil {panic(err)}defer resp.Body.Close()body, _ := io.ReadAll(resp.Body)fmt.Println(string(body))}
<?php$payload = <<<'JSON'{"colors": [{"label": "navy","hex": "#1F2A44"},{"label": "khaki","hex": "#C3B091"},{"label": "black","hex": "#1C1C1C"}]}JSON;$ch = curl_init('https://api.sudomock.com/api/v1/photo-mockups/MOCKUP_ID');curl_setopt_array($ch, [CURLOPT_CUSTOMREQUEST => 'PATCH',CURLOPT_RETURNTRANSFER => true,CURLOPT_HTTPHEADER => ['x-api-key: ' . getenv('SUDOMOCK_API_KEY'),'Content-Type: application/json',],CURLOPT_POSTFIELDS => $payload,]);$response = curl_exec($ch);curl_close($ch);echo $response;
Each render then sends "color": "navy" on the surface entry in place of the hex, and names match exactly. The fields are in update a photo mockup.
Render the whole catalog with a script
The script below reads a CSV of designs and renders each design on each cap color in parallel, saving every image under its SKU and color. A design with a png_url_dark sends that file on the black cap.
sku,png_url,png_url_darkCAP-MTN-01,https://cdn.example.com/caps/mountain-sun.png,https://cdn.example.com/caps/mountain-sun-light.pngCAP-WAVE-02,https://cdn.example.com/caps/wave-sun.png,
Fill in the three ids from the create response, set SUDOMOCK_API_KEY, install requests and run python caps.py designs.csv. A mockup opened from the template page is listed by GET /api/v1/photo-mockups, and retrieve a single photo mockup returns its print area and surface ids.
import csv, os, sys, timefrom concurrent.futures import ThreadPoolExecutorimport requestsMOCKUP_ID = "MOCKUP_ID"FRONT_AREA_ID = "FRONT_AREA_ID"CAP_SURFACE_ID = "CAP_SURFACE_ID"COLORS = {"white": None, "navy": "#1F2A44", "khaki": "#C3B091", "black": "#1C1C1C"}DARK = {"black"}URL = f"https://api.sudomock.com/api/v1/photo-mockups/{MOCKUP_ID}/render"HEADERS = {"x-api-key": os.environ["SUDOMOCK_API_KEY"]}def render(row, color):artwork = row["png_url"]if color in DARK and row.get("png_url_dark"):artwork = row["png_url_dark"]targets = [{"uuid": FRONT_AREA_ID, "artwork_url": artwork, "placement": {"fit": "fit"}}]if COLORS[color]:targets.insert(0, {"surface_uuid": CAP_SURFACE_ID, "color": COLORS[color]})body = {"print_areas": targets, "export_options": {"image_format": "jpg", "image_size": 1024}}res = requests.post(URL, json=body, headers=HEADERS, timeout=120)if res.status_code == 429:time.sleep(int(res.headers.get("Retry-After", 5)))res = requests.post(URL, json=body, headers=HEADERS, timeout=120)if not res.ok:return f"{row['sku']} {color} failed {res.status_code} {res.text}"image = requests.get(res.json()["data"]["print_files"][0]["export_path"], timeout=60)with open(f"{row['sku']}-{color}.jpg", "wb") as f:f.write(image.content)return f"{row['sku']} {color} saved"with open(sys.argv[1], newline="") as f:rows = list(csv.DictReader(f))jobs = [(row, color) for row in rows for color in COLORS]with ThreadPoolExecutor(max_workers=8) as pool:for line in pool.map(lambda job: render(*job), jobs):print(line)
Each pair lands as one JPG, such as CAP-MTN-01-navy.jpg. For a catalog of several hundred pairs or more, add "is_async": true to each request and collect every image from its job.
Without code, a Make scenario that renders each new Google Sheets row drives the same grid with one row per design and cap color, and the n8n node runs it from a workflow.
A cap PSD of your own
A cap template you already own as a PSD renders the same designs through its smart object. Upload it once with POST /api/v1/psd/upload (upload a PSD), then send each design to POST /api/v1/renders with the smart object's uuid.
A second smart object that covers the cap takes a color in each request, the way t-shirt color variants are built from one PSD. In the dashboard, PSD uploads are capped at 300 MB. API uploads support files up to Adobe's official PSD file size limit.
Next step
Open the front view of the white cotton dad hat template as a photo mockup, draw the front area at your provider's placement for your cap, and render two of your designs on two cap colors; then run the script over the catalog. The render reference lists every target, placement and blend field. Hats with lettering only are covered on text mockups for hats, and sticker mockups runs the same grid with one design on several product photos.
Frequently asked questions
What size should the print area be on a hat mockup?
Give it the shape of the front print file your provider takes for that cap, at the size the print has on the cap in the photo. A classic dad cap prints one wide strip across both front panels, while some caps print the front as two near-square panels beside the center seam. Draw one area per printed panel so each design scales the way it prints.
Can I change the hat color in a mockup?
Yes. Save a photo of a white or light cap as a photo mockup, and each render paints the cap with the hex color you send while the twill, seams and shadows stay. Save your color names on the mockup once and a render can ask for navy or khaki by name.
Do I need Photoshop to make hat mockups?
No. A cap photo saved as a photo mockup takes your designs through the dashboard or the API, with no PSD and no desktop software. A cap PSD you already own renders through its smart object in the same way.
How do I make hat mockups for every design and color?
Send one render per design and cap color against the same saved mockup, in parallel, and save each image under its SKU and color. Twenty designs in six colors are 120 renders, and the average SudoMock render finishes in under a second. For very large batches, queue the renders and collect each result from its job.
Which blend mode should a hat mockup use?
Keep the default, multiply, for a printed front: the design takes on the twill and adapts to a dark cap. Use normal when a logo has to show its brand colors exactly as they are in the file.
Sources
- Create a mockup from a product photo (opens in new tab), SudoMock docs
- Print areas and surfaces (opens in new tab), SudoMock docs
- Render a photo mockup (opens in new tab), SudoMock docs
- Render artwork onto a photo mockup (opens in new tab), SudoMock docs
- Fit and blend modes (opens in new tab), SudoMock docs
- Update an existing photo mockup (opens in new tab), SudoMock docs
- Render mockups with n8n and SudoMock (opens in new tab), SudoMock docs
- Render mockups with Make and SudoMock (opens in new tab), SudoMock docs
- Upload a PSD (opens in new tab), SudoMock docs
Beck
CTO
Related articles
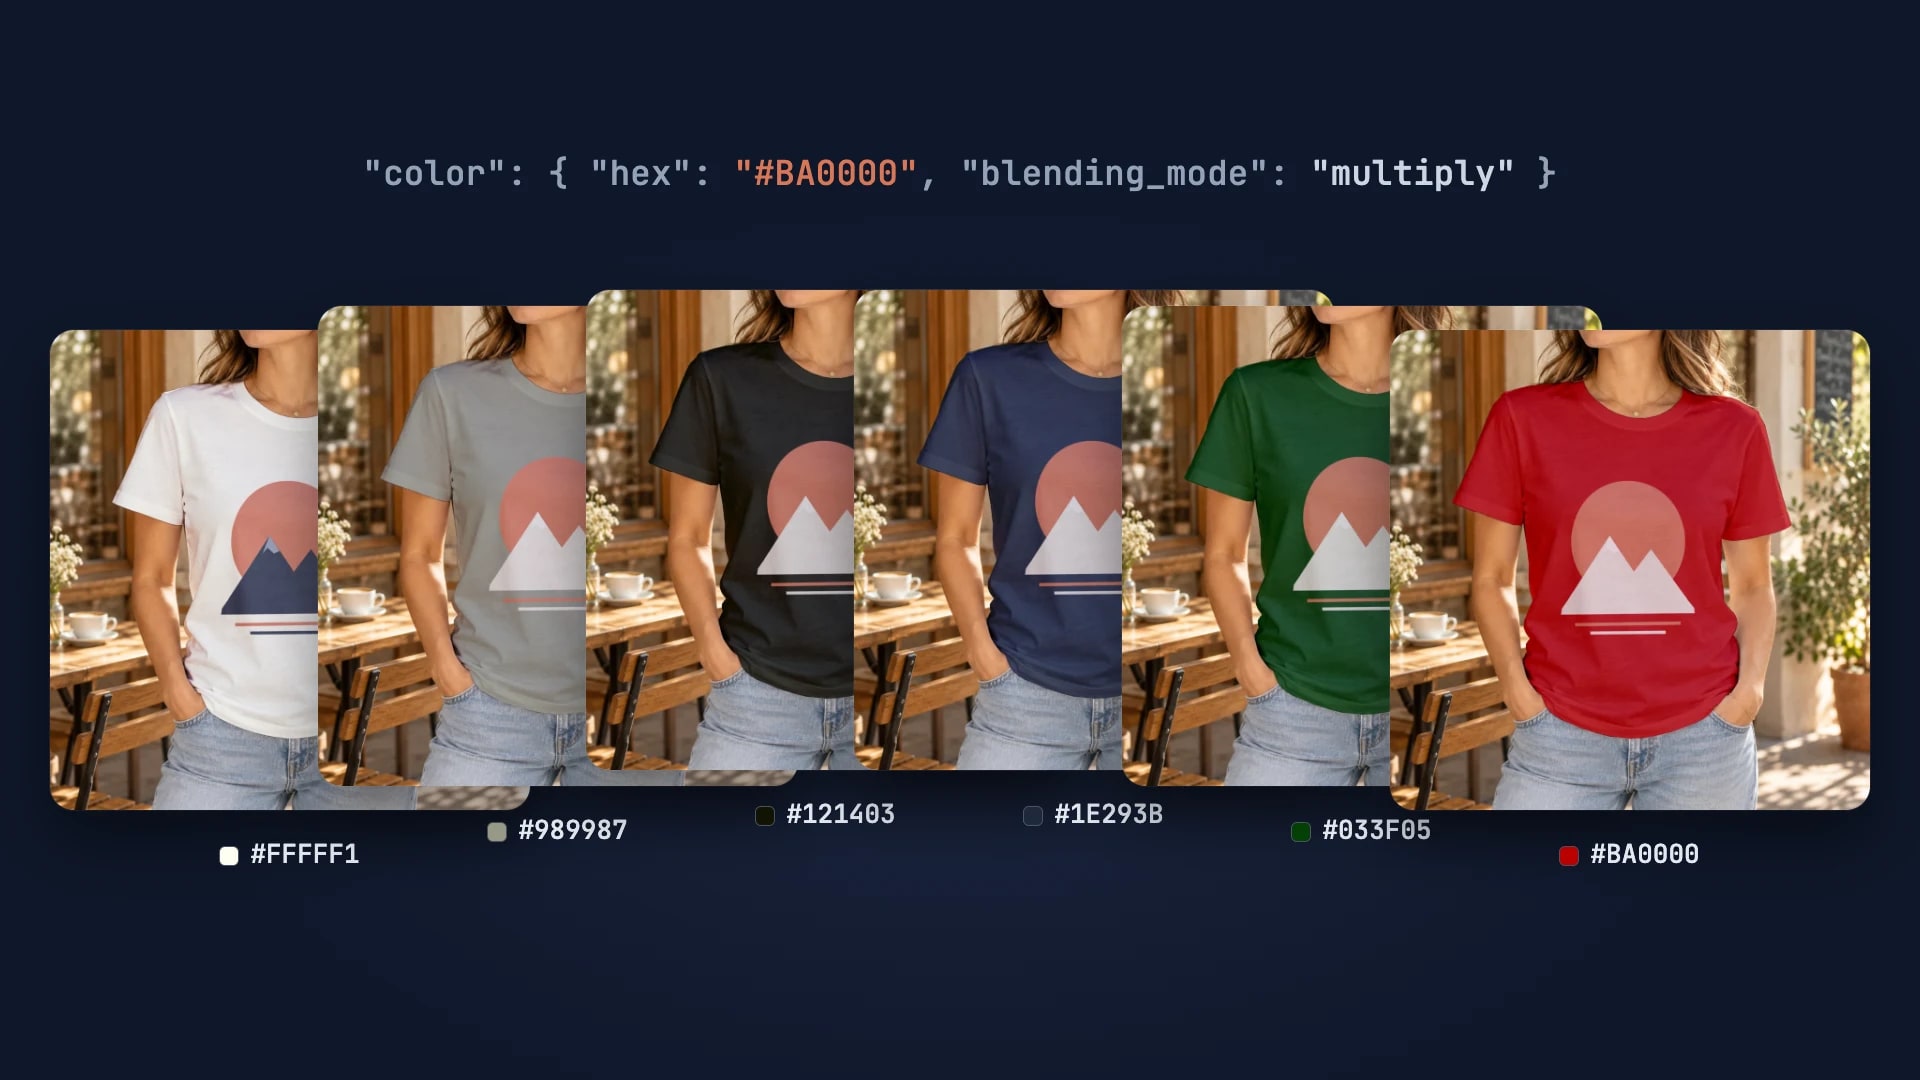
Every T-Shirt Color Variant Mockup from One PSD by API
One PSD with a color smart object renders every t-shirt colorway: one request per color, shown with six real renders.
4 min read
Front and Back T-Shirt Mockups: Both Prints in One Render
Put the chest badge and the back print of every design pair on one mockup, in every shirt color, with one render request each.
6 min read
Hoodie Mockups: A Wide Front File Above the Pocket, Every Color
Draw the front area above the pocket and the back area below the hood, then render each design, side and color by API.
9 min read
Explore by use case
See SudoMock in action for your specific product category
Your own PSD, rendered via API
Render your own PSD through the API. Start with 500 one-time credits, no card.