How to Make Your Own Mockup from Any Product Photo
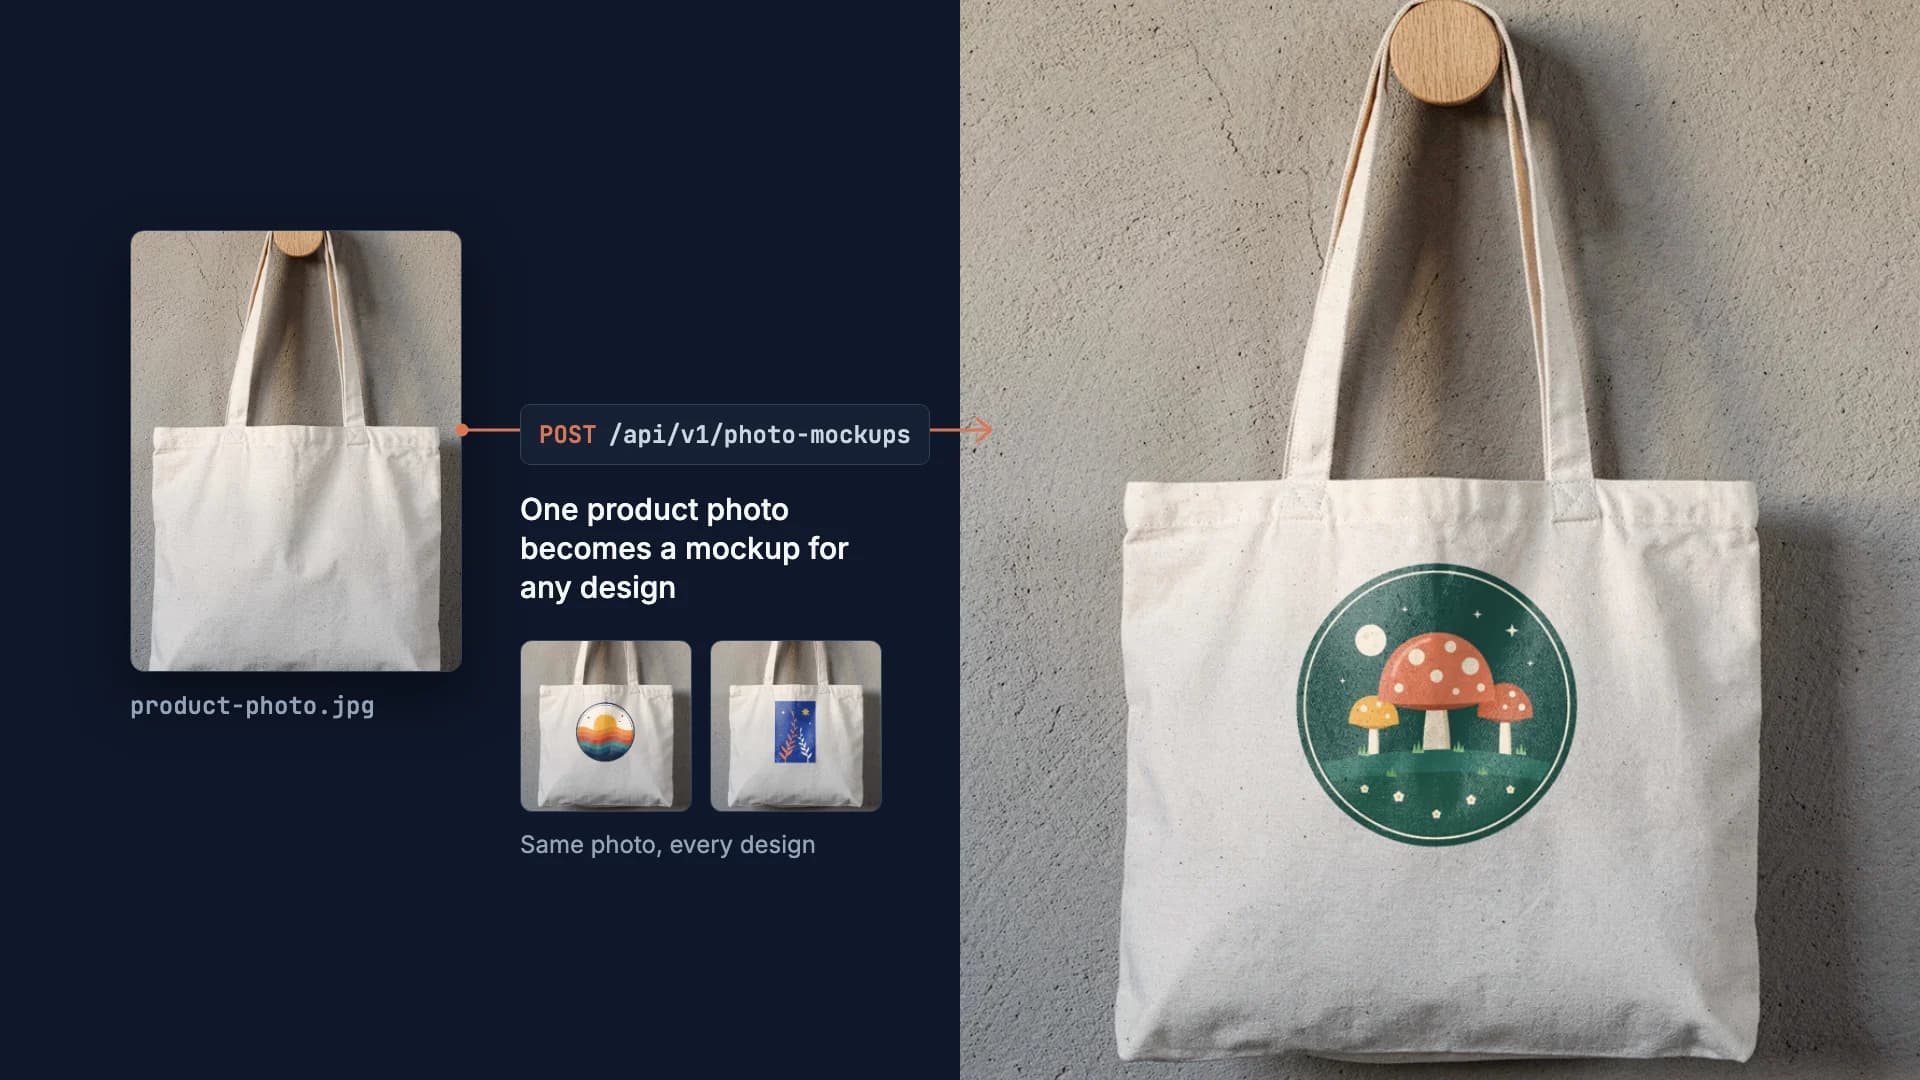
Photograph the product straight on and send the photo once to SudoMock's Photo Mockups endpoint. It returns a reusable mockup with a print area on the product, and every design after that is one render call, from the dashboard or the API, at the size your marketplace asks for.
Published 7 min readBeck
Key takeaways
- The create call returns a print area and a whole-product surface: two kinds of render target.
- Etsy lists no WebP: send jpg and size the short side to 2000 px (image_size 3556 for 16:9).
- For a catalogue, send one render per design in parallel, with is_async for large batches.
What makes a product photo work
A clear photo of the product with its printable face in view can become a mockup. Shoot that face straight on, in even light, with nothing printed on it, at high resolution, and save it as a JPEG, PNG or WebP file. The design takes on the texture and the light of the surface underneath, so plain canvas, cotton, paper or ceramic reads best.
A mockup made from your own sample shows the exact blank you ship, so your listings stop looking like every shop that uses the supplier's photos.
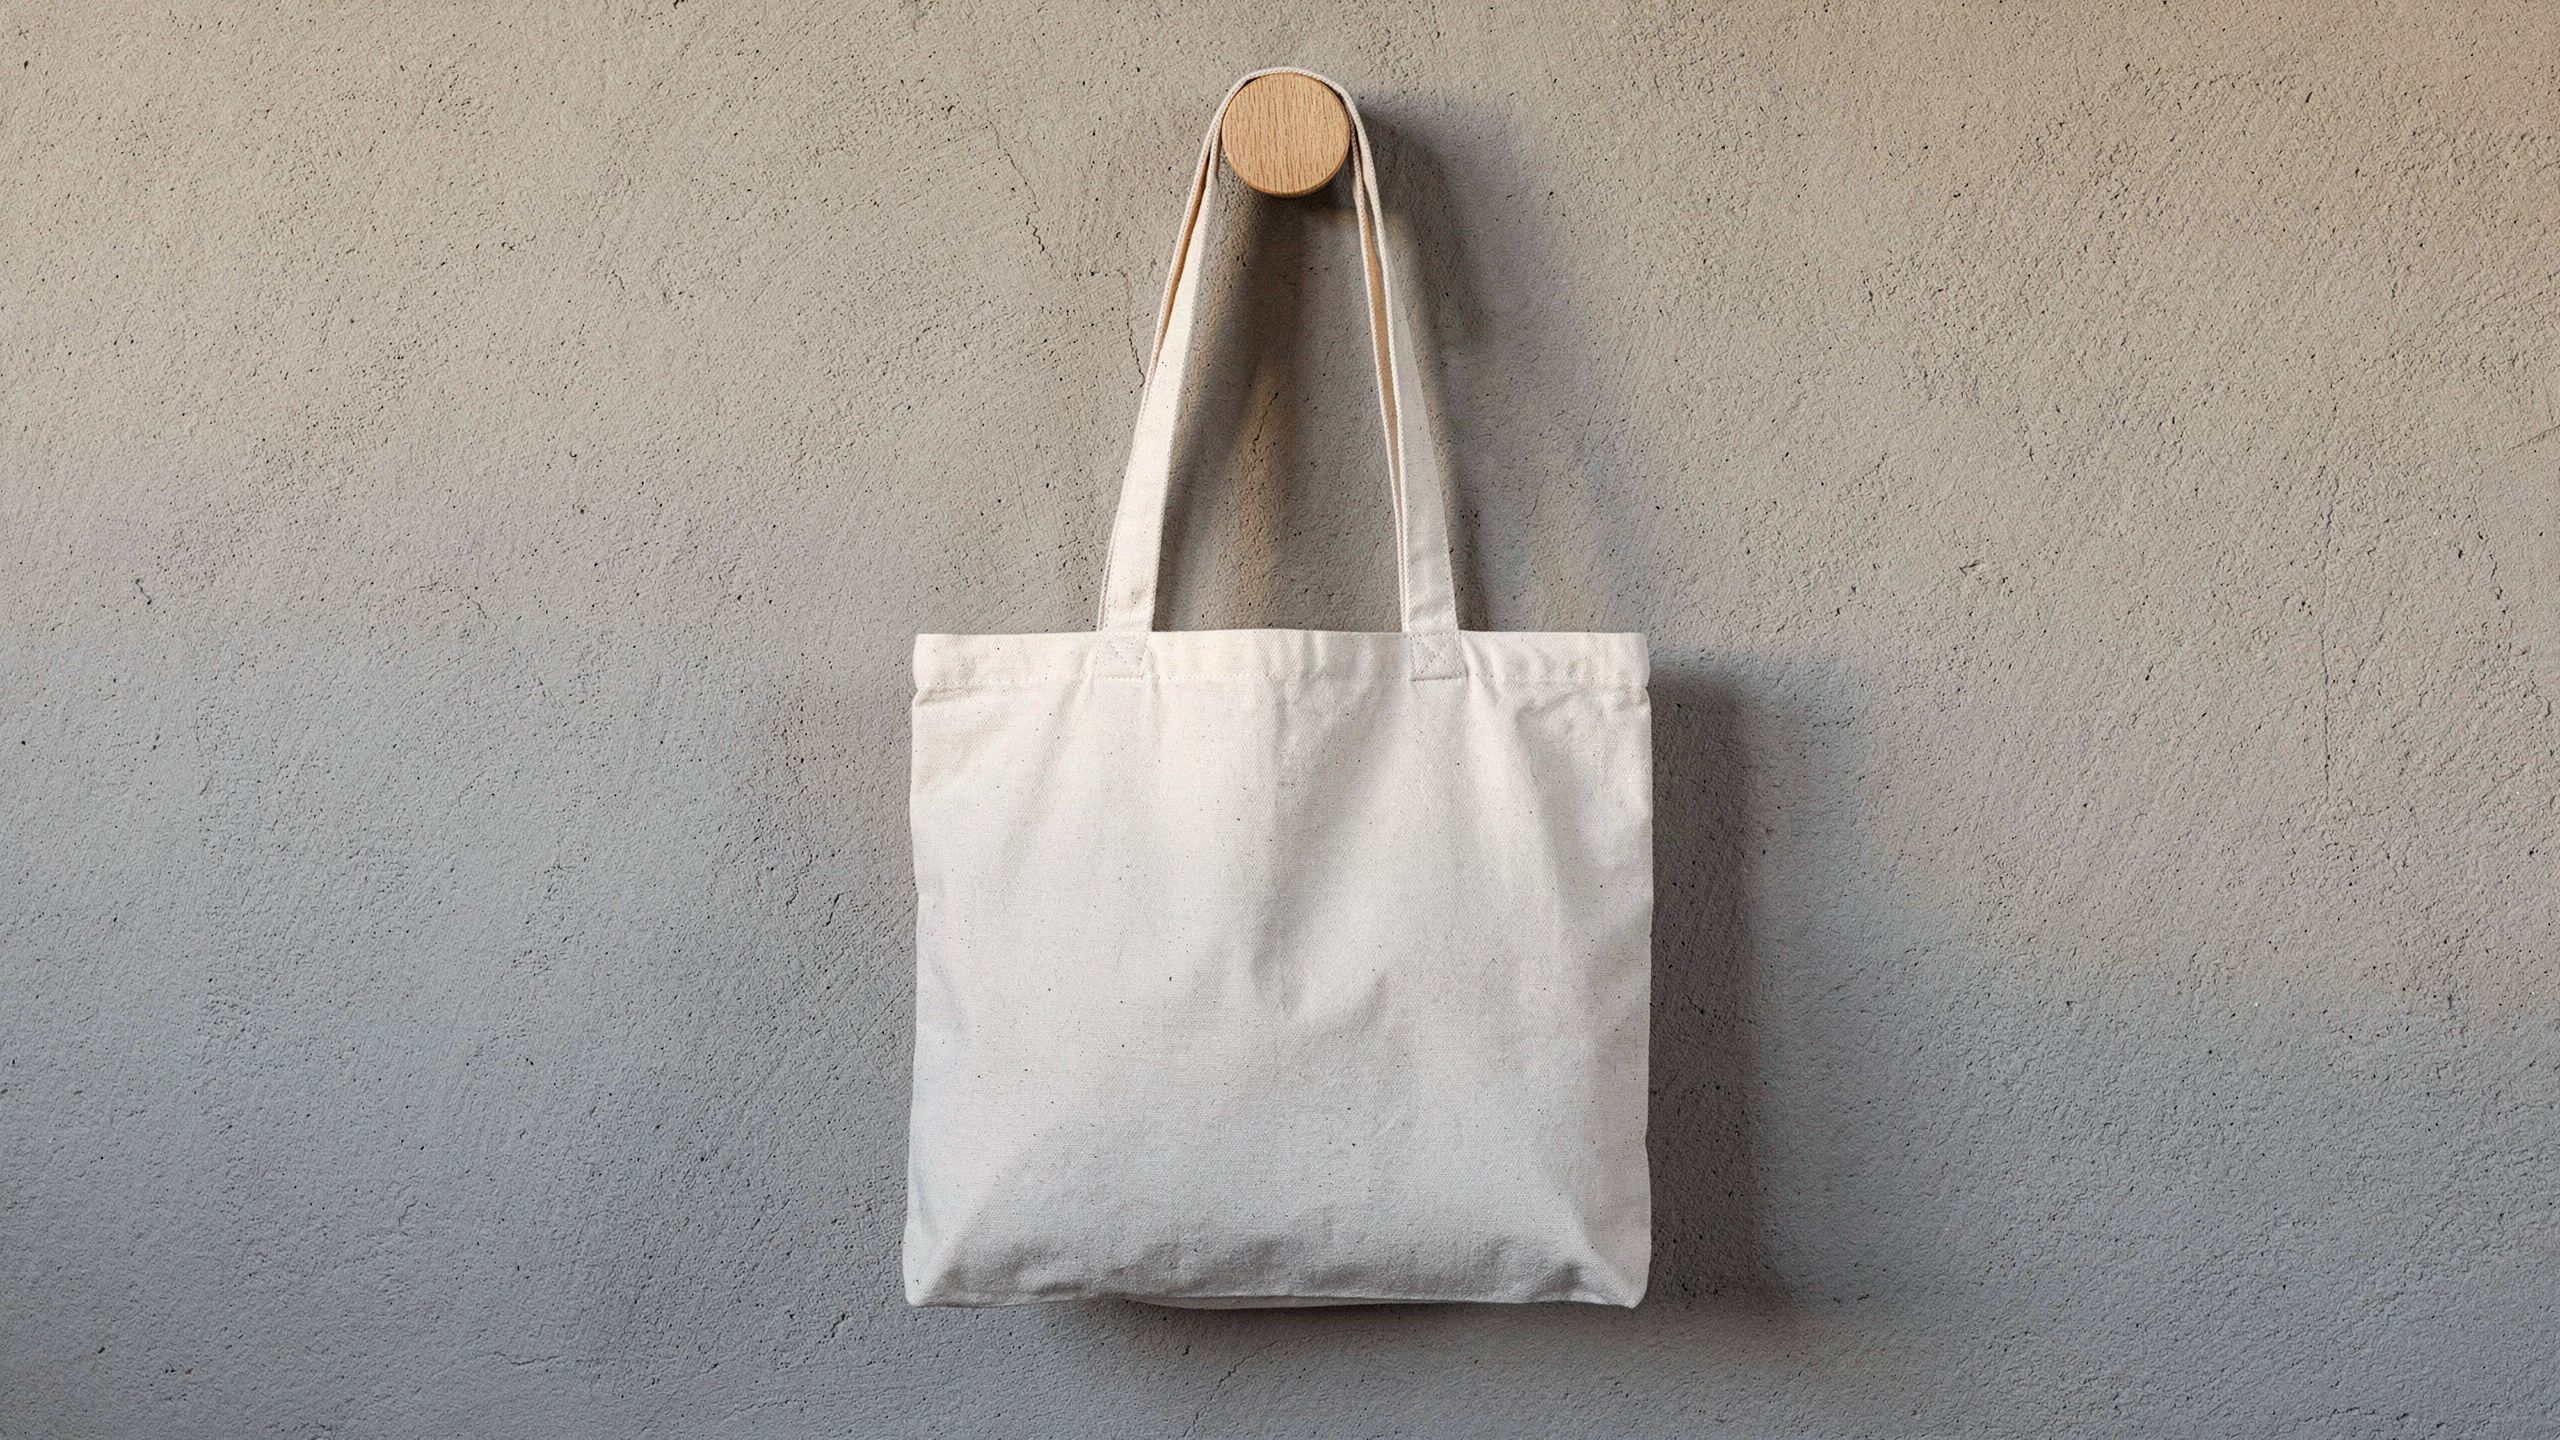 The input for every render below: a generated product photo of a blank canvas tote, 2560 x 1440 px. A photo of your own sample goes through the same call.
Shoot each view you want to sell as its own photo: the front, the back, the bag on a shoulder. Each photo becomes its own reusable mockup, and every design you make later can be rendered onto all of them.
Turn the photo into a mockup
Send the photo's URL to POST /api/v1/photo-mockups. The call answers with a ready mockup: its mockup_id, a print area found on the product and the product's whole surface. Keep the mockup_id and the print_area_id, because every render after this needs only those two ids and a design.
curl -X POST https://api.sudomock.com/api/v1/photo-mockups \-H "x-api-key: $SUDOMOCK_API_KEY" \-H "Content-Type: application/json" \-d '{"source_url": "https://example.com/photos/canvas-tote-front.jpg","name": "Canvas tote, front"}'
const response = await fetch('https://api.sudomock.com/api/v1/photo-mockups', {method: 'POST',headers: {'x-api-key': process.env.SUDOMOCK_API_KEY,'Content-Type': 'application/json',},body: JSON.stringify({"source_url": "https://example.com/photos/canvas-tote-front.jpg","name": "Canvas tote, front"}),});const data = await response.json();console.log(data);
import osimport requestsresponse = requests.post("https://api.sudomock.com/api/v1/photo-mockups",headers={"x-api-key": os.environ["SUDOMOCK_API_KEY"],"Content-Type": "application/json",},json={"source_url": "https://example.com/photos/canvas-tote-front.jpg","name": "Canvas tote, front",},)print(response.json())
package mainimport ("bytes""fmt""io""net/http""os")func main() {payload := []byte(`{"source_url": "https://example.com/photos/canvas-tote-front.jpg","name": "Canvas tote, front"}`)req, err := http.NewRequest("POST", "https://api.sudomock.com/api/v1/photo-mockups", bytes.NewBuffer(payload))if err != nil {panic(err)}req.Header.Set("x-api-key", os.Getenv("SUDOMOCK_API_KEY"))req.Header.Set("Content-Type", "application/json")resp, err := http.DefaultClient.Do(req)if err != nil {panic(err)}defer resp.Body.Close()body, _ := io.ReadAll(resp.Body)fmt.Println(string(body))}
<?php$payload = <<<'JSON'{"source_url": "https://example.com/photos/canvas-tote-front.jpg","name": "Canvas tote, front"}JSON;$ch = curl_init('https://api.sudomock.com/api/v1/photo-mockups');curl_setopt_array($ch, [CURLOPT_CUSTOMREQUEST => 'POST',CURLOPT_RETURNTRANSFER => true,CURLOPT_HTTPHEADER => ['x-api-key: ' . getenv('SUDOMOCK_API_KEY'),'Content-Type: application/json',],CURLOPT_POSTFIELDS => $payload,]);$response = curl_exec($ch);curl_close($ch);echo $response;
This is the response we got for the tote photo above on 2 October 2026, with the timestamps, the thumbnail and the surface outline left out:
{"data": {"mockup_id": "4beed8e0-d584-46b6-8726-35b3915e5775","name": "Canvas tote, front","status": "ready","customizable": true,"source_width": 2560,"source_height": 1440,"quads": [{"print_area_id": "03cb114c-daa3-40c7-ba4c-ea36b4b1e8a5","points": [[990, 635], [1562, 635], [1562, 1062], [990, 1062]],"name": null,"sort_order": 0}],"surfaces": [{"surface_uuid": "60ffdb66-b3e0-4049-b23d-87248ab24cad","bbox": { "x": 902.0, "y": 67.0, "width": 750.0, "height": 1242.0 }}],"version": 1},"success": true}
The two lists are the two kinds of target a render can name, as Print areas and surfaces explains:
quadsare print areas, bounded zones on the product addressed byprint_area_id. Here SudoMock placed one on the front of the bag, a 572 x 427 px box. Points are in the photo's own pixels, ordered top left, top right, bottom right, bottom left.surfacesare whole products addressed bysurface_uuid, for a print across the entire item.
When you already know where the design belongs, send your own four-point print_areas with the create call and they are used exactly as given, which keeps a bulk import repeatable. To move an area on a mockup you already made, PUT /api/v1/photo-mockups/{mockup_id}/print-areas replaces the list. One mockup holds up to eight print areas, so a front panel and a pocket on the same photo are two areas on one mockup.
Render a design onto it
Each design is one POST to /api/v1/photo-mockups/{mockup_id}/render naming the print area and the artwork. The finished image comes back at data.print_files[0].export_path, and the mockup stays ready for the next design. The request below also sets an exact box anchored at the bottom of the area, which keeps the print clear of the tote's stitched top hem and strap tabs.
curl -X POST https://api.sudomock.com/api/v1/photo-mockups/4beed8e0-d584-46b6-8726-35b3915e5775/render \-H "x-api-key: $SUDOMOCK_API_KEY" \-H "Content-Type: application/json" \-d '{"print_areas": [{"uuid": "03cb114c-daa3-40c7-ba4c-ea36b4b1e8a5","artwork_url": "https://example.com/designs/mushroom-badge.png","placement": { "width": 340, "height": 340, "position": "bottom_center" }}],"export_options": { "image_format": "webp", "image_size": 1024 }}'
const response = await fetch('https://api.sudomock.com/api/v1/photo-mockups/4beed8e0-d584-46b6-8726-35b3915e5775/render', {method: 'POST',headers: {'x-api-key': process.env.SUDOMOCK_API_KEY,'Content-Type': 'application/json',},body: JSON.stringify({"print_areas": [{"uuid": "03cb114c-daa3-40c7-ba4c-ea36b4b1e8a5","artwork_url": "https://example.com/designs/mushroom-badge.png","placement": {"width": 340,"height": 340,"position": "bottom_center"}}],"export_options": {"image_format": "webp","image_size": 1024}}),});const data = await response.json();console.log(data);
import osimport requestsresponse = requests.post("https://api.sudomock.com/api/v1/photo-mockups/4beed8e0-d584-46b6-8726-35b3915e5775/render",headers={"x-api-key": os.environ["SUDOMOCK_API_KEY"],"Content-Type": "application/json",},json={"print_areas": [{"uuid": "03cb114c-daa3-40c7-ba4c-ea36b4b1e8a5","artwork_url": "https://example.com/designs/mushroom-badge.png","placement": {"width": 340,"height": 340,"position": "bottom_center",},},],"export_options": {"image_format": "webp","image_size": 1024,},},)print(response.json())
package mainimport ("bytes""fmt""io""net/http""os")func main() {payload := []byte(`{"print_areas": [{"uuid": "03cb114c-daa3-40c7-ba4c-ea36b4b1e8a5","artwork_url": "https://example.com/designs/mushroom-badge.png","placement": {"width": 340,"height": 340,"position": "bottom_center"}}],"export_options": {"image_format": "webp","image_size": 1024}}`)req, err := http.NewRequest("POST", "https://api.sudomock.com/api/v1/photo-mockups/4beed8e0-d584-46b6-8726-35b3915e5775/render", bytes.NewBuffer(payload))if err != nil {panic(err)}req.Header.Set("x-api-key", os.Getenv("SUDOMOCK_API_KEY"))req.Header.Set("Content-Type", "application/json")resp, err := http.DefaultClient.Do(req)if err != nil {panic(err)}defer resp.Body.Close()body, _ := io.ReadAll(resp.Body)fmt.Println(string(body))}
<?php$payload = <<<'JSON'{"print_areas": [{"uuid": "03cb114c-daa3-40c7-ba4c-ea36b4b1e8a5","artwork_url": "https://example.com/designs/mushroom-badge.png","placement": {"width": 340,"height": 340,"position": "bottom_center"}}],"export_options": {"image_format": "webp","image_size": 1024}}JSON;$ch = curl_init('https://api.sudomock.com/api/v1/photo-mockups/4beed8e0-d584-46b6-8726-35b3915e5775/render');curl_setopt_array($ch, [CURLOPT_CUSTOMREQUEST => 'POST',CURLOPT_RETURNTRANSFER => true,CURLOPT_HTTPHEADER => ['x-api-key: ' . getenv('SUDOMOCK_API_KEY'),'Content-Type: application/json',],CURLOPT_POSTFIELDS => $payload,]);$response = curl_exec($ch);curl_close($ch);echo $response;
{"data": {"print_files": [{"export_path": "https://cdn.sudomock.com/mockup-assets/renders/2d/4beed8e0-d584-46b6-8726-35b3915e5775/0274de0e-7764-41b4-9d76-8d8aeba87cd5.webp","export_format": "webp"}],"render_uuid": "0274de0e-7764-41b4-9d76-8d8aeba87cd5"},"success": true}
Swap artwork_url, set the box to the new design's proportions, and send the request again. These are three more designs on the same mockup, rendered on 2 October 2026:
| Round badge | Tall botanical print | Arch print |
|---|---|---|
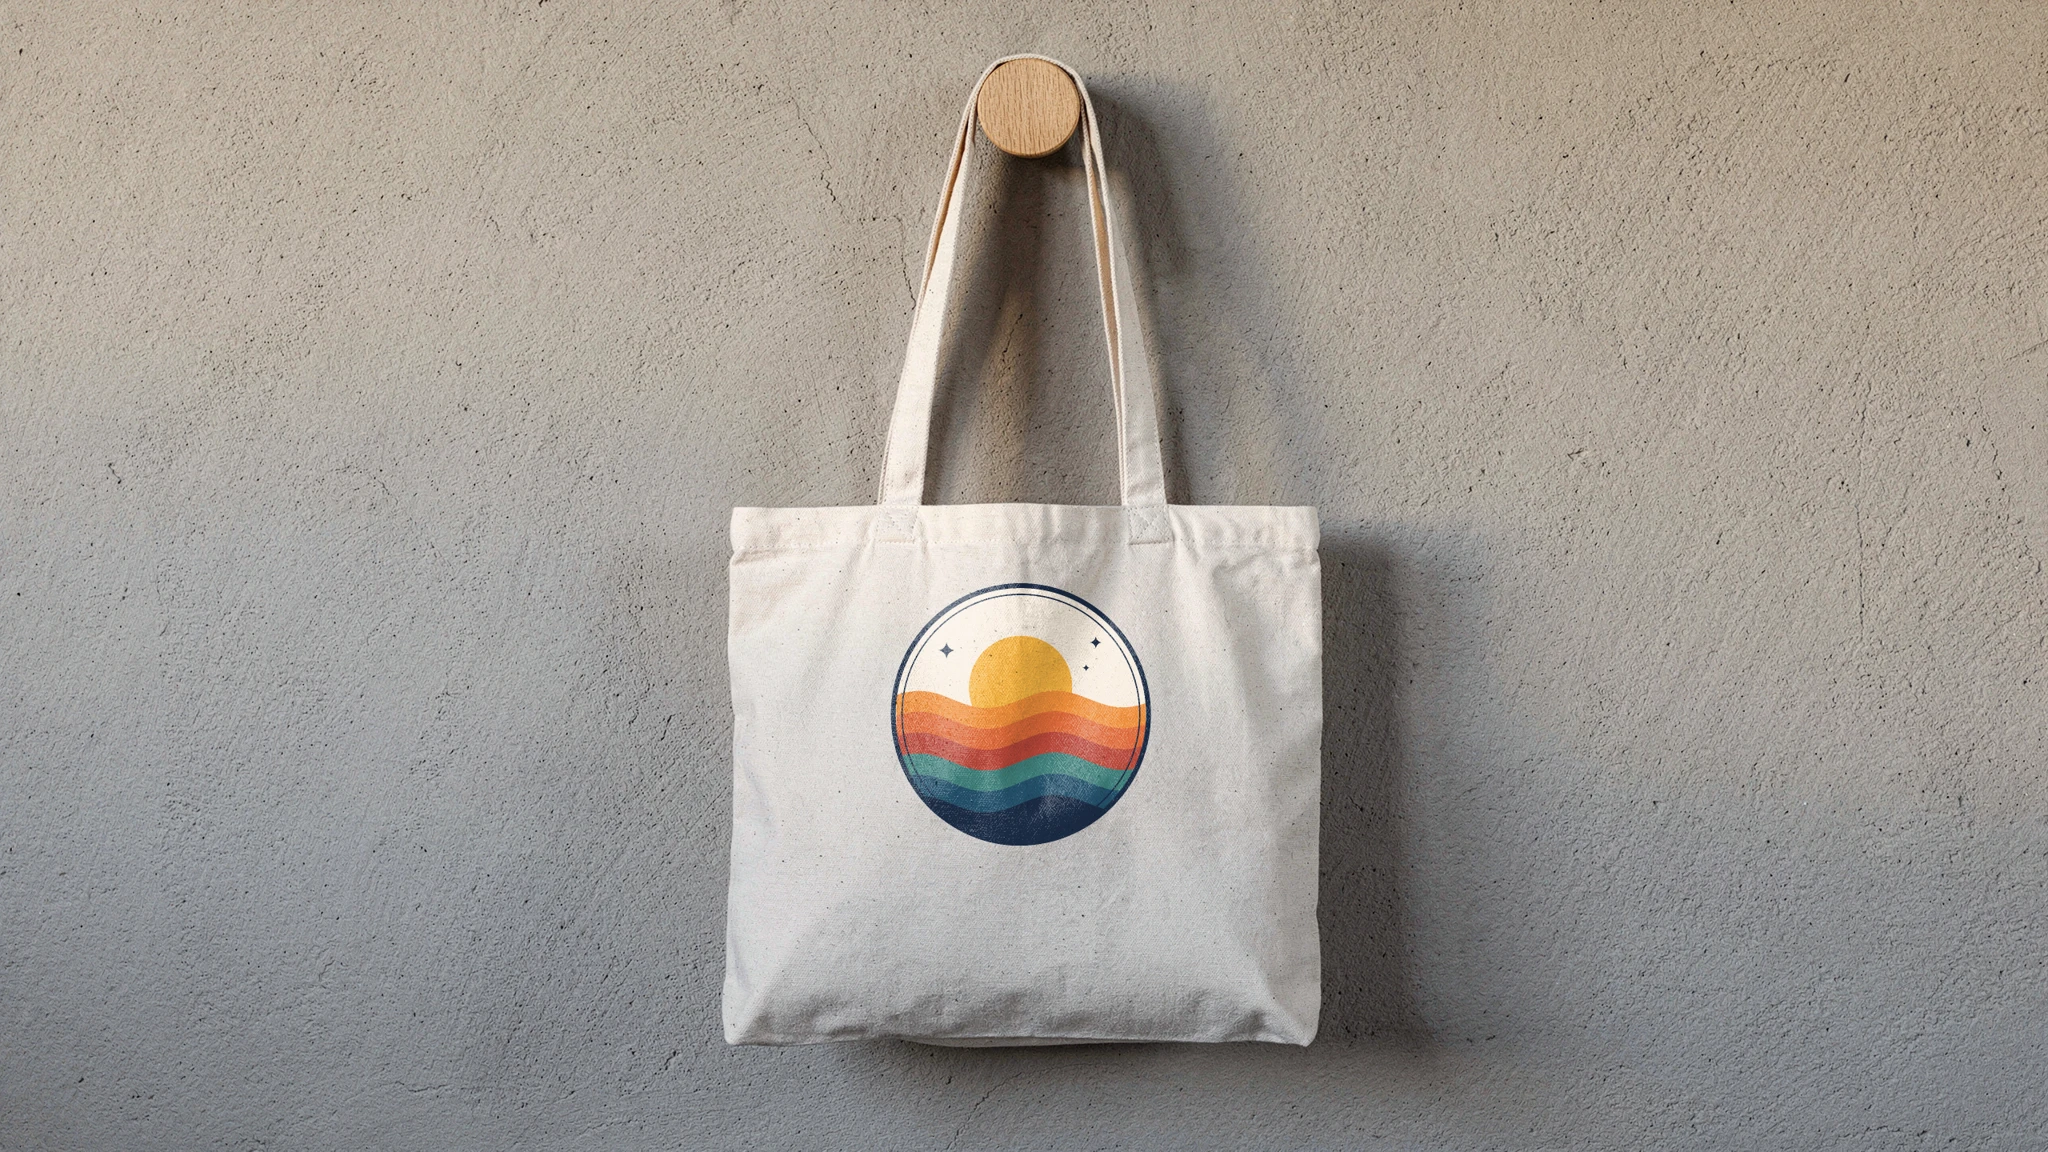 | 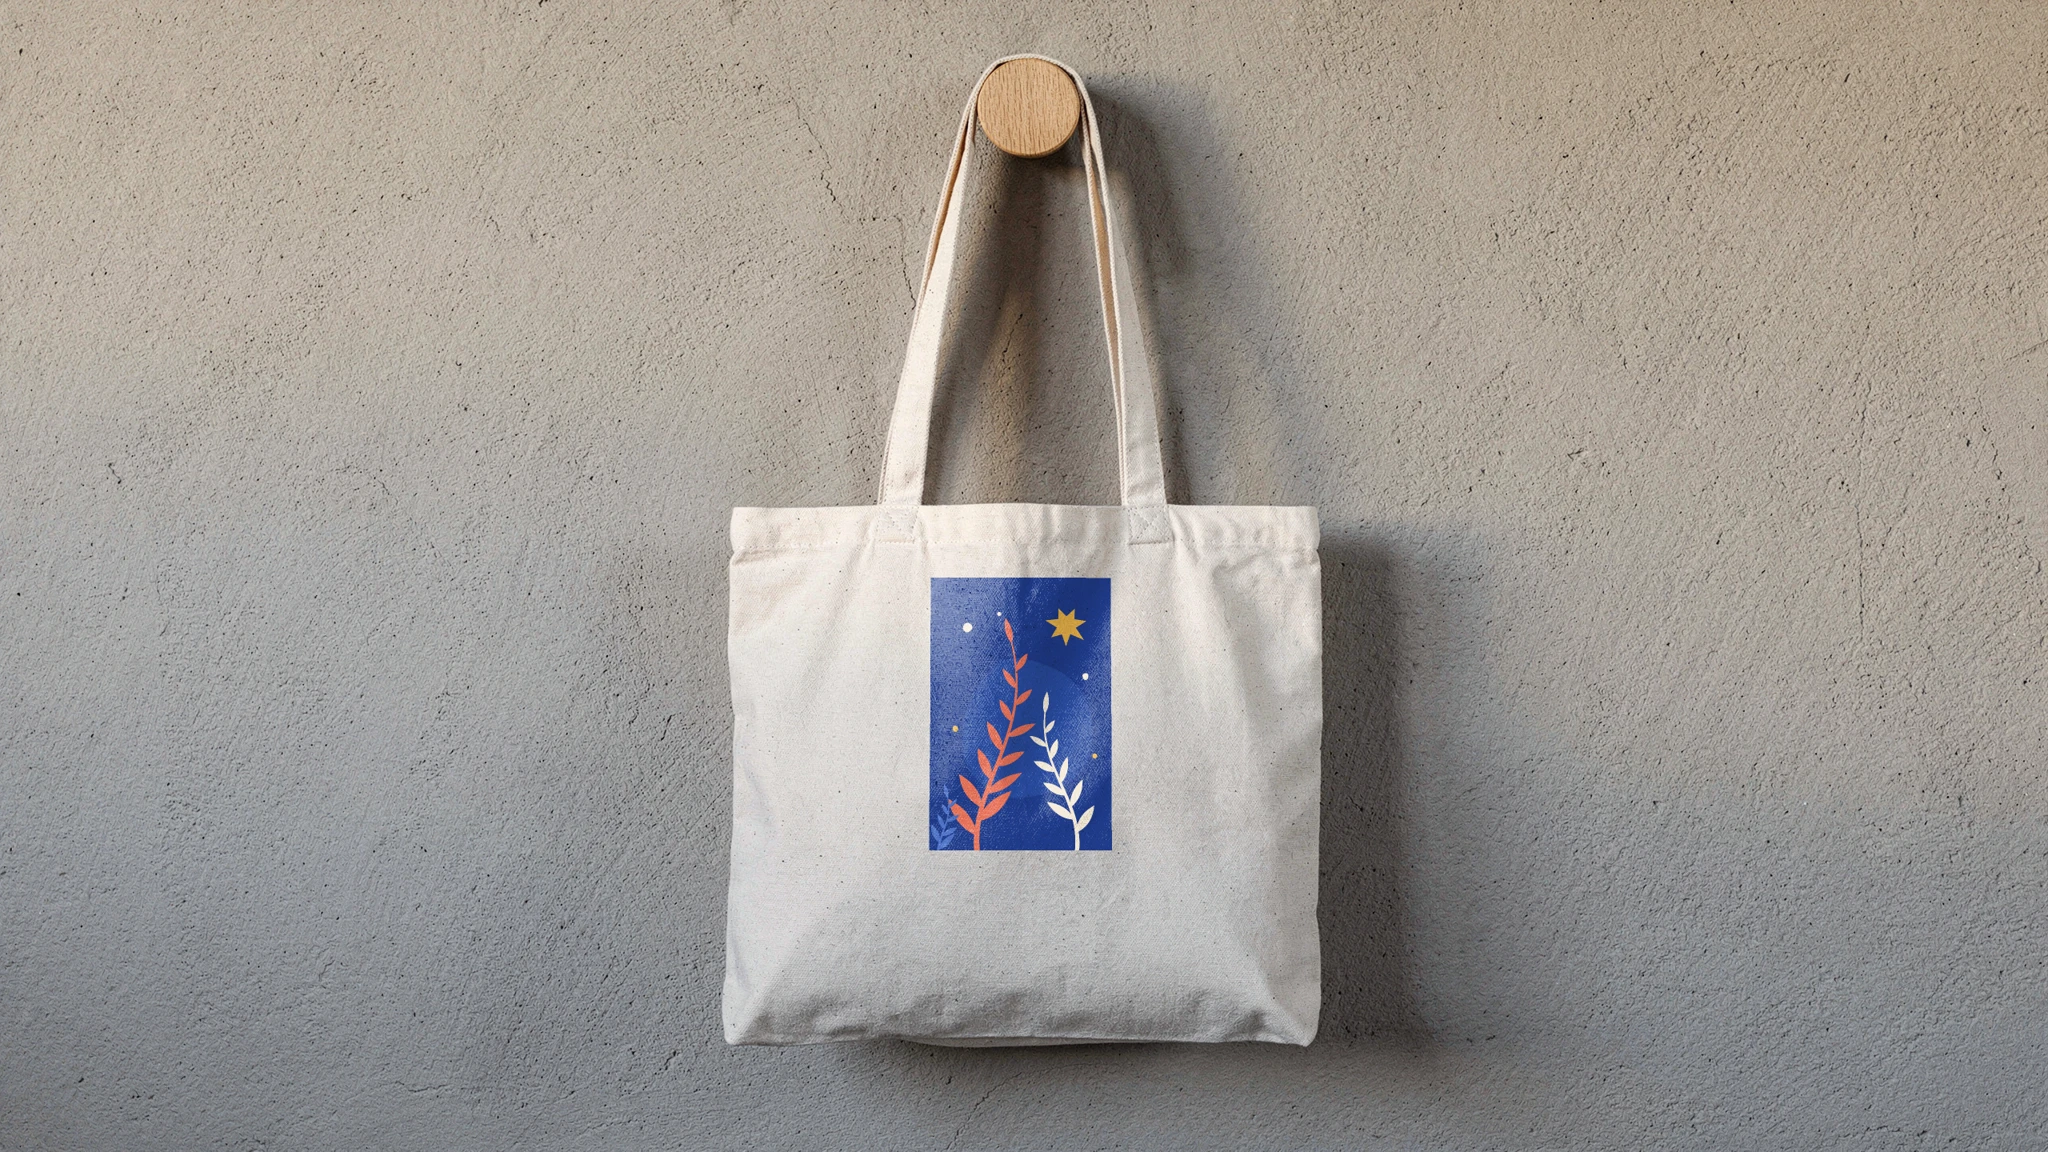 | 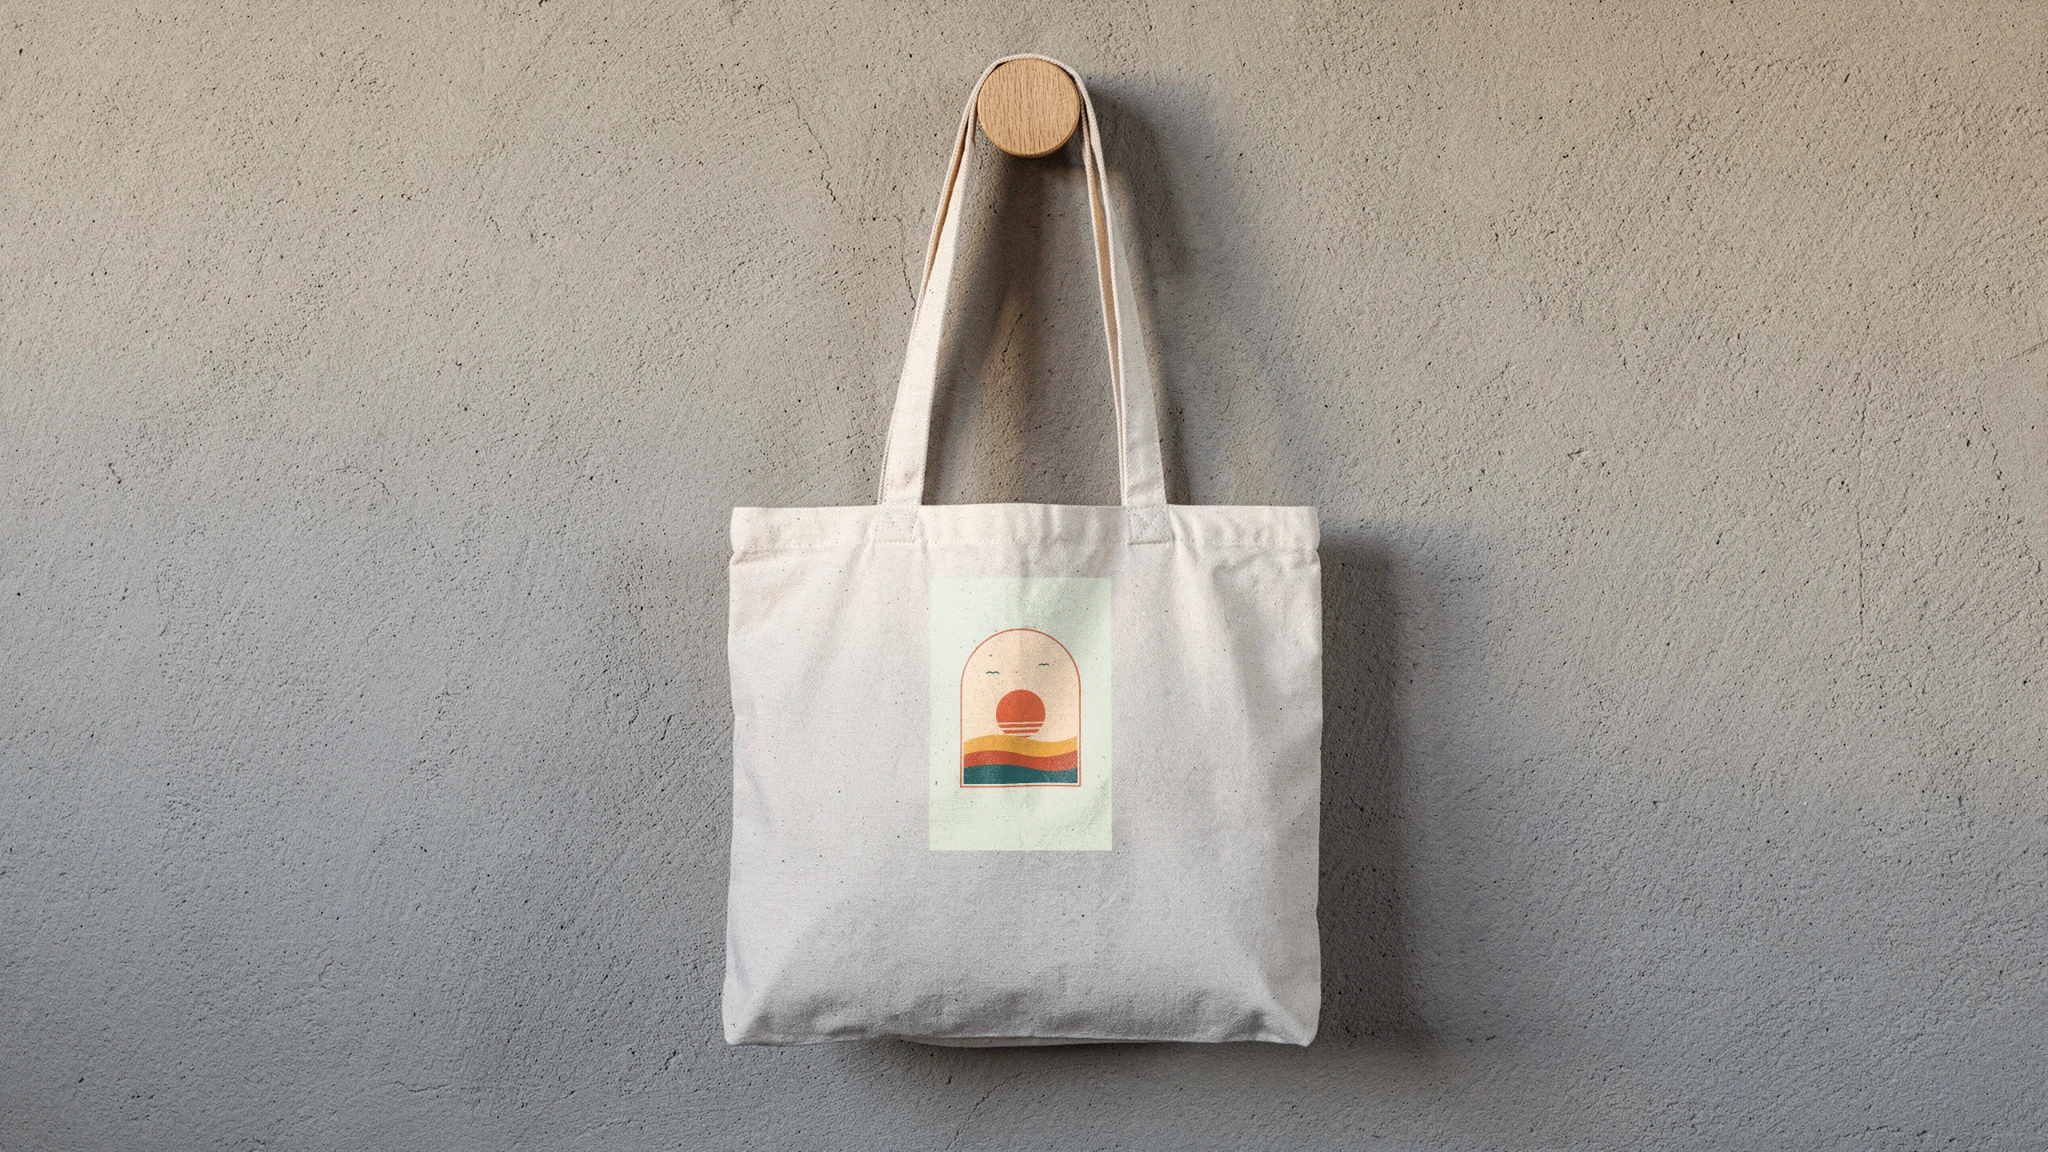 |
Only artwork_url and, for the two 2:3 prints, the box size (227 x 340) changed between the three requests. The ink follows the canvas weave and the light of the original photo, so each render looks like the printed bag.
Render artwork onto a photo mockup lists the placement fields. The ones a seller reaches for first:
placement.fit:fit(the default) keeps the design's proportions inside the whole area.cropcovers the whole area and trims the overflow, andfillstretches to the edges.placement.positionwithoffset_xandoffset_yanchors the design on a three by three grid, orwidthandheightset an exact box in target pixels. The design is scaled to exactly that box, so give it the design's own proportions.adjustments.blend_mode:multiply(the default) reads like ink on material, andnormalreproduces the file's colors exactly when a brand color has to match.
Export at the size your marketplace asks for
export_options.image_size sets the output width in pixels, and the height follows the photo's aspect ratio, so size from the short side. Etsy does not list WebP, the API's default format, so send jpg or png there.
| Where the image goes | What the platform says | export_options for a 16:9 photo |
|---|---|---|
| Etsy | Etsy's image guidelines (read 2 October 2026): "We recommend your listing photos have a width and height of at least 2000 pixels or more." Files must be .jpg, .gif, .png, .svg or .heic, and transparent parts appear black. | {"image_format": "jpg", "image_size": 3556} gives 3556 x 2000 px |
| Shopify | Shopify's product media guide (read 2 October 2026): images can be "any size up to 5000 x 5000 px, or 25 megapixels", under 20 MB, and PNG then JPEG are the best file types. | {"image_format": "png", "image_size": 2048} gives 2048 x 1152 px |
For a 4:3 photo the Etsy width is 2667, and for a square photo it is 2000. The Etsy row was rendered as written: the same tote with "image_format": "jpg" and "image_size": 3556 came back as a 3556 x 2000 px JPEG. For a mockup headed for print, such as a catalogue page, set image_size to inches times dpi and send dpi as well: 12 inches at 300 dpi is 3600 px.
Render every design in your catalogue
The mockup is reusable for as long as you keep it. Store the mockup_id and print_area_id with the product in your catalogue and send one render per design, in parallel. The average SudoMock render finishes in under a second, and for a large batch "is_async": true returns a job right away instead of holding the connection open:
{"job_id": "5f1c0b2a-7d43-4e9a-8c16-0b5d3f7a2e94","kind": "photo_mockup_render","status": "queued","status_url": "/api/v1/jobs/5f1c0b2a-7d43-4e9a-8c16-0b5d3f7a2e94"}
Poll status_url until the job reports succeeded and read the image from result_url, or subscribe to the photo_mockup_render.succeeded webhook and skip polling. A single render names up to eight targets, so a design for the front panel and one for a pocket land in the same image.
Make the same mockup in the browser
The dashboard's Create page does the same job without code. Choose Upload photo (on a phone, Take photo shoots it in place), confirm, then drag the corners of the print area in the editor and save. The Code tab then prints the ready request with the real mockup_id and target id, so a mockup set up by hand renders over the API from then on.
Every member of your organization sees the same mockup, and it renders from the same balance. Create a mockup in the browser walks through the page. The same mockups are reachable from the SDKs, the official n8n node and the Make app.
Next step
Send your own product photo to the create endpoint, then put your first design on it with the render endpoint. Without code, choose Upload photo on the dashboard's Create page, or run the same calls from the official n8n node or the Make app. If you already work from layered Photoshop files, the PSD template guide covers that route. With no product photo yet, describe the product on the same Create page and generate one, or start from a ready template in the mockup library or the tote bag mockups use case.
Frequently asked questions
Can I use a photo of my product taken with a phone?
Yes. The create call takes a JPEG, PNG or WebP photo as a public HTTPS URL or as base64, so a phone photo of your own sample goes through the same request once it is saved in one of those formats. Shoot the printable face straight on, in even light, at high resolution so large exports stay sharp.
Do I need Photoshop or a PSD file to make my own mockup?
No. A photo mockup is built from the photo alone and takes new artwork the way a smart object does, with no layered file. If you already have PSD templates, they render through SudoMock's PSD endpoint instead.
Can I move the print area after the mockup is made?
Yes. PUT /api/v1/photo-mockups/{mockup_id}/print-areas replaces the whole list of areas, so send every area you want to keep. Dragging the corners in the dashboard editor and saving writes the same list.
What does a photo mockup cost?
Plans start at $25/month. Subscriptions from $0.002 per render. Every plan includes Photo Mockups: preparing a mockup costs 25 credits once, and each render onto it costs 5 credits from the same monthly pool.
Sources
- Create a mockup from a product photo (opens in new tab), SudoMock docs
- Render a photo mockup (opens in new tab), SudoMock docs
- Print areas and surfaces (opens in new tab), SudoMock docs
- Render artwork onto a photo mockup (opens in new tab), SudoMock docs
- Photo mockups (opens in new tab), SudoMock docs
- Create a mockup in the browser (opens in new tab), SudoMock docs
- Mockup API Pricing 2026: SudoMock Plans Explained (opens in new tab)
- Requirements and Best Practices for Images in Your Etsy Shop (opens in new tab), Etsy Help
- Product media types (opens in new tab), Shopify Help Center
Beck
CTO
Related articles
Every T-Shirt Color Variant Mockup from One PSD by API
One PSD with a color smart object renders every t-shirt colorway: one request per color, shown with six real renders.
4 min read
PSD Mockup Template Guide: Best Practices for Automation
Learn how to create API-ready PSD mockup templates. Complete guide covering dimensions, Smart Object setup, layer naming, blend modes, and optimization for automation.
7 min read
How to Automate Etsy Product Mockups in 2026
Step-by-step guide to automating your Etsy listing mockups with SudoMock API. Save hours of manual work.
2 min read
Explore by use case
See SudoMock in action for your specific product category
Your own PSD, rendered via API
Render your own PSD through the API. Start with 500 one-time credits, no card.