PSD Mockup Template Guide: Best Practices for Automation
Learn how to create API-ready PSD mockup templates. Complete guide covering dimensions, Smart Object setup, layer naming, blend modes, and optimization for automated mockup generation.
TL;DR
Create API-ready PSD mockup templates with Smart Objects. Use 27 supported blend modes like Multiply for fabrics, Normal for hard surfaces. Export to WebP, PNG, or JPG. SudoMock handles high-resolution professional files with unlimited layers.
Key Takeaways:
- •Smart Objects are the foundation of automated mockups
- •27 blend modes supported including Multiply for fabrics
- •Layer naming matters - APIs use these names
- •Max file size: 300MB, max dimensions: 10,000x10,000px
Built for high-resolution workflows
What Makes a Good Mockup Template?
A well-prepared PSD template is the foundation of automated mockup generation. Whether you're building a print-on-demand business or creating marketing assets at scale, your template quality directly impacts output quality.
Supported Blend Modes
SudoMock supports all 27 standard Photoshop blend modes. These are extracted directly from the PSD and applied pixel-perfectly during rendering:
All Photoshop blend modes implemented
Blend Mode Recommendations
- Fabrics (t-shirts, hoodies): Multiply - shows texture through design
- Hard surfaces (phones, laptops): Normal - clean, solid colors
- Glossy materials: Overlay or Soft Light - adds depth
- Paper/print mockups: Multiply at 80-90% opacity
Layer Masks vs Clipping Masks
Understanding how masks work with Smart Objects is crucial for creating reliable mockup templates. SudoMock supports both layer masks and clipping masks, but they behave differently:
Critical: Smart Object Layer Masks
Layer masks applied to the Smart Object layer itself affect the canvas-level display, not the embedded content. When you replace Smart Object content via API, the mask stays on the layer but does not clip the new design. This is standard Adobe Photoshop behavior.
Solution: If you need masking on the design itself, use a clipping mask layer above the Smart Object, or apply the mask inside the PSB (embedded Smart Object).
Best Practice for T-Shirt/Fabric Mockups
If your t-shirt mockup has a layer mask that shapes the design area, consider:
- Using Multiply blend mode instead of masks for natural fabric integration
- Placing the mask on a group containing the Smart Object, not directly on the SO
- Using clipping mask layers above the Smart Object for shape constraints
Nested Smart Objects
Unlike some competitors, SudoMock
1
Layer Effects on Smart Objects
SudoMock renders layer effects (layer styles) applied to Smart Object layers. Here's what's supported:
Effects Inside vs Outside Smart Object
- Effects on the SO layer: Preserved when content is replaced
- Effects inside the PSB: Replaced along with the content
Keep decorative effects on the Smart Object layer itself for consistent rendering across all designs.
Step-by-Step: Creating Your Template
Set Up Your Canvas
Start with your product photo as the base. SudoMock accepts PSDs with these specifications:
- Max dimensions: 10,000×10,000px
- Max file size: 300MB
- Format: Standard PSD (Photoshop CC compatible)
Create the Smart Object
The Smart Object is where designs will be placed. This is the most critical step:
- Create a new layer or shape where the design should appear
- Right-click → Convert to Smart Object
- Double-click to open the embedded .psb file
- Set the PSB canvas to your desired design resolution
- Save and close the .psb
Smart Object Size Limits
Smart Object internal canvas can be up to 10,000×10,000px. The API will extract
the exact dimensions and return them in the size field of the response,
which you should use to prepare designs at the optimal resolution.
Apply Transforms
Make the design fit your product naturally using Photoshop's transform tools:
- Edit → Transform → Distort for perspective
- Edit → Transform → Warp for curved surfaces (mugs, fabric folds)
- Edit → Transform → Perspective for angled views
All transforms are preserved. The API extracts quad coordinates that represent
the four corner points of the transformed Smart Object.
Set Blend Mode
Choose from 27 supported blend modes. The most commonly used for mockups:
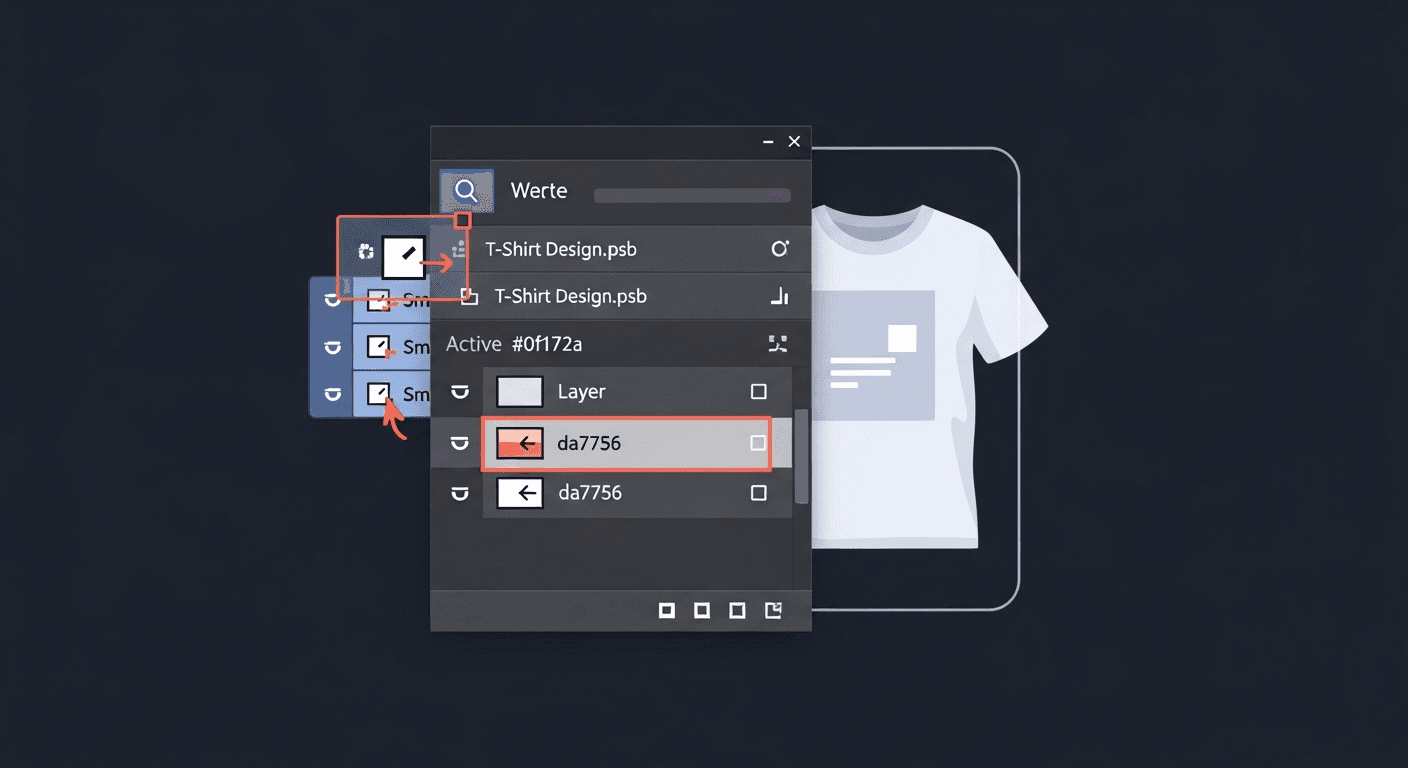
Name Your Layers
Layer names appear in API responses. Use clear, descriptive names:
1
Optimize File Size
While SudoMock supports large files, smaller files process faster and upload quicker:
- Delete Cropped Pixels: Image → Crop with "Delete Cropped Pixels" enabled removes hidden content outside canvas
- Flatten background layers that don't need editing
- Delete hidden layers you're not using
- Rasterize text layers that won't change
- Use "Purge All" (Edit → Purge) to clear history and clipboard
- Merge visible layers for non-essential decorative elements
- Save a copy to avoid bloated history states
Pro Tip: Smart Object Dimensions
Smart Object internal canvas (PSB) size affects file size significantly. If your design area is 2000×2000px, don't create a 10,000×10,000px Smart Object "just in case". Size it appropriately for your use case.
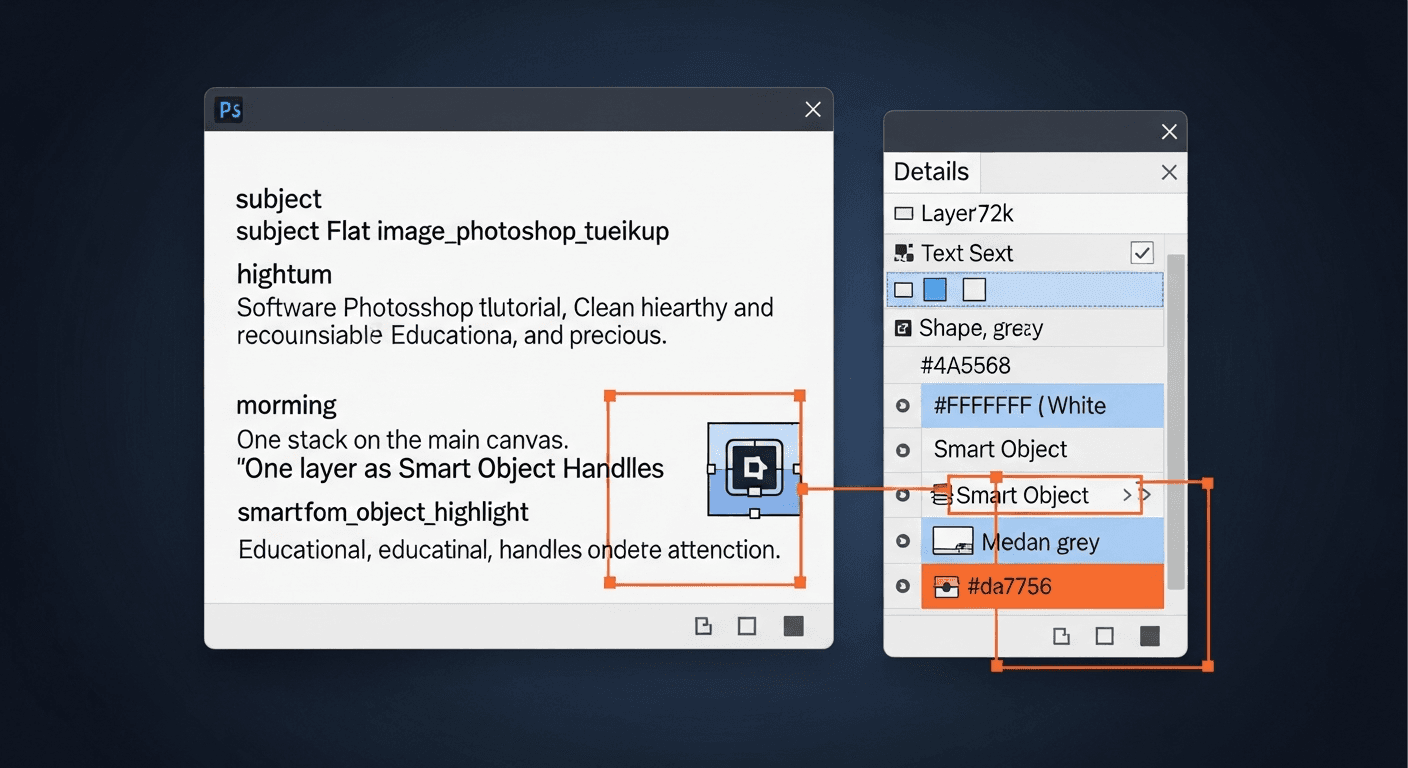
Recommended PSD Structure
Here's the recommended layer organization for a mockup template:
Smart Object Response Data
When you upload a PSD, the API extracts detailed metadata from each Smart Object. Understanding this data helps you build better integrations:
What you get after uploading a PSD
1
size vs position
- size = Original Smart Object canvas (embedded PSB dimensions)
- position = Where it appears on the mockup (bounding box)
- quad = Four corner points if transformed (warp/perspective)
Prepare your designs at the size dimensions for best quality.
Export Options
When rendering mockups, you have full control over the output format and quality:
1
Quick Reference Checklist
Before Upload
☐ File size under 300MB
☐ Dimensions under 10,000×10,000px
☐ Smart Objects converted (not rasterized)
☐ Descriptive layer names
Smart Object Settings
☐ Blend mode set (multiply for fabrics)
☐ Transforms applied (warp, perspective)
☐ Visible (not hidden)
☐ Positioned correctly on canvas
☐ Internal canvas sized appropriately
Related Resources
Frequently Asked Questions
Related Articles

5 Ways to Scale Your POD Business with API
Learn how successful POD sellers use APIs to generate thousands of product variations automatically.
Complete Guide to Smart Objects in Mockups
Everything you need to know about Smart Objects for mockup templates. Setup, best practices, and common mistakes.
Explore by Use Case
See SudoMock in action for your specific product category
Your own PSD, rendered via API
Photoshop-grade product mockups at $0.002 per render. Start free with 500 credits, no card.